
22 Stunning Side Swept Bangs for a Fresh, Flirty Look
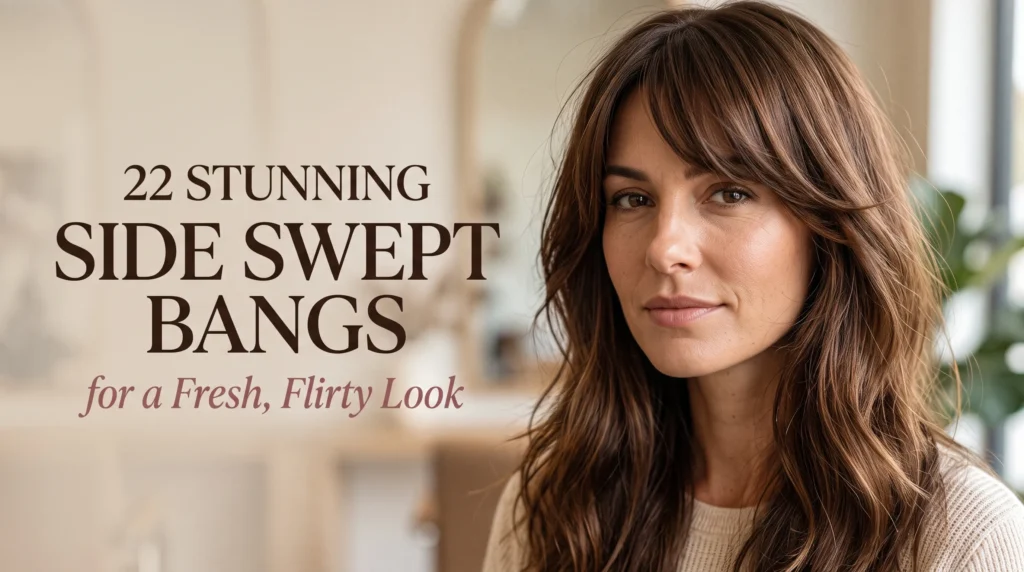
Sometimes a small change around your forehead is all it takes to make a familiar haircut feel new. The right fringe can soften your features, add movement, and give your everyday style a fresh finish.
These side swept bangs ideas include everything from wispy, feathered pieces to sleek fringes, textured layers, and polished updos. Whether your hair is short, long, straight, wavy, or curly, you can find a look that suits your texture and the amount of styling time you have. Use the photos as inspiration, then discuss the length and shape with your stylist before cutting, since hair can sit differently when dry. A simple round brush, light styling cream, and a clear reference photo can help you recreate your favorite look at home.
1. Soft Feathered Fringe

A soft, feathered fringe frames the eyes without creating a heavy line across the forehead. The ends look light and airy, especially when they blend into cheekbone-length layers instead of stopping bluntly. This shape adds movement while keeping the overall haircut relaxed and wearable.
Ask your stylist to keep the shortest pieces near the outer brow, then gradually lengthen them toward the cheek. This angle helps the fringe grow out gracefully. For an everyday finish, blow-dry with a small round brush, guiding the hair across your forehead and slightly away from your face.
2. Long Face-Framing Layers

- Long layers can make a side fringe look intentional rather than disconnected.
- Ask for the shortest piece to start near the outer brow and gradually lengthen toward the cheek.
- Keep the layers blended around the temples to avoid a visible step between the fringe and the rest of your hair.
- For fine hair, request gentle shaping instead of heavy thinning, which can leave the front looking sparse.
- For waves, let your stylist work with your natural pattern so the front pieces do not spring too short when dry.
Side swept bangs pair especially well with long face-framing layers, giving the front a connected shape without sacrificing length. In my experience, showing your stylist a side-view reference helps clarify where the shortest piece should fall. This look suits straight or wavy hair, while thick hair may benefit from light internal weight removal.
3. Deep Side Part

Quick Tip:
A deeper part can create instant root lift without cutting more hair. Shift the part gradually instead of forcing a sharp line, especially if your hair naturally falls forward.
The right part can change the balance of your hairstyle without a major cut. For a softer result, let a few fine strands fall near the temple instead of creating a severe line. This simple adjustment suits straight or wavy hair and takes only a minute to refresh each morning.
4. Curtain-Blend Fringe

BEFORE:
A fringe that stops abruptly can make long hair feel disconnected. The front may look too blunt against flowing lengths.
AFTER:
Graduated pieces sweep diagonally and merge into curtain-like layers near the cheekbones. The transition softens the outline and gives the hair movement without hiding the face.
This blended shape works especially well if you like a fringe but want an easy grow-out phase. Ask your stylist to keep the side pieces long enough to tuck behind an ear. A lightweight styling cream can smooth flyaways without flattening the roots at the front.
5. Rounded Blowout Fringe

- Start with damp hair: Apply a small amount of lightweight heat protectant to the fringe.
- Choose a small round brush: Place it underneath the front section and direct the hair diagonally across your forehead.
- Shape the curve: Use your blow-dryer on medium heat while gently turning the brush away from your face.
- Let it cool: Hold the curved section briefly before removing the brush to help the shape settle.
- Finish lightly: Smooth stray strands with your fingertips instead of applying heavy hairspray.
A rounded finish keeps the fringe airy rather than stiff. Use a lower heat setting near the hairline and keep the brush moving to limit heat exposure. If your hair is very straight, a small Velcro roller can help hold the curve while the rest of your hair cools.
Also Visit : 21 Bold Concert Hairstyles That Keep You Party-Ready
6. Wispy Brow-Skimming Fringe

| Styling Detail | Natural Texture | Polished Sweep |
| Brush | Fingers or wide-tooth comb | Small round brush |
| Product | Lightweight leave-in cream | Light-hold styling spray |
| Finish | Soft, separated strands | Smooth, defined curve |
| Best for | Relaxed everyday styling | Events or dressed-up looks |
Wispy fringe works beautifully when you want a lighter look around the forehead without committing to thick bangs. Ask your stylist to preserve enough density at the roots while softly texturizing the ends. Fine strands can separate easily, so use a tiny amount of product and avoid brushing repeatedly throughout the day.
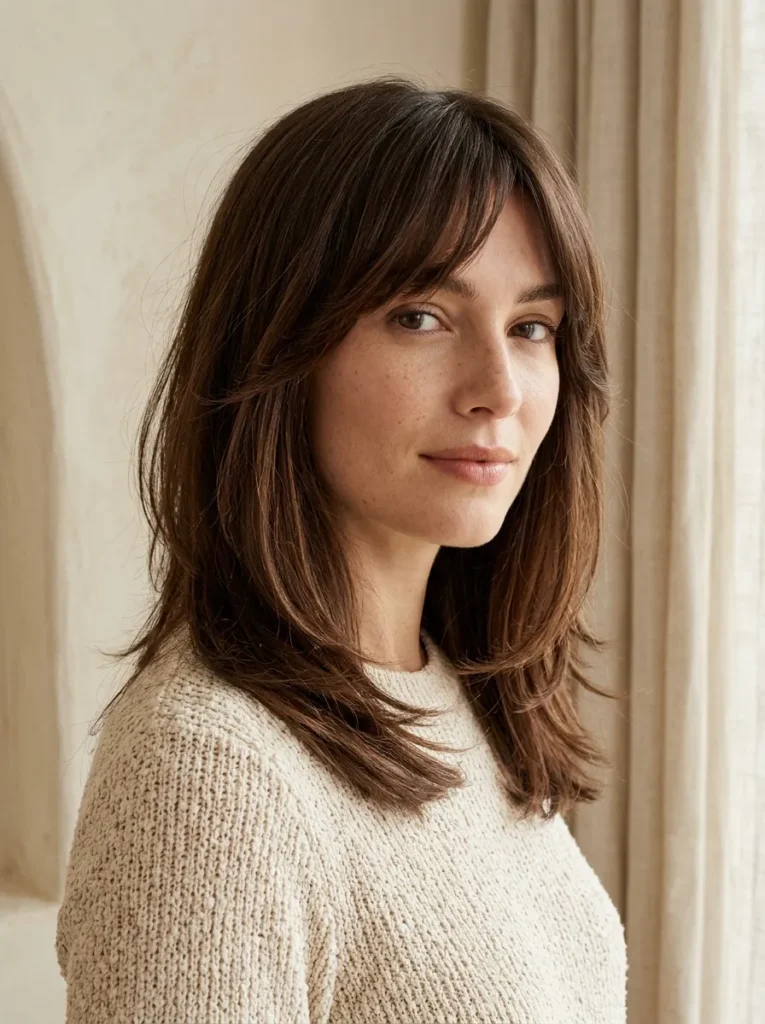
7. Textured Cheekbone Sweep
DO:
- Ask your stylist to angle the fringe toward the cheekbones for a flattering, face-framing finish.
- Request soft texturing at the ends to create movement without removing too much fullness.
- Blow-dry the front section diagonally with a medium round brush.
- Use a light styling cream to separate the strands and control flyaways.
DON’T:
- Cut the shortest section too high above your natural brow line without discussing the desired result.
- Apply heavy wax that makes the fringe look greasy.
- Thin fine hair excessively around the hairline.
- Ignore your natural growth direction when choosing the part.
Textured ends give this fringe a relaxed finish that does not look overly styled. It works particularly well with layered shoulder-length hair, soft waves, and longer cuts. Keep the texture subtle if your hair is fine, and ask for a dry finish check before your stylist makes any final adjustments.
8. Side-Swept Pixie Cut
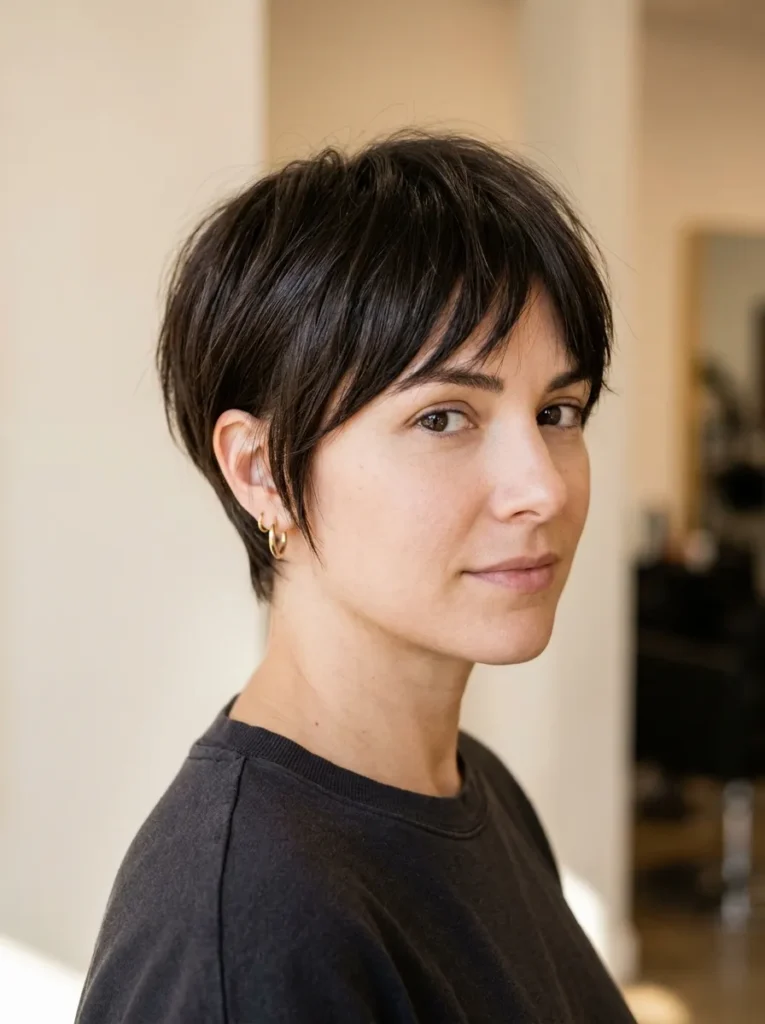
Best For: Short hair lovers who want softness around the forehead.
Styling Time: About 3 to 5 minutes once the shape is established.
Skill Level: Beginner-friendly with the right haircut and a small styling brush.
Result: A textured, modern silhouette with extra movement across the front.
Short hair can feel surprisingly versatile when the fringe is left longer on top. The angled section softens the cropped sides and creates a focal point around the eyes. Work a pea-sized amount of lightweight styling cream through the front, then sweep the strands into place with your fingers.
9. Sleek Blonde Fringe

A smooth blonde fringe creates a clean, polished outline while bringing attention to the eyes. Honey and champagne tones can add dimension to the front layers, especially when the hair catches natural light. Keep the cut softly angled so it blends into the rest of the hairstyle instead of forming a straight, heavy edge.
For a sleek finish, apply heat protectant before blow-drying and guide the fringe sideways with a paddle brush. A quick pass with a flat iron can smooth stubborn pieces, but avoid repeated high-heat passes. Ask your stylist to consider your hair’s natural part and texture before deciding how short the front should be.
10. Voluminous Side Fringe

- Lift the roots: Blow-dry the front section in the opposite direction first, then sweep it into your preferred part.
- Choose the right brush: A medium round brush creates a curved finish without making the fringe look too curled.
- Add gentle volume: Use a small amount of lightweight mousse at the roots rather than applying heavy product to the ends.
- Set the shape: Allow the hair to cool before brushing it into place.
- Keep the finish soft: Separate the strands with your fingertips for natural movement.
Extra volume gives the front of your haircut a fuller, more noticeable shape. This technique is especially useful for fine or flat hair that struggles to hold a curve. Avoid overloading the roots with styling products, because too much buildup can make the fringe fall forward before the day ends.
Also Visit : 22 Stunning Hoco Hairstyles for a Picture-Perfect Night
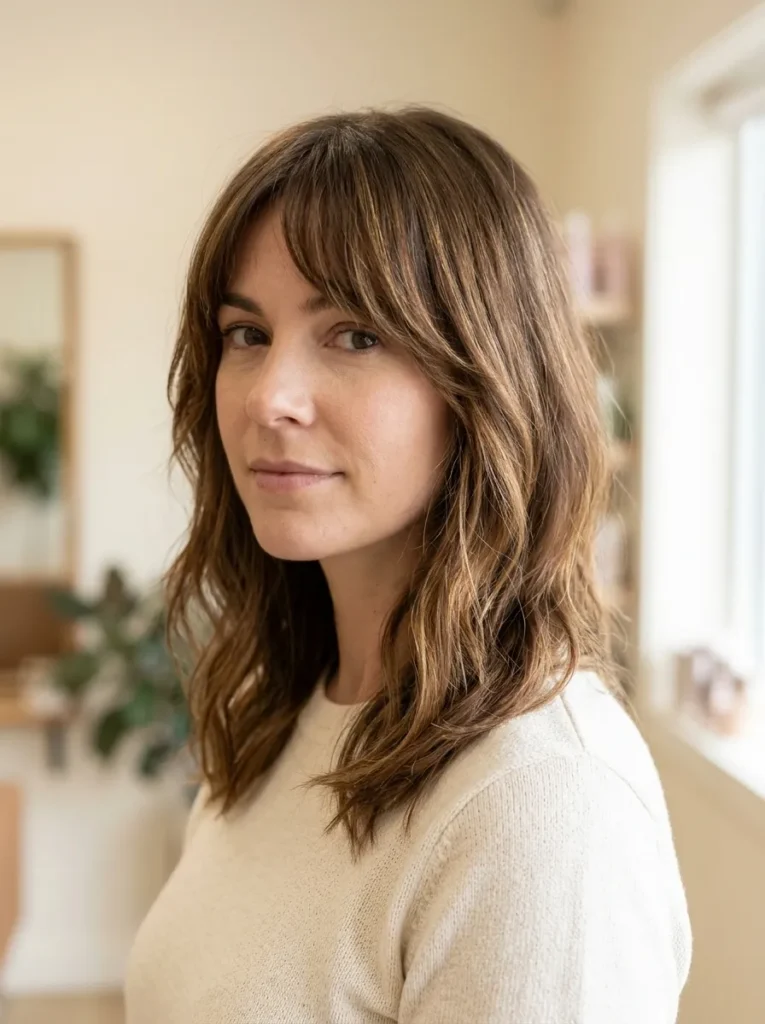
11. Soft Wavy Fringe
Quick Tip:
Work with your natural wave instead of trying to make every strand perfectly straight. Apply a lightweight curl cream to damp hair, then guide the front section sideways while gently scrunching the ends.
Soft waves give a side fringe a relaxed finish with plenty of movement around the eyes and cheekbones. For a natural result, let the hair dry partially before arranging the front pieces with your fingers. If one section curls more tightly than the others, use a small brush to guide it into place.
12. Chin-Length Bob Fringe
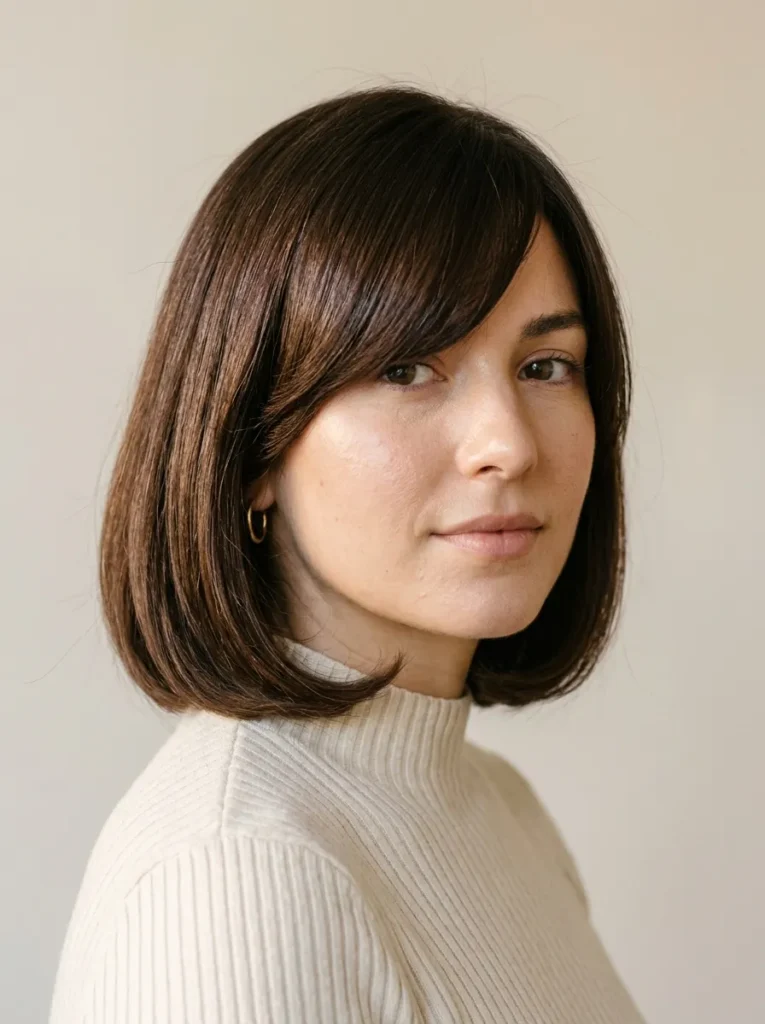
BEFORE:
A chin-length bob with a blunt front can look quite structured, especially when the hair falls evenly around the face. The forehead area may also feel visually separate from the rest of the cut.
AFTER:
A longer, angled fringe introduces movement across the front while maintaining the bob’s crisp outline. The diagonal shape softens the overall silhouette and draws attention toward the eyes.
Ask your stylist to blend the fringe into the front of the bob without removing too much weight from the ends. A round brush can create a gentle curve, while a flat iron offers a sleeker finish. This pairing works particularly well for straight hair, though naturally wavy hair may need slightly different shaping.
13. Curly Side Fringe

- Start with the right cut: A beautiful curly fringe begins with shaping that respects your natural curl pattern. Ask your stylist to assess your curls dry or account for shrinkage before cutting.
- Define the curls: Apply a lightweight curl cream to damp hair, concentrating on the front sections to encourage smooth, separated spirals.
- Guide the direction: Use your fingers to encourage the fringe toward one side while keeping the curls springy and natural.
- Dry gently: Use a diffuser on low heat or allow the hair to air-dry without repeatedly touching the fringe.
- Refresh as needed: Mist the front with water and reshape individual curls between wash days.
Curly hair brings natural volume and texture to an angled fringe, creating a soft frame around the eyes. The key is allowing enough length for curls to shrink as they dry. Avoid cutting the front too short while wet, and ask your stylist to show you how to refresh the shape at home.
14. Shoulder-Length Sweep

| Styling Detail | Air-Dried Waves | Smooth Blowout |
| Texture | Relaxed and natural | Sleek and polished |
| Best Tool | Fingers or diffuser | Round brush |
| Styling Product | Lightweight curl cream | Heat protectant |
| Overall Finish | Soft, casual movement | Defined, glossy shape |
Shoulder-length hair offers a versatile base for a sweeping fringe because the front layers can blend naturally into the rest of the cut. Choose air-dried waves for a relaxed everyday finish or a round-brush blowout for extra polish. Keep the shortest pieces near the cheekbones if you prefer a softer grow-out.
15. Asymmetrical Lob Fringe
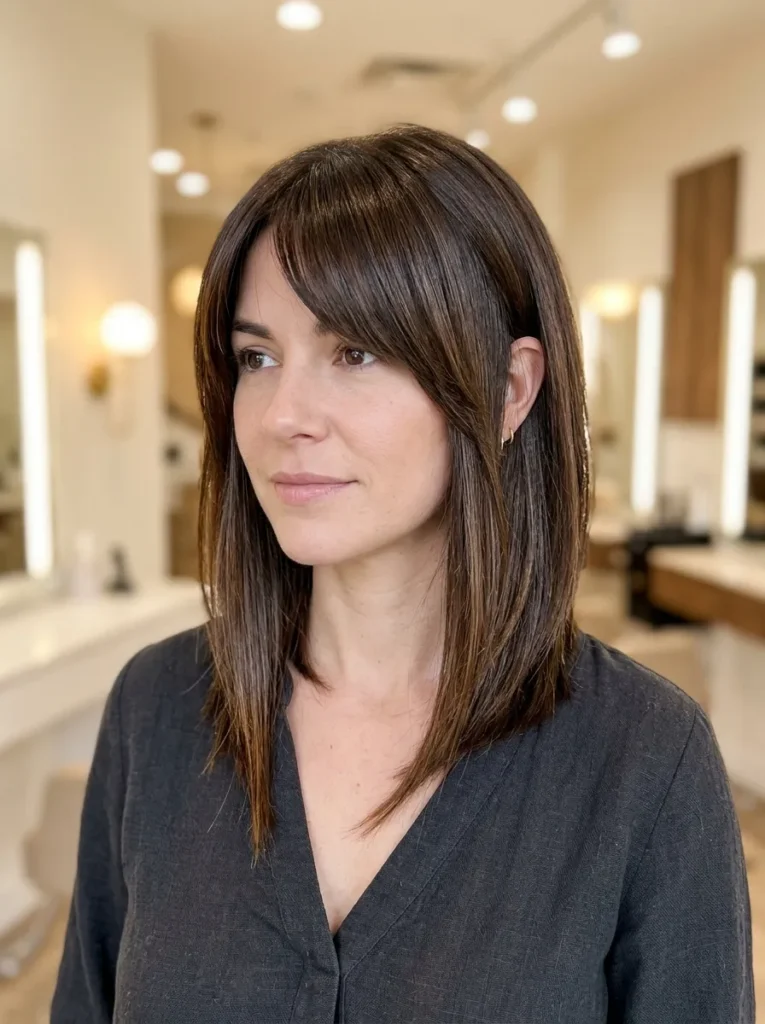
DO:
- Ask for a slightly longer front section to complement the angled fringe.
- Keep the back and sides balanced so the haircut maintains a clean outline.
- Use a flat iron with heat protectant for a smooth, defined finish.
- Schedule trims according to how quickly your fringe loses its shape.
DON’T:
- Cut the front too short before checking how it falls naturally.
- Remove excessive weight from the ends of a fine lob.
- Force a center part if you prefer a strong diagonal sweep.
- Apply heavy oils near the roots if your hair becomes greasy quickly.
An asymmetrical lob adds shape and definition without requiring very short hair. The longer front pieces balance the shorter outline, while the angled fringe draws attention toward the eyes. This combination works particularly well for straight or slightly wavy hair, especially if you prefer a modern cut with a polished finish.
Also Visit : 24 Collarbone Length Hair Looks for a Bold New Feel
16. Tousled Layered Fringe

Best For: Medium-length hair with natural movement.
Styling Time: Around 5 to 8 minutes.
Skill Level: Beginner-friendly with a little practice.
Styling Product: Lightweight texturizing spray or flexible-hold cream.
Result: A relaxed, softly layered finish with natural volume.
Tousled layers give the fringe a casual finish that feels stylish without looking overly arranged. Start with a small amount of texturizing product, then use your fingers to guide the front pieces into a diagonal shape. This look suits busy mornings because a few loose strands add character rather than needing constant correction.
17. Sleek Straight Fringe
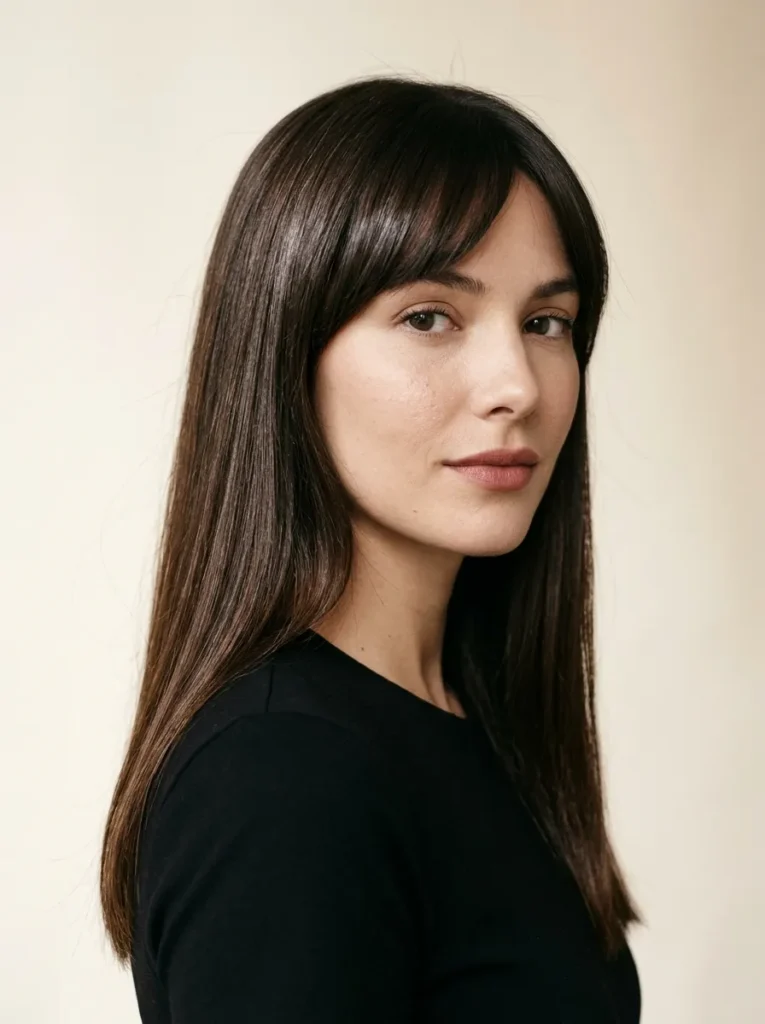
Straight hair makes it easy to see the clean angle of a sweeping fringe. The smooth finish highlights the eyes and creates a neat outline around the forehead without requiring extra layers. A small amount of shine serum on the ends can make the front pieces look polished without weighing them down.
For a salon-inspired result, apply heat protectant and blow-dry the front section in the direction you want it to fall. Guide the brush diagonally rather than pulling the fringe straight down. Side swept bangs can look especially striking on sleek hair, but keeping a little root lift prevents the style from appearing flat against the forehead.
18. Shaggy Fringe Layers

- Keep the layers connected: Ask your stylist to blend the fringe into the shorter layers around your temples.
- Preserve natural texture: Request soft, uneven ends instead of a thick, blunt line across the forehead.
- Choose lightweight styling products: A small amount of texturizing cream helps separate strands without making them stiff.
- Work with your natural part: Let the front settle in its preferred direction before adjusting individual pieces.
- Refresh selectively: Restyle only the front sections when they lose their shape instead of redoing your entire haircut.
Shaggy layers bring a playful, lived-in quality to a sweeping fringe. This combination works particularly well with naturally wavy hair because the texture adds movement around the cheeks and jawline. For straighter hair, a few loose bends created with a styling tool can provide a similar finish without making the haircut look overly polished.
19. Caramel Highlighted Fringe

Color Palette: Chocolate brown, caramel, honey gold, warm beige.
Best For: Brunettes who want subtle brightness around the face.
Maintenance: Refresh highlights according to your stylist’s recommended schedule.
Styling Time: Approximately 5 to 10 minutes.
Result: A dimensional finish that draws attention to the eyes and cheekbones.
Caramel highlights bring extra depth to a sweeping fringe by making individual strands more visible in natural light. Ask your colorist to concentrate a few fine highlights around the front rather than creating a strong, contrasting stripe. This approach adds brightness while keeping the overall hair color soft and natural.
20. Airy Brunette Fringe

The secret to an airy fringe is keeping movement at the ends while maintaining enough fullness near the roots. A soft, diagonal shape opens up the face and prevents the front from looking like a solid block of hair.
Ask your stylist for gentle texturing rather than aggressive thinning, especially if your hair is fine. At home, use a small round brush to direct the fringe sideways, then separate the ends with your fingertips. The result feels light and natural without sacrificing the definition that makes this haircut stand out.
Also Visit : Which 21 Magical Christmas Hairstyles Get Noticed?
21. Side Fringe Updo

- Prepare the fringe: Apply a small amount of lightweight styling cream to tame flyaways without flattening the roots.
- Create the updo: Gather the remaining hair into a low bun, leaving the front section loose.
- Shape the sweep: Use a round brush to guide the fringe diagonally across the forehead.
- Secure gently: Pin loose pieces near the bun without pulling the front hair too tightly.
- Finish with flexibility: Mist lightly with flexible-hold hairspray to preserve movement.
A softly swept fringe adds a flattering frame to a low bun, French twist, or relaxed ponytail. It is especially useful for weddings, dinner dates, and formal gatherings when you want hair away from your neck without exposing the entire forehead. Leave a few fine strands near the temples for a softer finish.
22. Side-Swept Ponytail Fringe

Best For: Everyday styling, workouts, brunch dates, and casual occasions.
Styling Time: About 5 to 7 minutes.
Difficulty: Beginner-friendly with a brush and hair tie.
Result: A lifted ponytail with a soft, face-framing finish.
A ponytail feels more polished when a sweeping fringe adds softness around the forehead. Gather your hair high or low, secure it comfortably, then shape the front section with a small round brush. Keep the fringe loose rather than stiff, and finish with light hairspray for a style that stays neat without losing its natural movement.
CONCLUSION
The best fringe is one that fits your hair texture, routine, and personal style. From a soft feathered finish to a sleek bob or relaxed ponytail, these side swept bangs ideas show how a small change at the front can add movement and frame your face in a fresh way.
Before booking a cut, save a few favorite photos and note what you like about each one, such as the length, volume, or parting. Then ask your stylist which details will work with your natural growth pattern. Save this guide on Pinterest, try a look that feels like you, and share it with a friend seeking a new hairstyle.


