17 Easy Hair Updos for Effortless, Elegant Looks to Try

Some mornings call for a hairstyle that looks polished without taking up half your getting-ready time. Easy hair updos can help you feel put together for work, weekend plans, celebrations, and everything in between.
This collection brings together 17 simple ways to pin, twist, braid, and gather your hair into styles that feel special without requiring salon-level skills. You will find relaxed buns, pretty twists, braided details, and quick options for days when you need your hair off your face. Each idea includes practical styling guidance, so you can choose a look that suits your hair length, texture, outfit, and available time. A little texture spray, a few well-placed pins, or a comfortable clip can make styling easier and help your updo stay in place. Save the ideas that catch your eye and come back to them when you need fresh inspiration.
1. Classic Low Bun

A low bun proves that an updo does not need height or complicated braiding to look refined. Gather your hair at the nape, smooth the sides with your fingers, and secure a loose ponytail with an elastic. Twist the length gently, then coil it around the base.
Pin the coil in place with two or three bobby pins, crossing them for a steadier hold. Leave a few soft pieces near your cheeks if you like a relaxed finish. Among easy hair updos, this one works especially well for office days, dinner plans, and second-day hair.
2. Chic Claw Clip Twist

- Start with the right clip: Choose a medium or large claw clip that comfortably holds your hair without squeezing or pulling.
- Create the twist: Gather your hair at the nape and twist it upward toward the crown while keeping the movement relaxed.
- Tuck the ends: Fold the loose ends downward over the twist or tuck them inside for a cleaner finish.
- Secure the style: Open the clip, catch the twisted hair, and close it firmly against your head.
A claw clip can create a polished twist in less time than it takes to find your hair ties. Gather your hair at the nape, twist it upward, fold the ends down, and clamp the style securely. Choose a clip large enough to hold your hair without pulling.
3. Soft French Twist

Quick Tip:
For a French twist that stays in place, add a little texture spray before styling. Use crossed bobby pins along the tucked seam instead of relying on just one pin.
A soft French twist looks intricate, but the shape is easier to build than it seems. Keep the twist relaxed rather than pulling every strand tight, then secure it with pins along the seam. A little texture spray can help slippery hair stay put, while a few loose strands keep the finish gentle.
4. Braided Crown Updo

BEFORE: Loose hair can fall flat around the face, especially when you need a neat style for a special occasion. Simply tying it back may not give the finished look you’re hoping for.
AFTER: A braided crown creates a beautiful frame around the head while keeping the rest of your hair secured. The result feels romantic, tidy, and detailed without looking overly formal.
Start by parting your hair down the middle and creating two loose braids, one on each side. Bring them across the back of your head, overlap the ends, and secure them with discreet bobby pins. Leave a little softness around your temples for a flattering finish.
5. Messy Top Knot

- Gather your hair: Flip your hair forward slightly and collect it into a high ponytail at the crown of your head.
- Create the bun: Twist the ponytail loosely and wrap it around its base, keeping some natural volume.
- Secure the shape: Use a strong hair elastic or several bobby pins to hold the bun comfortably.
- Add texture: Gently pull small sections around the crown and bun to create a fuller, relaxed appearance.
A messy top knot is especially useful on busy mornings when washing and styling your hair is not an option. A little dry shampoo can add grip, while loose strands soften the overall shape. Keep the bun secure but avoid pulling too tightly, particularly around your hairline.
Also Visit : 21 Radiant Blonde Hair Ideas for a Fresh New Season
6. Elegant Side Chignon

| Styling Detail | Sleek Chignon | Soft Chignon |
| Hair texture | Smooth and polished | Naturally textured |
| Placement | Tightly folded near one ear | Loosely gathered to one side |
| Accessories | Pearl pins or jeweled clips | Small floral pins |
| Best occasion | Formal events and weddings | Dinner dates and parties |
A side chignon brings an elegant finish while keeping your hair away from your face. Gather your hair just behind one ear, twist the length inward, and secure it with bobby pins. For extra hold, finish with light hairspray and check that the bun feels comfortable from every angle.
7. Curly Pinned Updo
DO:
- Let your natural curls provide volume instead of brushing them completely flat.
- Apply curl cream or lightweight mousse before gathering your hair.
- Secure individual curls with bobby pins that match your hair color.
- Leave a few delicate curls around your temples for softness.
DON’T:
- Avoid brushing dry curls aggressively, as this can create frizz.
- Don’t pull every curl tightly against your scalp.
- Avoid using too many heavy styling products.
- Don’t place all your pins in one spot.
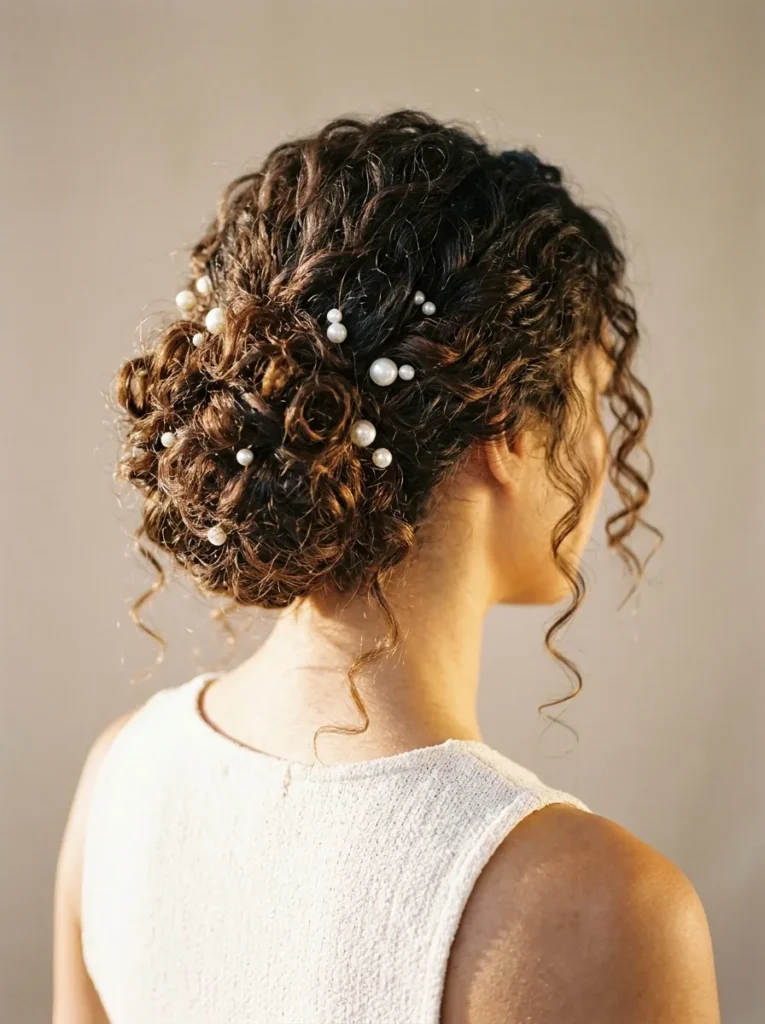
The secret to a beautiful curly updo is preserving the natural shape of your curls. Pin sections loosely from the nape upward, allowing the curls to overlap naturally. I’ve noticed that strategically placed pins create better volume than forcing every strand into a perfectly smooth bun.
8. Satin Scarf Bun
Best For: Everyday outfits, brunch, casual gatherings
Styling Time: 5 to 8 minutes
Skill Level: Beginner
Key Accessory: Satin or silk scarf
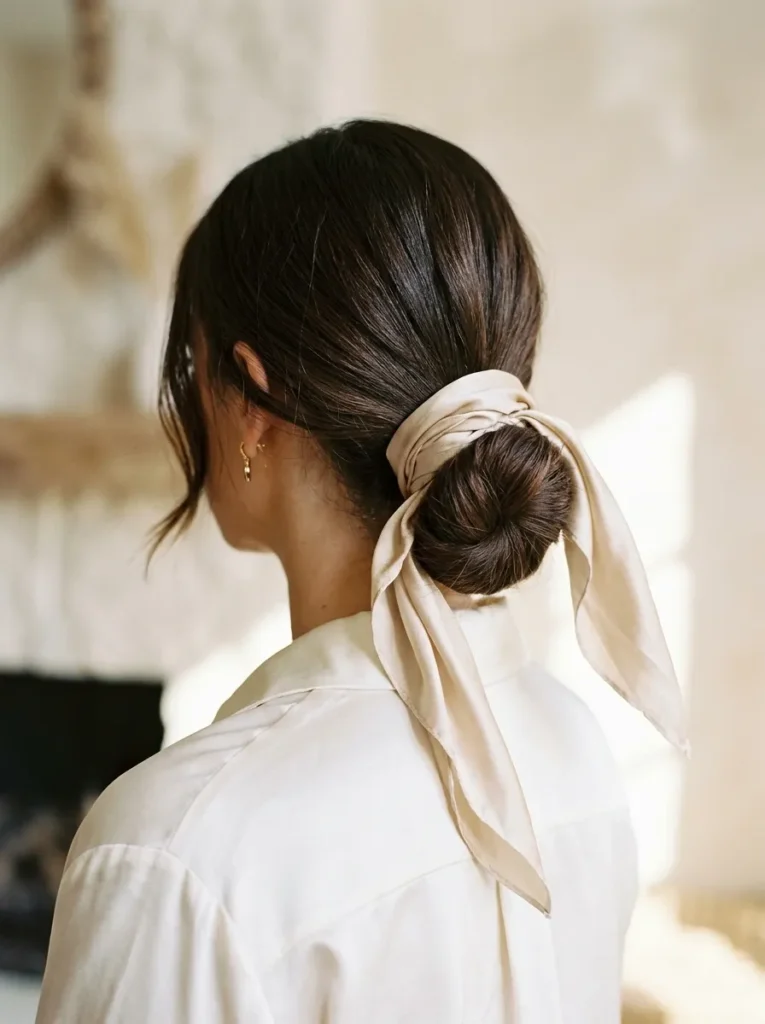
A satin scarf adds color and personality to a simple bun without requiring advanced styling skills. First, secure your hair into a low bun using an elastic. Fold a lightweight scarf into a narrow band, wrap it around the bun, and tie a neat knot.
Choose a floral scarf for a playful daytime look or a solid cream, black, or champagne design for something more refined. Make sure the scarf is secured comfortably so it does not loosen while you move. This style also works beautifully with simple earrings and a crisp shirt.
9. Loose Braided Bun

A little braid detail can make an ordinary bun look much more polished. Start by gathering your hair into a low ponytail, then divide the length into three equal sections and create a traditional braid. Keep the weave slightly relaxed rather than pulling each section tightly.
Once the braid reaches the ends, secure it with a small elastic. Wrap the braided length around the ponytail base to form a bun, then use bobby pins to hold it in place. Gently loosen a few braid sections for added fullness. This style works particularly well for medium and long hair, especially when you want something detailed without complicated techniques.
10. Rolled Tuck Updo

- Brush gently: Remove tangles before styling so the hair folds smoothly without creating bumps.
- Create a ponytail: Gather your hair at the nape and secure it loosely with a small elastic.
- Make a pocket: Slide your fingers above the elastic to create a small opening between the hair and scalp.
- Roll inward: Flip the ponytail upward and tuck its length through the opening.
- Pin securely: Use bobby pins to hold the tucked ends and hide any loose sections.
A rolled tuck gives your hair a graceful shape without requiring braiding or complicated techniques. It works particularly well for straight and slightly wavy textures. For a more polished finish, smooth the sides with a little styling cream and add a decorative pin above the tucked section.
Also Visit : 24 Effortless Pool Hairstyles That Stay Put All Day
11. Double Twisted Bun

Quick Tip:
Create two separate twists before joining them into one bun. This gives the hairstyle extra texture and helps distribute the hair more evenly, especially when working with thick or long hair.
Start by dividing your hair into two sections from the middle or slightly off-center. Twist each section backward, then bring both twists together at the nape. Wrap the remaining lengths around each other to form a low bun and secure with bobby pins. For a softer appearance, gently loosen the twists around the crown without disturbing the bun.
12. Pinned French Roll

BEFORE: Loose hair can feel distracting during formal occasions, and a basic ponytail may look too casual with an elegant outfit. Hair that slips out of ordinary pins can also make styling frustrating.
AFTER: A French roll gathers the entire length into a clean vertical shape at the back of the head. The result looks refined, keeps hair away from the neck, and pairs beautifully with dresses and tailored outfits.
Brush your hair toward one side and secure the back with several bobby pins arranged vertically. Gather the remaining length, roll it inward over the pinned section, and tuck the ends inside. Add extra pins along the fold to keep everything secure. A light mist of hairspray helps control flyaways without making the style stiff.
13. Sleek High Bun
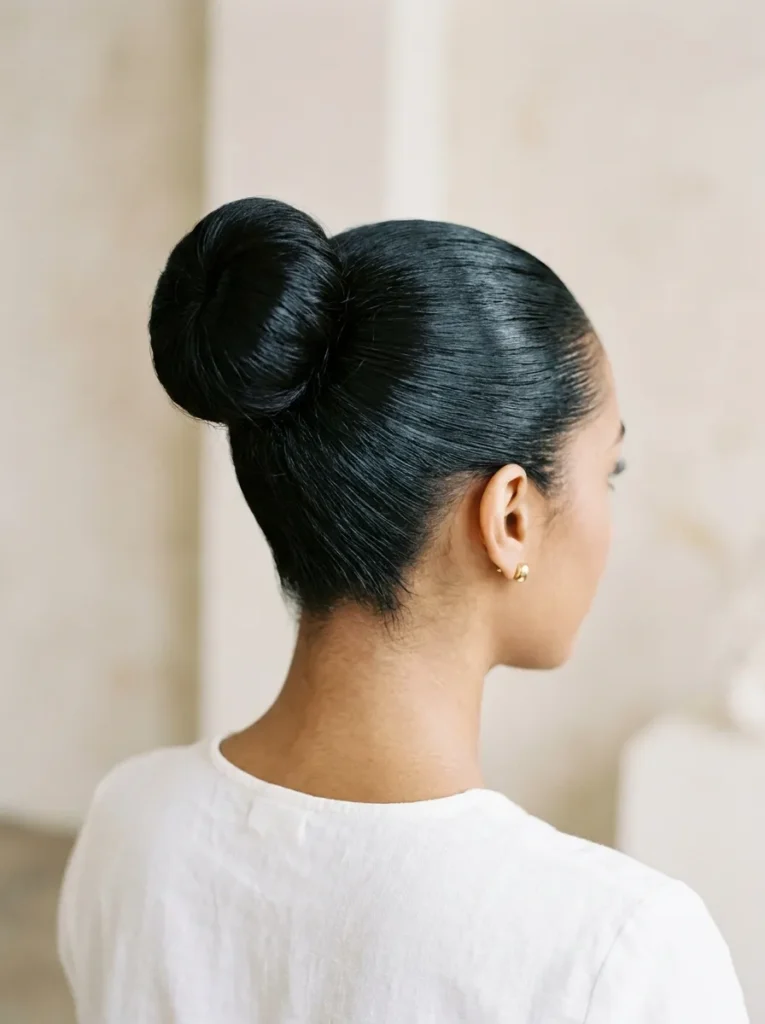
- Smooth the hair: Brush your hair upward toward the crown, removing tangles and creating a clean shape. Apply a small amount of smoothing cream to control flyaways.
- Secure a ponytail: Gather your hair high on your head and fasten it tightly with a strong elastic.
- Wrap the length: Twist your ponytail and coil it around the elastic to create a rounded bun.
- Fix the shape: Insert bobby pins around the bun and finish with a light mist of hairspray.
A sleek high bun creates a clean, lifted appearance that pairs beautifully with statement earrings and structured outfits. For the smoothest result, use a fine-tooth comb around your hairline and a soft brush over the crown. This style is especially useful for warm days, office outfits, and formal gatherings.
14. Twisted Ponytail Updo

| Styling Detail | Simple Ponytail | Twisted Ponytail Updo |
| Hair preparation | Brush and gather | Divide and twist sections |
| Base appearance | Visible elastic | Elastic covered with twists |
| Styling time | 2 to 3 minutes | 5 to 8 minutes |
| Overall finish | Casual and simple | Polished and decorative |
| Best occasion | Everyday errands | Office, brunch, and dinners |
A twisted ponytail gives a familiar hairstyle a more finished appearance without adding much styling time. Create two small twists from the front sections, bring them backward, and secure them around your ponytail base. Keep the remaining length softly wavy or straight, depending on your outfit and personal style.
15. Romantic Floral Updo

DO:
- Create loose twists before pinning sections at the back.
- Choose small artificial flowers with secure clips or flexible wire stems.
- Place floral accents asymmetrically for a natural finish.
- Match flower colors with your dress or accessories.
DON’T:
- Avoid oversized decorations that overwhelm the hairstyle.
- Don’t insert sharp floral wires directly against your scalp.
- Avoid arranging every flower in a straight line.
- Don’t use heavy accessories that pull on delicate pinned sections.
A floral updo adds a delicate finishing touch to wedding guest outfits, engagement celebrations, and garden parties. Start with a loose low bun, then tuck small floral accessories into the twists. For better comfort, choose lightweight decorations and secure each piece firmly before leaving home.
Also Visit : 22 Flattering Square Face Hairstyles to Soften Angles
16. Rope Twist Updo

Styling Time: 6 to 10 minutes
Skill Level: Beginner
Best For: Medium to long hair
Hold: Bobby pins and flexible hairspray
Two simple rope twists can give loose hair a surprisingly intricate finish. Part your hair down the middle, twist each side away from your face, then cross and pin the lengths at the nape. The overlapping sections create texture while keeping the style secure throughout the day.
17. Bubble Braid Bun

A bubble braid bun brings playful texture to a gathered style, so it feels more detailed than a standard bun without requiring a complicated braid. Make a high or low ponytail, adding small elastics every few inches along its length, depending on your hair length.
Gently pull each section outward to create rounded bubbles, then wrap the ponytail around its base and pin it securely. Among easy hair updos, this one is a fun choice for casual parties or weekend plans. Use clear elastics and tuck the final ends underneath.
CONCLUSION
The right updo can make getting ready feel simpler while giving your look a thoughtful finish. From classic low buns and French twists to braided styles and playful bubble buns, these ideas offer options for everyday routines and special occasions. Choose a style that suits your hair texture, start with a few basic pins or elastics, and adjust the finish until it feels comfortable. Keep this collection of easy hair updos handy, save it to your Pinterest boards, and try one of the styles this week. Share the article with a friend who would enjoy a fresh hairstyle idea, too.