20 Emo Scene Hairstyles Perfect for Your Face Shape
Your face shape is not a limitation — it’s your greatest styling advantage. The right emo scene hairstyles don’t just change how you look; they change how you carry yourself, how you walk into a room, and how confidently you face the world every single day. That shift is real, and it starts with finding the style that was genuinely built for your features.
I’ve noticed that so many people fall in love with a hairstyle online, get it cut, and then feel disappointed — not because the style is wrong, but because it wasn’t chosen with their face shape in mind. A blunt micro fringe that looks jaw-dropping on an oval face can feel overwhelming on a rounder one. A teased crown that beautifully elongates a round face might overpower someone who already has strong vertical proportions. The details matter enormously, and understanding them makes all the difference between a haircut you tolerate and one you genuinely love.
This article brings together 20 carefully chosen emo and scene-inspired hairstyles — from side-swept razored bangs and raccoon-stripe highlights to shaggy wolf cuts and textured curtain bangs — each one explored with real attention to which face shapes it flatters most and why. Whether you’re stepping into this aesthetic for the first time or looking to evolve a look you already love, there is something here that will inspire you, suit you, and make you want to book that appointment today.
1. Side-Swept Razored Bang
Side-swept razored bangs are one of those cuts that instantly change your entire face. They fall diagonally across the forehead, drawing the eye downward and creating a sharp, dramatic frame that feels effortlessly cool. This style works especially well for round and oval face shapes because the angle adds length and definition right where it matters most. The razored edge gives the ends a feathery, lived-in texture that separates this look from a basic fringe — it has attitude built right into the cut itself, and that energy is impossible to ignore.
In my experience, this bang style works best when it’s cut slightly longer than feels comfortable at first. It needs a little length to sweep properly and stay in place throughout the day. Pair it with a texturizing spray and a fine-tooth comb to direct it across the eye, and you get that iconic emo lean that looks intentional rather than accidental. I’ve noticed that people with thicker hair get the most dramatic sweep, while those with finer hair can add dry shampoo at the roots for extra hold and volume at the part.
2. Choppy Layered Fringe
There’s something magnetic about a choppy layered fringe — it looks undone in the best possible way. Unlike a blunt cut, this fringe has pieces that fall at different lengths, creating a textured curtain across the forehead that moves with you. It softens angular jaw lines beautifully and adds a certain effortless edge to straight or slightly wavy hair. The layers make it incredibly versatile too. On some days it reads as casual and relaxed, and on others, with the right product and a little teasing, it transforms into something bold and intentional that fits right into the emo scene aesthetic.
I’ve tried this fringe on several different hair types and it consistently delivers the most visual impact on dark, high-contrast hair — think jet black or deep brown with lighter highlights underneath. The contrast makes each choppy layer visible and adds dimension without needing much styling. For fine hair, a small amount of pomade worked through the tips separates the pieces beautifully. I’ve noticed it suits heart-shaped and oval faces the most since the varied lengths draw attention toward the eyes and cheekbones, balancing the face naturally without any harsh lines.
3. Teased Crown Volume
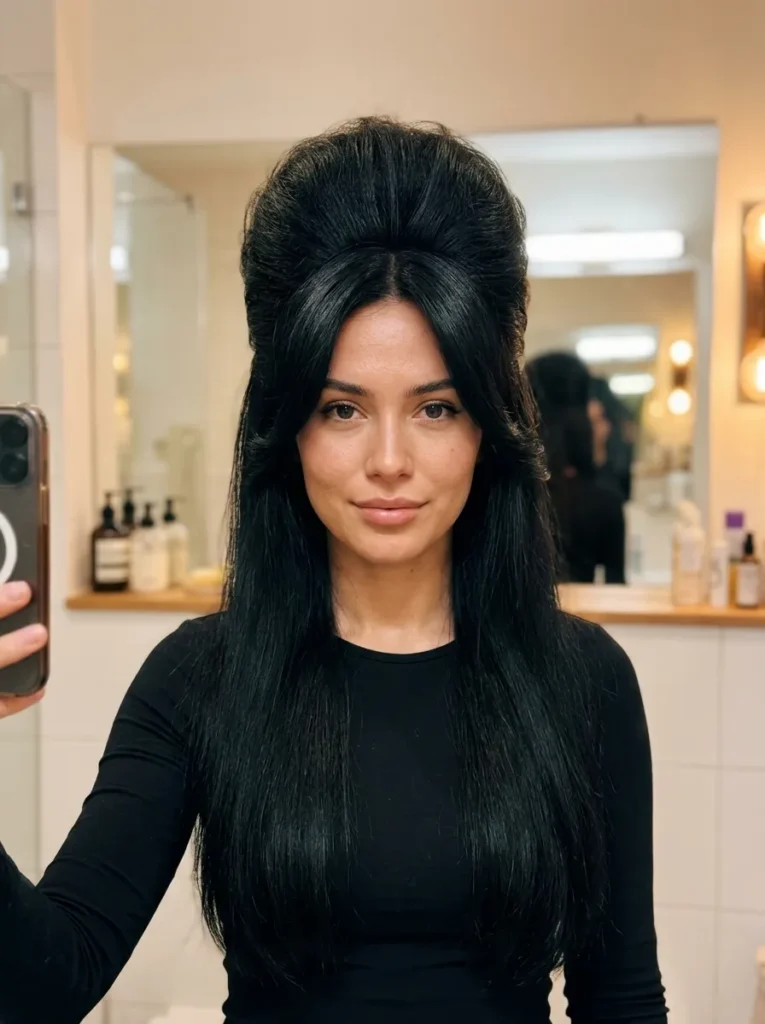
Big, teased crown volume is the heartbeat of classic scene styling and it hasn’t lost a single bit of its power. The technique involves backcombing the roots at the crown of the head to build height, then smoothing the top layer loosely over it to create that signature sky-high silhouette. It makes the face appear longer and more oval, which is incredibly flattering for those with rounder face shapes. The contrast between the voluminous crown and sleek or straightened ends below creates a visual balance that feels dramatic yet deliberate — like every strand was placed with total confidence and purpose.
Getting the tease right takes a little practice, but it’s completely worth it. I’ve noticed that a medium-hold hairspray applied before backcombing gives the structure more staying power throughout the day without making it feel stiff or crunchy. A fine-tooth or rat-tail comb works best for building real height at the root. In my experience, sectioning the crown into two or three parts before teasing gives more control over the shape. Once you’re happy with the volume, gently lay the top section over the teased base and lock it with a light mist — the result looks effortless even though the technique is very intentional.
4. Blunt Micro Fringe

A blunt micro fringe sits high on the forehead, just below the hairline, and it makes an immediate statement. It’s one of the most daring choices in the emo scene hairstyles world because there’s nowhere to hide — the cut is precise, graphic, and completely confident. It frames the face like a bold punctuation mark, drawing full attention to the eyes and brows. This style works best on those with oval or longer face shapes since the high placement of the fringe visually shortens the forehead and brings the entire face into better proportion, creating a striking and intentional aesthetic.
Blunt micro fringes require upkeep, but that’s part of their charm. In my experience, they need a trim every three to four weeks to stay at the right length — let them grow even half an inch and the whole effect softens. Straightening them with a flat iron on low heat gives the cleanest, sharpest finish. I’ve noticed that this fringe looks most powerful when paired with sleek, straight lengths below rather than heavy layers, because the contrast between the precise bang and the smooth fall of hair below amplifies the graphic quality of the cut. It’s a commitment, but it photographs beautifully every single time.
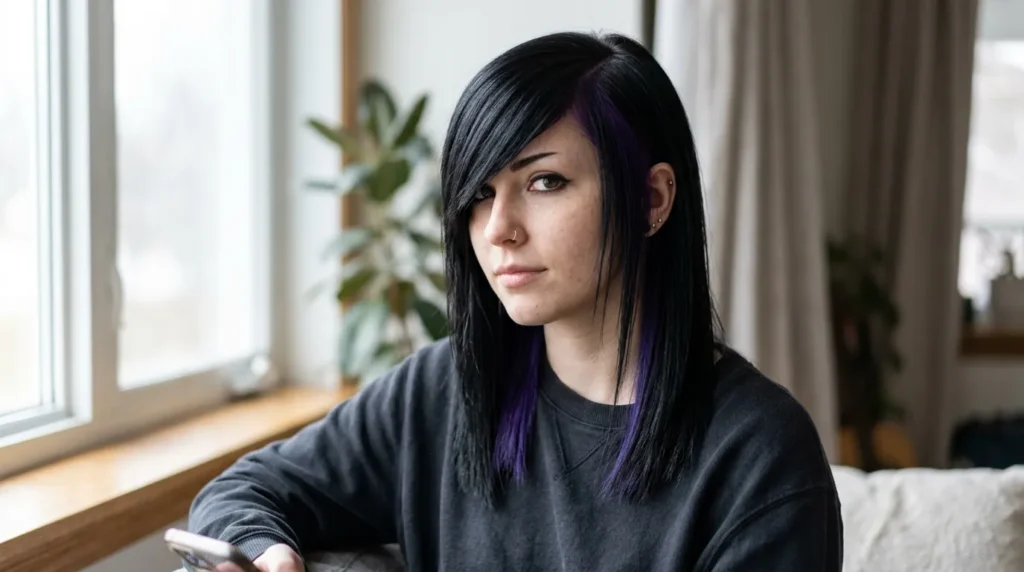
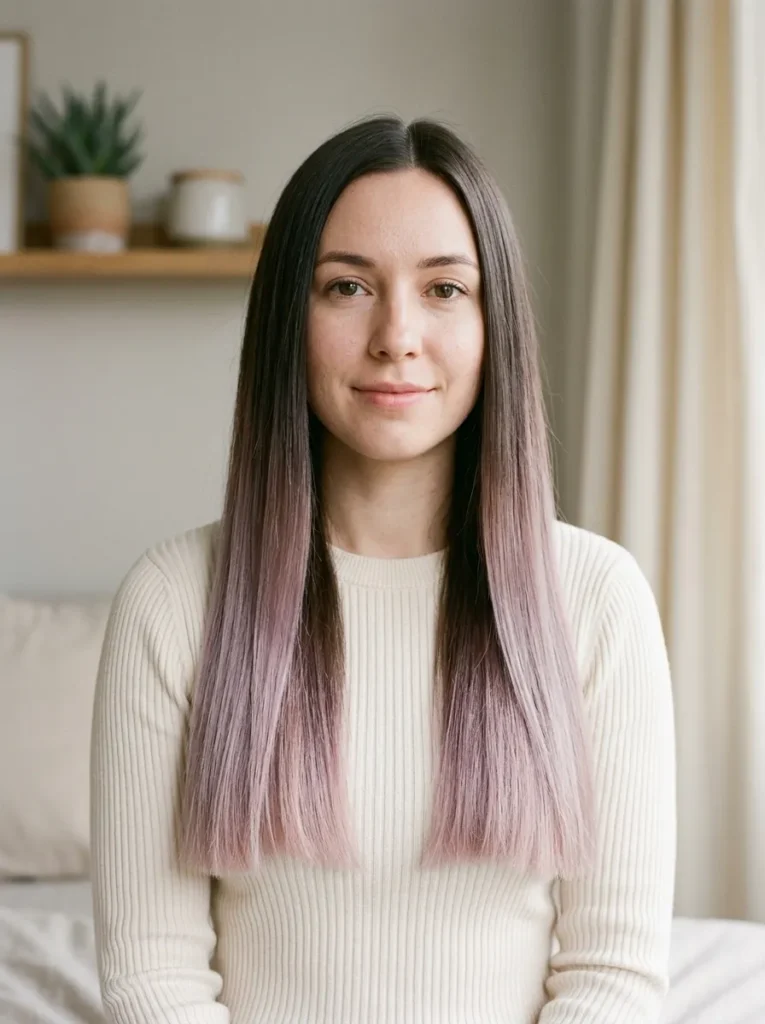
5. Black-to-Purple Ombre
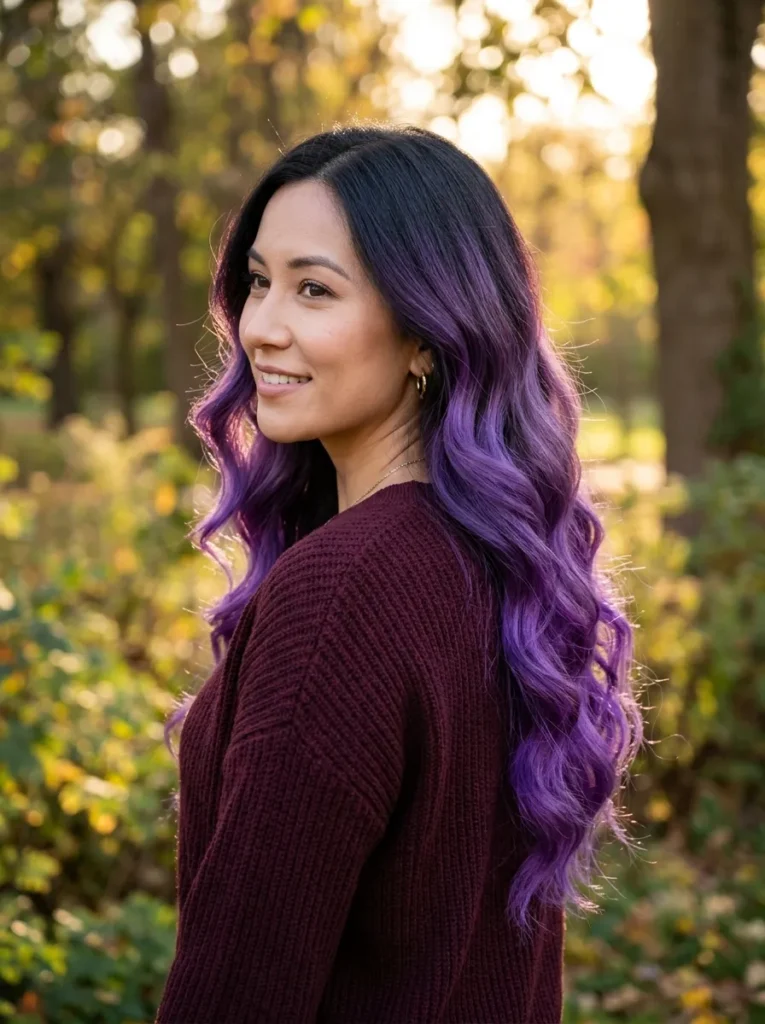
Black-to-purple ombre is one of those color combinations that looks like it was made for moody, dramatic hair. The color starts deep and dark at the roots — usually a true black or very dark brown — then melts gradually into a rich, saturated purple toward the ends. The transition feels natural rather than harsh, which makes it wearable for everyday life while still carrying serious visual impact. It works on every face shape because the color draws the eye downward along the length of the hair, creating a natural elongating effect that flatters almost everyone who tries it.
I’ve noticed that the depth of the purple makes a huge difference in how this color reads in different lighting. Indoors it looks deep and almost mysterious, but in natural sunlight it catches the light and glows with violet and magenta tones that feel completely alive. In my experience, using a purple toning shampoo once a week keeps the color vibrant between salon visits and prevents it from fading into a washed-out lavender too quickly. This color combination suits all hair lengths beautifully, but it reaches its full potential on long, layered hair where the ombre transition has enough space to fully develop and breathe.
Also Visit : 20 haircuts with curtain bangs trending right now
6. Scene-Style Space Buns
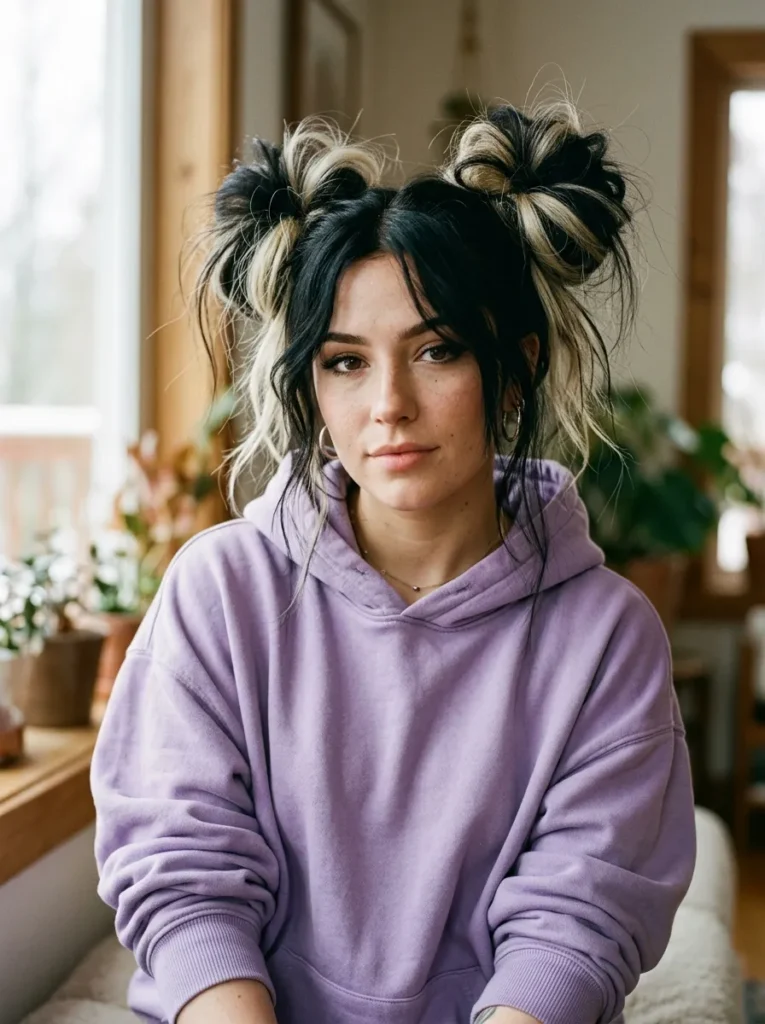
Scene-style space buns take a playful concept and push it straight into bold, statement territory. Unlike soft, rounded buns, the scene version involves teasing the hair before gathering it into two high sections, giving each bun a full, almost exaggerated volume that sits proudly on either side of the head. The height and placement instantly widen the visual frame of the face, making this style especially flattering for those with longer or more narrow face shapes. Pair them with a heavy fringe or wispy face-framing pieces and the whole look comes together with a personality that’s impossible to overlook.
What makes scene space buns so visually interesting is the deliberate imperfection built into them. They’re not meant to be smooth or perfectly symmetrical — the messier and more textured they look, the more authentic the style feels. I’ve noticed that using a texturizing spray before sectioning the hair gives the buns more grip and body, while a few deliberately pulled-out pieces around the face soften the look just enough to keep it wearable. In my experience, this style holds best on second-day hair when there’s a little natural texture and oil at the roots — it gives the buns something real to hold onto.
7. Raccoon-Stripe Highlights
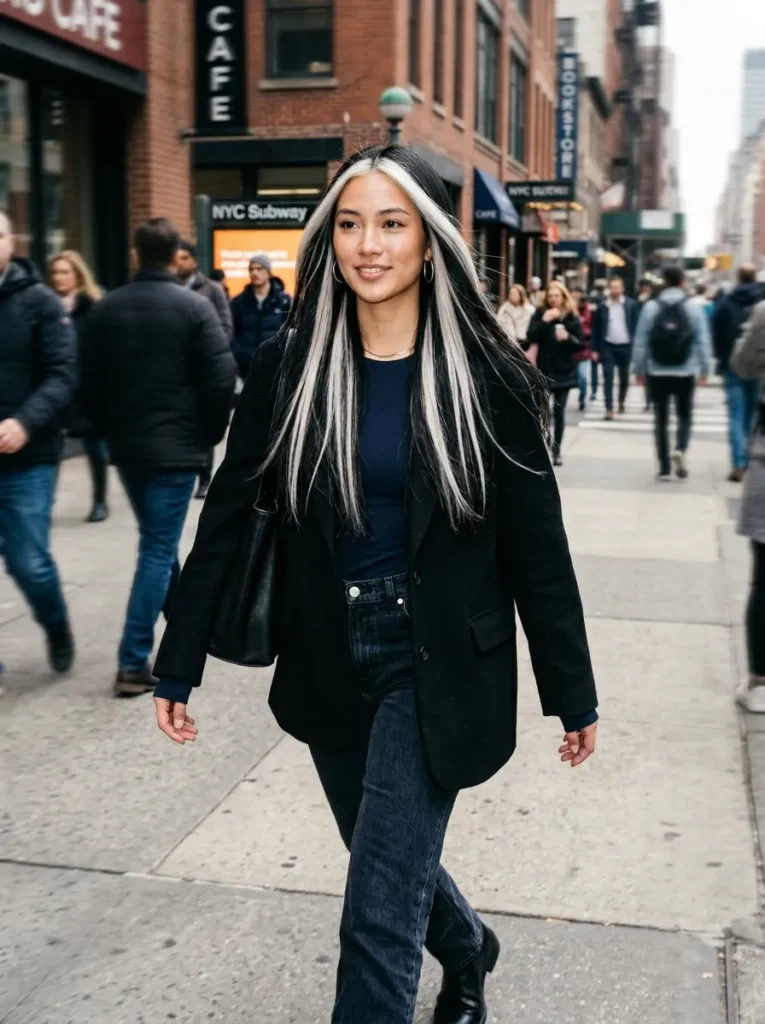
Raccoon-stripe highlights are having a serious cultural moment and for very good reason — they’re bold, graphic, and completely unforgettable. The technique involves placing thick, chunky sections of a lighter or contrasting color — usually platinum blonde, white, or bright silver — throughout darker base hair. The result mimics the natural banding pattern of a raccoon’s tail, which sounds unexpected but translates into something genuinely striking on human hair. The chunky contrast adds incredible dimension and makes even simple haircuts look infinitely more complex and textured, giving the overall style a raw, editorial quality.
The beauty of raccoon stripes is how customizable they are. In my experience, the placement of the stripes matters just as much as the color itself — face-framing pieces with this technique immediately draw attention to the eyes and cheekbones, while stripes placed throughout the mid-lengths and ends create more of an all-over textured effect. I’ve noticed this technique works especially well on wavy or slightly tousled hair because the movement of the waves makes the contrasting sections catch the light at different angles, creating a dynamic, almost three-dimensional color effect that looks completely different depending on how the hair falls.
8. Asymmetrical Razor Cut

An asymmetrical razor cut is confidence made visible. One side is cut noticeably shorter than the other, creating a deliberate imbalance that immediately signals individuality and edge. The razor technique used to finish the ends adds a soft, feathered quality to the cut rather than a blunt, heavy line, which keeps the style from feeling too severe or structured. This contrast between bold asymmetry and soft texture is exactly what makes the look so compelling. It suits square and heart-shaped faces particularly well because the longer side frames the jaw softly while the shorter side exposes the neck and ear with a clean, striking confidence.
Razor cuts require a stylist who understands how to use the tool properly, because the angle and pressure of each stroke directly affects how the ends fall and move. In my experience, asking for a dry razor finish after the initial cut gives the most accurate result since hair behaves differently when it’s wet versus dry. I’ve noticed that this style looks incredible with a deep side part that directs all the volume toward the longer side, amplifying the asymmetry intentionally. A small amount of smoothing serum on the longer side and a matte pomade on the shorter side creates a beautiful contrast in texture that elevates the entire look.
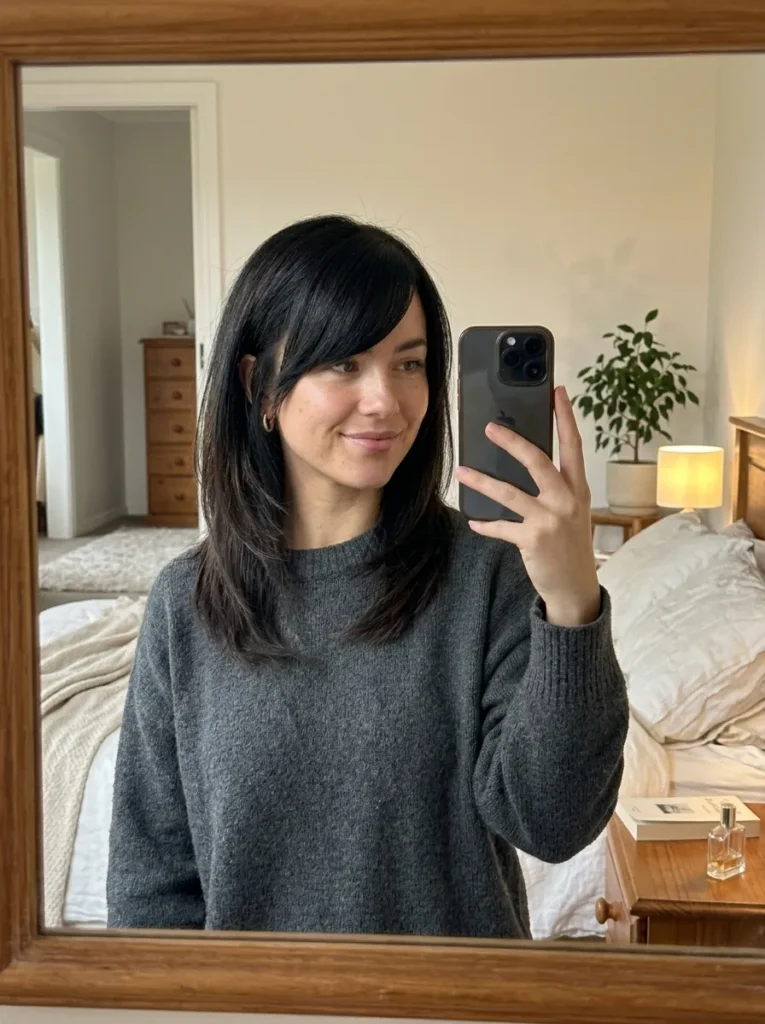
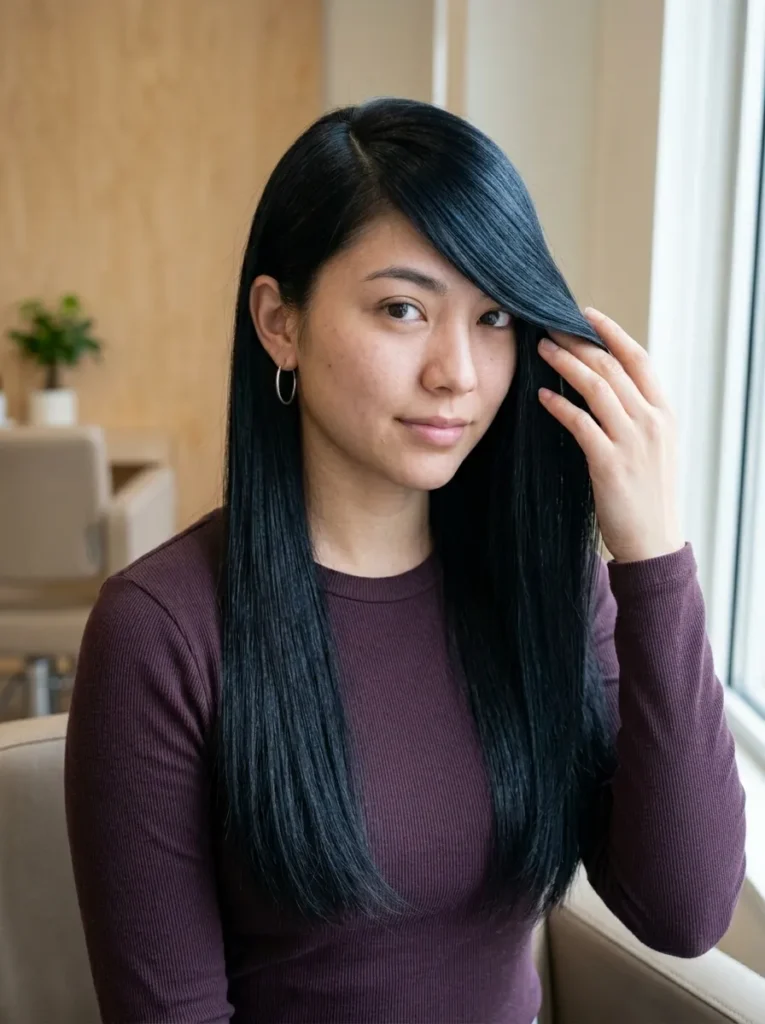
9. Jet Black Straight Sleek
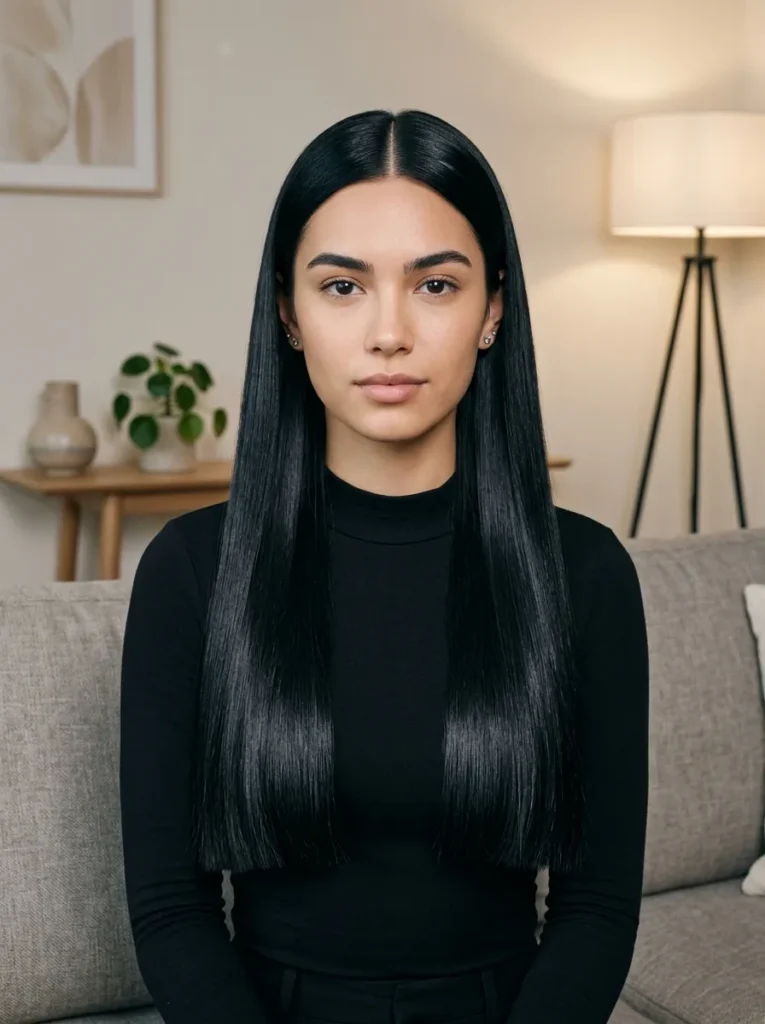
Jet black straight sleek hair is one of those styles that carries its own gravitational pull. There’s a reason it became the foundation of so many iconic emo scene hairstyles — the color is absolute, the finish is mirror-smooth, and the overall effect is quietly commanding without trying too hard. It works beautifully across all face shapes because the darkness creates a strong contrast against the skin, defining the face naturally. When the hair is cut with intention — whether blunt at the ends or slightly layered — the sleekness amplifies every detail of the cut and makes even a simple silhouette look deliberate and powerful.
Achieving true jet black sleekness at home takes more than just a flat iron pass. In my experience, starting with a smoothing serum applied to damp hair before blow-drying makes the biggest difference in the final finish. It seals the cuticle down before any heat touches the hair, which means less frizz and more shine once the flat iron goes through. I’ve noticed that pulling the hair taut while straightening — section by section, working from underneath upward — gives a cleaner, glossier result than rushing through large sections. Finish with a shine spray held at arm’s length, not too close, and the reflection is genuinely stunning in any light.
10. Curly Emo Fringe Style
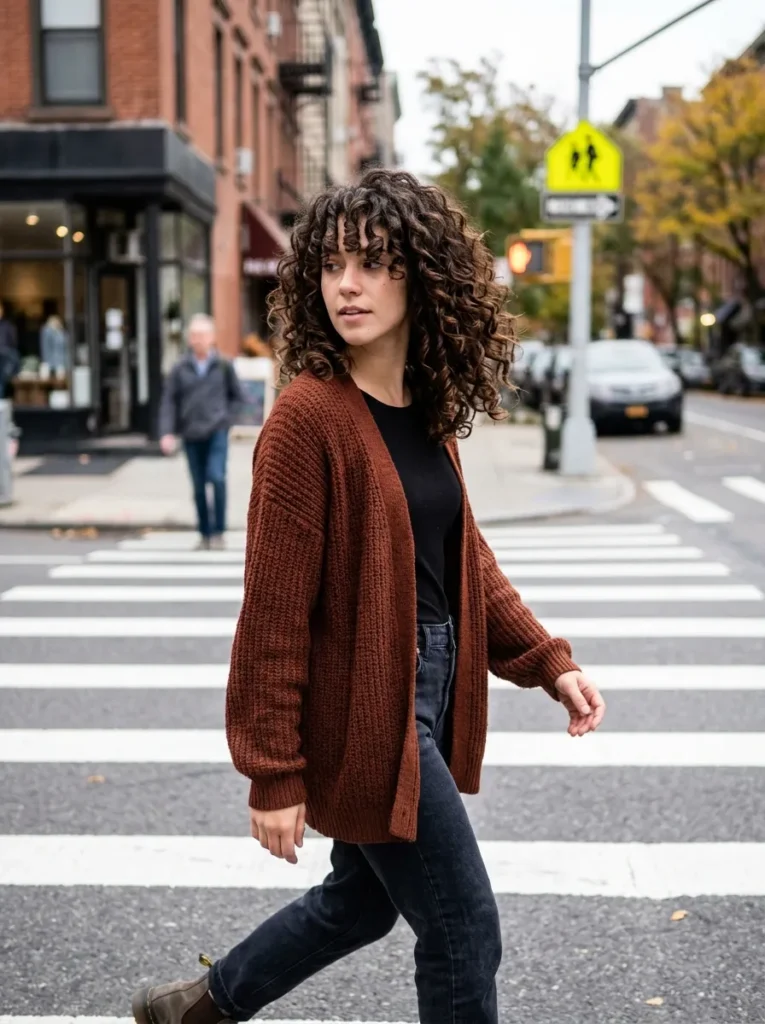
Curly hair and emo styling might not seem like an obvious pairing, but when they come together the result is unexpectedly beautiful. The curly emo fringe style embraces natural curl texture while adding a dramatic fringe that falls loosely across the forehead in soft, bouncy spirals rather than a flat, straight line. The fringe doesn’t fight the curl — it leans into it, creating a face frame that feels organic and full of personality. This style works especially well for oval and heart-shaped faces because the volume of the curls at the front adds softness and width at the forehead, beautifully balancing a narrower chin.
The key to making this style work is allowing the curls to define themselves fully before attempting to shape or direct the fringe. I’ve noticed that applying a curl-defining cream to soaking wet hair and then scrunching gently — rather than touching it while it dries — gives the fringe the cleanest, most consistent curl pattern. In my experience, diffusing on a low heat setting rather than air-drying alone gives more volume at the root without disturbing the curl formation. Once dry, a single light scrunch with a small amount of curl oil breaks the cast and leaves the fringe looking soft, touchable, and genuinely alive with movement.
11. Half-Up Twisted Knot

The half-up twisted knot sits right at the intersection of effortless and intentional. The top section of hair is gathered, twisted once or twice, and then secured into a small knot at the crown while the rest of the hair falls freely below. It’s a style that frames the face cleanly without pulling everything back completely, which means you still get the softness and movement of loose hair alongside the structure of an updo. For those with round or square face shapes, this style works particularly well because the height of the knot at the crown visually lengthens the face, creating a more balanced and elongated silhouette.
What I love most about this style is how naturally it adapts to different hair textures. On straight hair it looks sleek and precise; on wavy or curly hair it looks relaxed and romantic. In my experience, leaving a few face-framing pieces loose before securing the knot makes the whole style feel less rigid and more wearable for a full day. I’ve noticed that twisting the section tightly before knotting gives more hold and a cleaner shape, while a looser twist creates a softer, more undone feel. Either way, a single bobby pin or small clear elastic is all it needs — this style doesn’t require much to stay in place beautifully.
12. Peek-a-Boo Color Panels
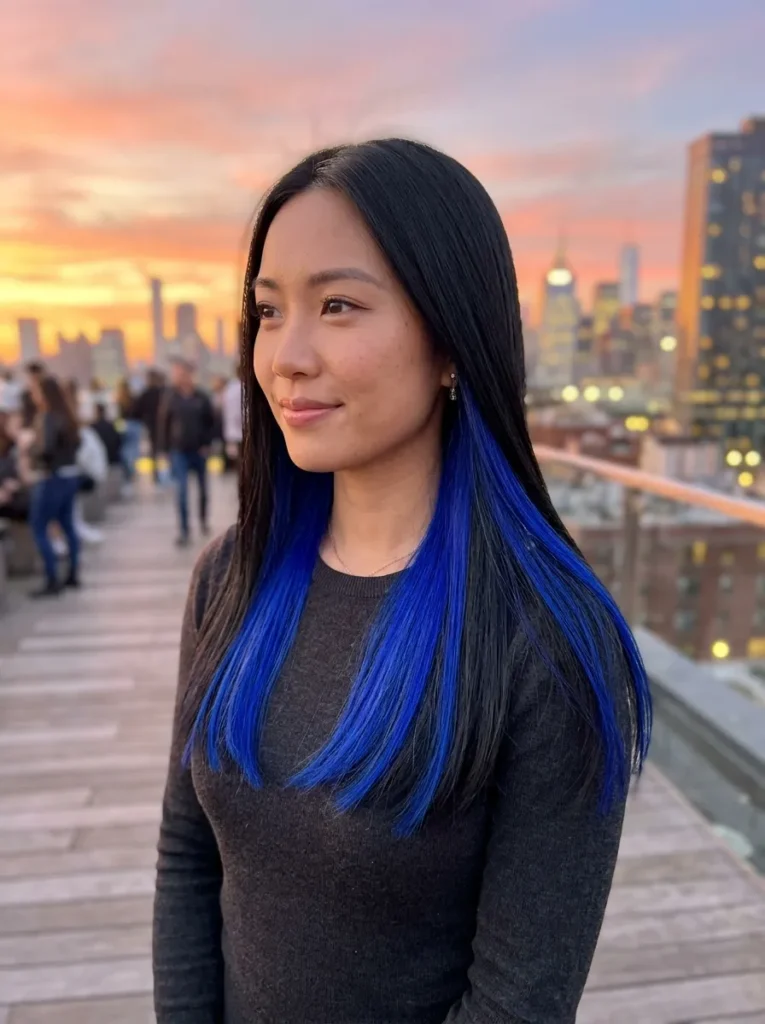
Peek-a-boo color panels are one of the most clever and versatile coloring techniques in the scene hair playbook. Hidden sections of vivid color — electric blue, candy pink, deep violet, or lime green — are placed underneath the top layer of hair so they stay mostly concealed when the hair is down. But the moment the hair moves, gets tucked behind an ear, or gets pulled into a half-up style, those panels flash into view like a secret being revealed. It’s a coloring technique designed for people who want drama on their own terms — visible when they choose, hidden when they need it.
I’ve noticed that the placement of the panels makes a huge difference in how often the color actually shows. Panels placed directly beneath the crown section peek through with every slight movement of the head, while panels placed lower toward the nape stay hidden until the hair is deliberately lifted. In my experience, this technique works beautifully as a first step into vivid color for those who aren’t ready to commit to an all-over bright shade — it lets you test the color, wear it with confidence, and decide how much you want to reveal based on how the style is worn on any given day.
13. Wispy Face-Framing Layers
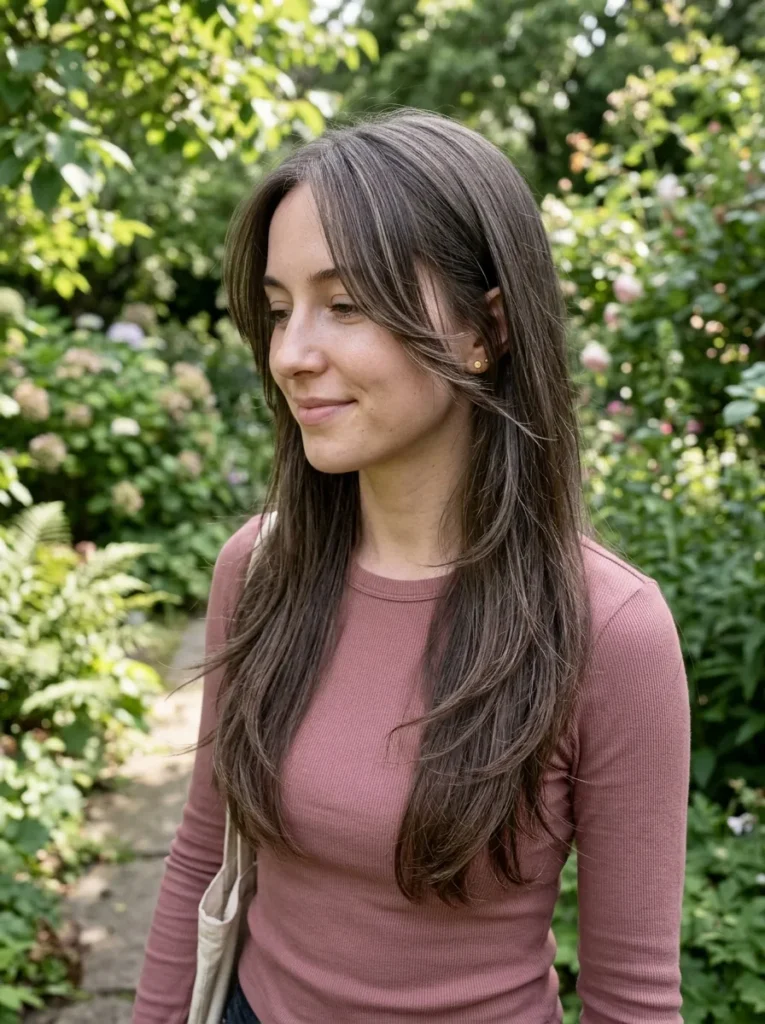
Wispy face-framing layers are the kind of detail that quietly transforms an entire hairstyle. These are thin, delicate pieces cut specifically to fall forward around the face — softer and more feathered than traditional face-framing layers, with ends that taper almost to a point rather than landing with a defined weight. They move constantly, catching light and creating gentle movement around the cheekbones and jawline that makes the overall style feel alive rather than static. For anyone with a square or diamond face shape, these layers are especially flattering because they soften strong angles without hiding them, creating a balance that feels natural and effortless.
The secret to truly beautiful wispy layers is in the finishing technique rather than the cut itself. In my experience, the layers need to be encouraged to separate rather than clump together — a small amount of lightweight hair oil worked through just the very tips keeps them individually defined without weighing them down. I’ve noticed that blow-drying these pieces with a round brush, curling them very slightly inward toward the face, gives them the perfect gentle curve that makes them frame the face exactly as intended. On days when there’s no time to style, a single pass of a flat iron through just these front pieces takes under two minutes and makes an enormous visual difference to the whole look.
14. Crimped Texture Wave

Crimped texture is one of those trends that walked straight out of the early 2000s scene era and landed back in the present looking fresher than ever. Unlike tight, old-school crimping that covered every strand uniformly, the modern version is selective and deliberate — applied to specific sections, usually the mid-lengths and ends, while the roots and top layer remain smooth or slightly tousled. The result is a beautiful contrast between sleek and textured that adds enormous visual depth to the hair. It makes fine hair look significantly thicker and gives already thick hair an almost sculptural quality that photographs incredibly well.
Crimping tools vary widely in plate width, and that width completely changes the final effect. In my experience, a narrow plate creates tight, detailed waves that look intricate and almost braided from a distance, while a wider plate produces a softer, more relaxed zigzag that reads as texture rather than pattern. I’ve noticed that crimping on hair that has been very lightly misted with hairspray beforehand gives the waves more definition and significantly better longevity throughout the day. Always work on fully dry hair — even the slightest dampness causes the waves to drop within an hour, and the effort of creating them deserves to last much longer than that.
15. Long Scene Side Part
A long scene side part is one of those foundational styles that holds the entire emo scene hairstyles aesthetic together. The hair is parted deeply to one side — usually quite extreme, almost grazing the ear — and the heavier section sweeps dramatically across the forehead, covering one eye partially or completely. It’s an immediately recognizable silhouette that balances volume on one side with a cleaner, more exposed line on the other. This works particularly well for oval and oblong face shapes because the strong diagonal line of the part creates width and visual interest without adding any unwanted length to the face.
What makes the long scene side part so enduringly popular is how much it changes the energy of a hairstyle without requiring any cut or color commitment. I’ve noticed that the angle of the part — whether pulled further forward toward the temple or kept closer to the natural part line — completely changes how dramatic the effect reads. In my experience, using a boar bristle brush to smooth the heavier side flat against the head before adding any waves or texture gives the part a cleaner foundation that makes everything else look more polished. A small amount of pomade worked through just the parting line keeps flyaways from disrupting the strong diagonal sweep all day.
16. Dip-Dyed Pastel Ends
Dip-dyed pastel ends bring a softer, dreamier energy to the emo scene world — proving that this aesthetic isn’t limited to dark and dramatic color alone. The technique involves lightening just the bottom section of the hair and then toning it into a soft pastel shade — think dusty lilac, pale rose, mint, or baby blue — so that the ends seem to fade into something almost ethereal. The transition between the darker base and the soft pastel tips creates a gradient that feels romantic and editorial at the same time. It adds color and personality without overwhelming the overall look, making it one of the most wearable vivid color techniques available.
Pastel shades are notoriously high maintenance, but there are ways to extend their life significantly. In my experience, washing hair in the coolest water temperature that’s comfortable makes a genuine difference — hot water opens the cuticle and lets pigment escape far more quickly than cold water does. I’ve noticed that color-safe dry shampoo used between washes dramatically reduces how often the hair actually needs to be wetted, which is one of the single most effective strategies for preserving pastel tones. Storing a small amount of the original toning mixture to refresh the ends every three to four weeks at home also keeps the color looking intentional rather than faded and neglected.
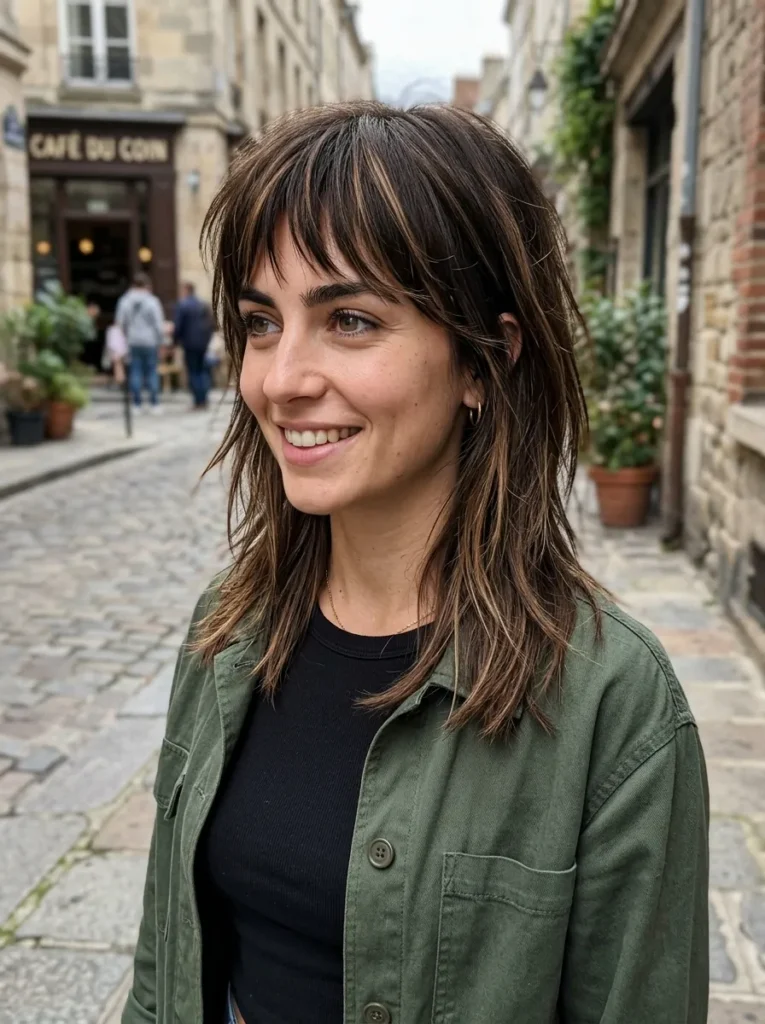
17. Shaggy Wolf Layered Cut
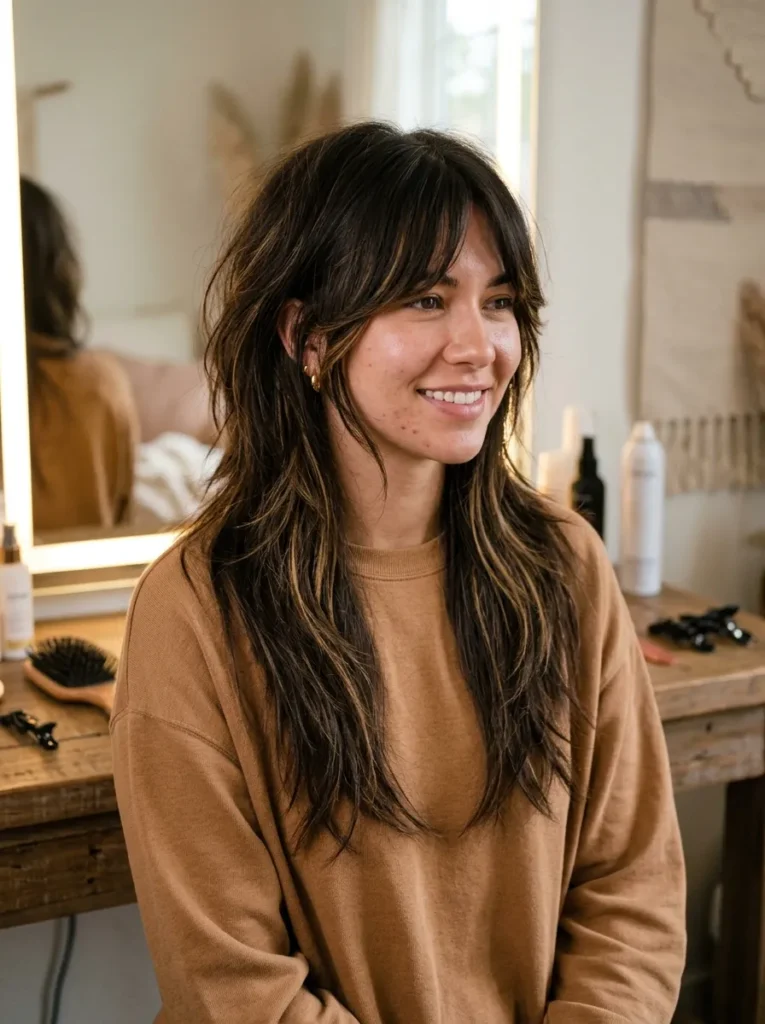
The shaggy wolf cut arrived in the scene world and immediately felt like it had always belonged there. It combines the heavy layering of a classic shag with the face-framing curtain bangs and choppy ends of a wolf cut, creating a silhouette that is simultaneously retro and completely current. The layers are cut at varying lengths throughout the entire head, building movement and texture from root to tip so the hair never sits flat or lifeless. It works beautifully for round and oval face shapes because the layers create vertical movement that elongates the face naturally, while the curtain bang softens the forehead without completely covering it.
The wolf cut is one of those styles that genuinely looks better with a little deliberate styling effort rather than just air-drying and hoping for the best. In my experience, diffusing on medium heat while scrunching sections upward into the diffuser bowl builds the kind of root volume that makes the layers look intentional and full rather than deflated. I’ve noticed that a texturizing spray worked through the mid-lengths before diffusing adds grip and separation to the layers, so each individual section holds its shape and contributes to the overall textured silhouette. Once dry, a very small amount of matte styling cream through the ends defines the choppiness without weighing the layers down.
18. Braided Crown Accent

A braided crown accent adds an unexpected delicate detail to an otherwise bold emo scene look. Rather than a full braided style, this technique involves taking a thin section of hair from one side of the head, braiding it tightly, and pinning it across the crown like a subtle headband. The rest of the hair falls freely below — straight, wavy, or textured — creating a beautiful contrast between the structured braid above and the loose volume beneath. This detail works for all face shapes but is particularly flattering for heart-shaped faces because the horizontal line of the braid draws the eye across the widest part of the forehead, creating a natural visual balance.
What makes the braided crown accent so versatile is how differently it reads depending on the braid tightness and the hair it’s paired with. In my experience, a tighter, neater braid paired with sleek straight hair below creates a polished, almost editorial look, while a looser, more textured braid worn over wavy hair gives a relaxed, bohemian edge that still feels firmly rooted in scene aesthetics. I’ve noticed that adding a few small decorative pins or tiny butterfly clips along the braid where it meets the crown elevates the detail beautifully and gives it a genuinely Pinterest-worthy finish that feels personal and intentional rather than generic.
19. Undercut Nape Design
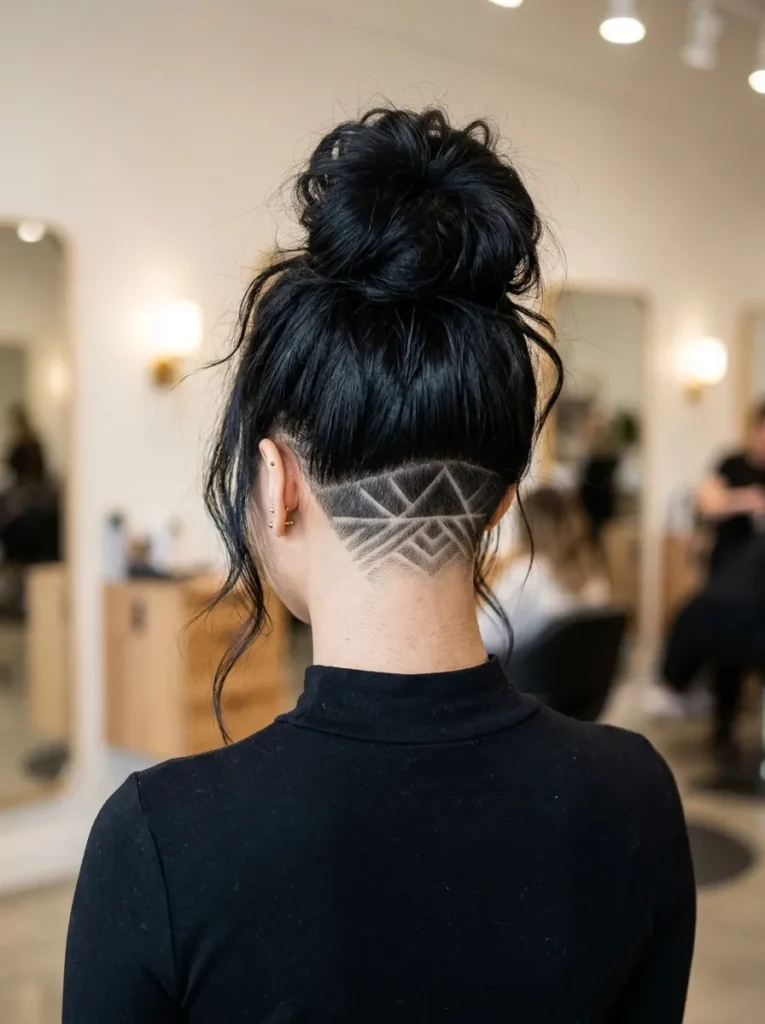
The undercut nape design is where emo scene styling meets genuine artistry. The hair at the nape of the neck is shaved or clipped very short — sometimes completely to the skin — while the rest of the hair above remains at its full length and falls naturally over the top, concealing the undercut completely when worn down. The design element comes when the hair is lifted or tied up, revealing the shaved section underneath. Some people leave the undercut plain while others use clippers or razor tools to carve geometric patterns, lines, or delicate shapes directly into the shaved section, turning the back of the head into a canvas.
This is a style that requires commitment but rewards that commitment with something genuinely unique. In my experience, the nape area grows back faster than most people expect — typically needing a cleanup every three to four weeks to keep the undercut looking intentional rather than simply grown out. I’ve noticed that pairing the undercut nape with a high ponytail or a messy bun is one of the most effective ways to show it off, because lifting the top hair creates a clean, deliberate reveal that looks almost theatrical in the best way. When the hair is worn down, the hidden undercut becomes a personal detail that only the wearer truly knows is there.
20. Textured Curtain Bang
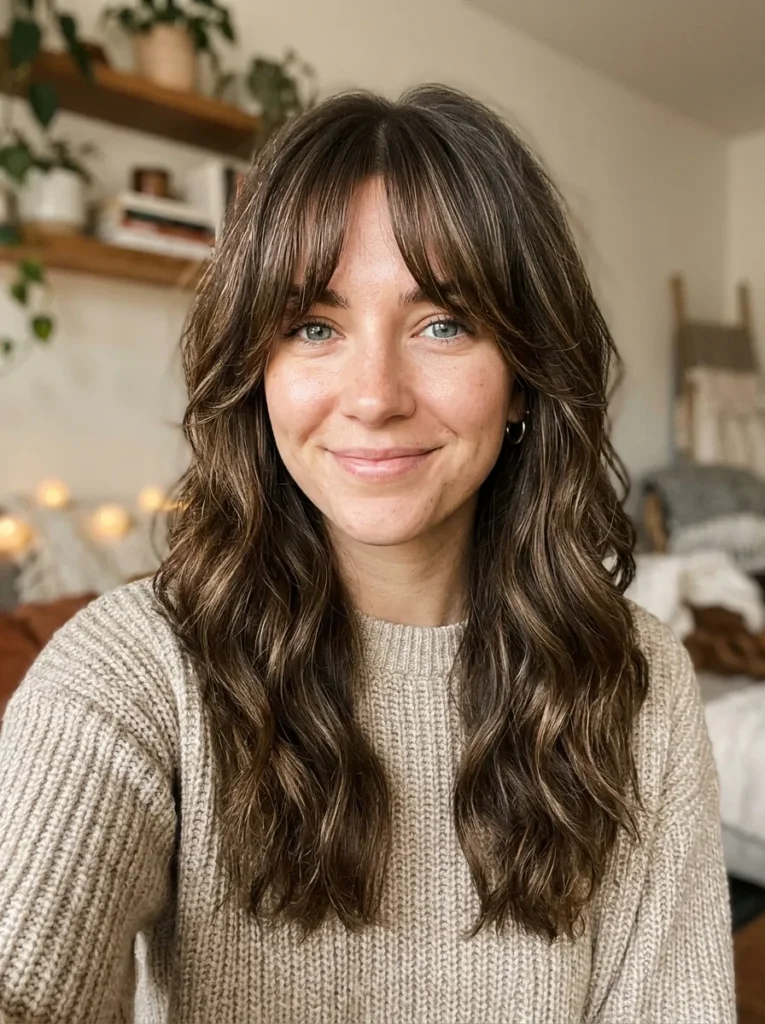
Textured curtain bangs are the perfect final entry in any celebration of emo scene hairstyles because they represent exactly what the aesthetic is built on — softness and edge living together in complete harmony. The bang is parted at the center and falls in two curtain-like sections on either side of the face, framing the eyes and cheekbones with a gentle, flowing movement. Unlike a blunt fringe, the textured version has feathered, wispy ends that blend into the face-framing layers below, creating a seamless transition from bang to length. This style flatters every single face shape, which is genuinely rare for a fringe style.
Styling curtain bangs correctly makes the difference between a look that reads polished and one that reads like a growing-out mistake. In my experience, using a round brush and a blow dryer to dry the bangs in two separate sections — directing each side away from the center part and then curving the ends very slightly inward — creates the signature curtain sweep that makes this style so recognizable. I’ve noticed that a very light hold spray applied before drying keeps the texture intact without stiffness, and a single pass of a small curling wand through just the tips adds a finishing curve that photographs beautifully from every angle and holds its shape reliably throughout the day.
Conclusion
Every single style in this article was chosen with one goal in mind — to help you find an emo scene hairstyle that feels made for you, not just borrowed from someone else’s feed. The right cut, color, or fringe can genuinely transform the way you see yourself in the mirror, and I’ve seen that transformation happen time and again with styles exactly like these. Now it’s your turn. Save this post on Pinterest so you never lose these ideas, share it with a friend who’s ready for a change, and go find the look that makes you feel completely, unapologetically yourself.