20 Easy Wedding Guest Hairstyles for a Glamorous Night
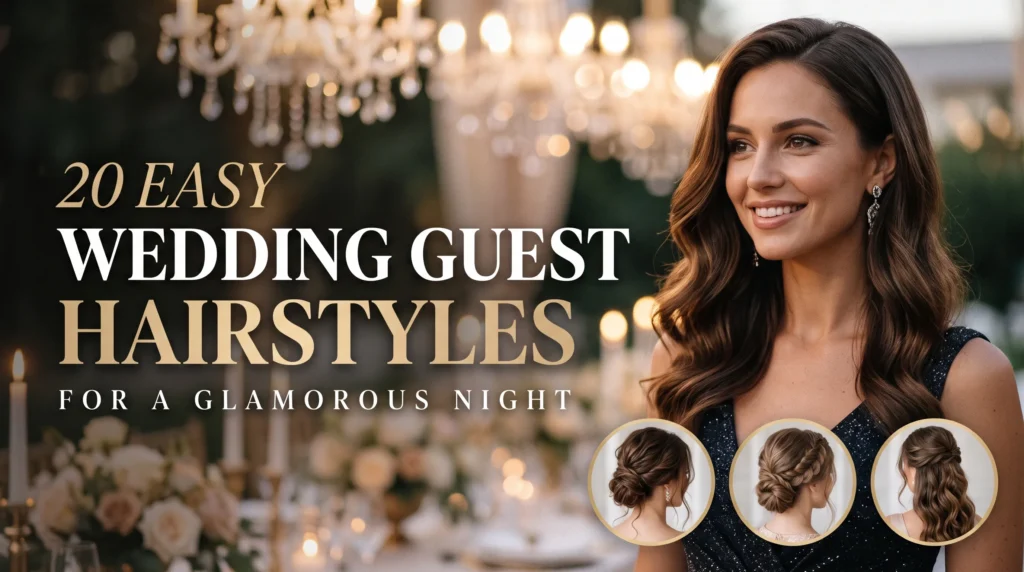
Wedding invitations are exciting, but deciding how to wear your hair can become one more task on an already busy day. You want a style that looks lovely in photographs, feels comfortable through dinner and dancing, and does not take hours to create.
These 20 easy wedding guest hairstyles offer inspiration for different lengths and moods, from polished low buns and Hollywood waves to quick ponytails, braids and pretty accessories. Each idea includes practical styling details to help you recreate the look at home, even if you are not confident with complicated techniques.
Choose a style that suits your hair length, natural texture and outfit neckline. Set aside a little time to practise before the event, and keep a few bobby pins and flexible-hold spray in your bag. A simple plan can help you feel prepared and enjoy the celebration.
1. Twisted Low Bun

A softly twisted low bun brings instant polish without requiring complicated styling. Gather hair at the nape, leave two fine pieces loose near the face, then twist the length into a compact bun. Secure it with crossed bobby pins so the shape feels firm but not stiff.
For a smoother finish, work a little styling cream through the ends before pinning, then mist lightly with flexible hold spray. Small pearl pins or a delicate gold barrette add evening detail without competing with statement earrings. This style suits medium to long hair and pairs especially well with open necklines.
2. Side Swept Curls
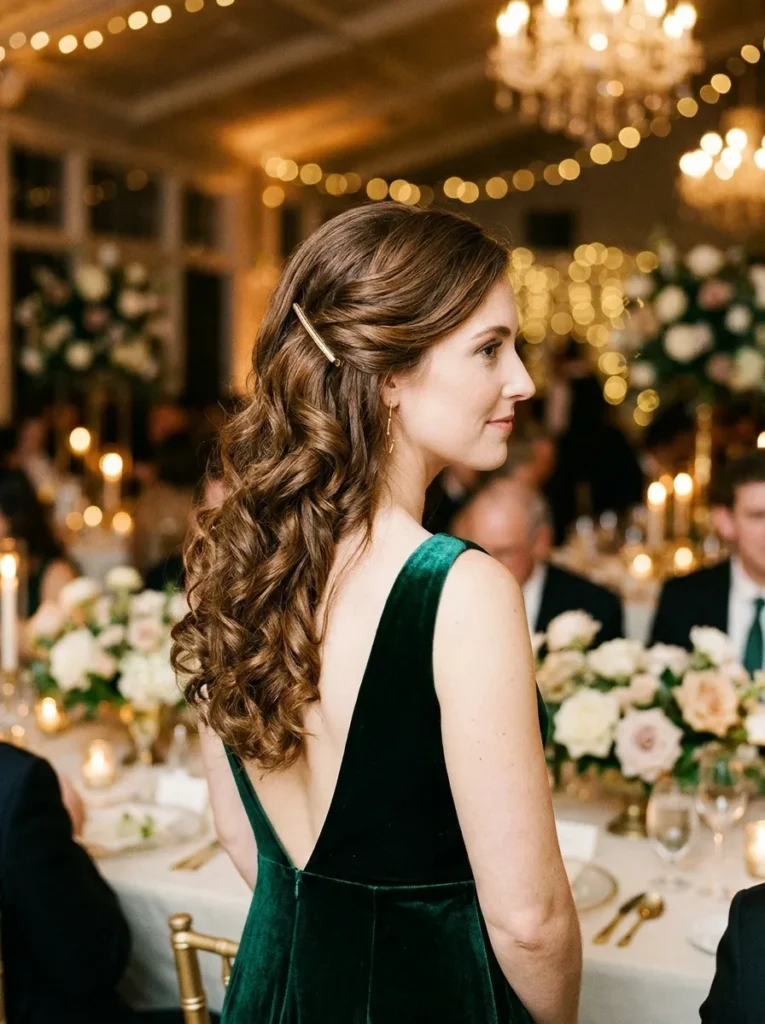
- A deep side part instantly gives loose curls a glamorous red-carpet finish.
- Create soft curls with a medium-barrel curling iron, alternating the curling direction for natural movement.
- Brush the curls gently with a wide-tooth comb to create smooth, flowing waves.
- Sweep all the hair over one shoulder and secure a hidden section behind the opposite ear.
- Finish with a lightweight shine spray and a decorative gold clip.
Once the curls are set, sweep them across the shoulder and secure a hidden section behind the ear with two crossed pins. A light mist of flexible hairspray helps the shape hold through dinner and dancing. Among easy wedding guest hairstyles, this one makes statement earrings especially noticeable.
3. Half Up Crown Twist

Quick Tip:
Before pinning, lightly backcomb the hair at the crown and smooth only the surface. Slide the comb in at an angle, then anchor it with a discreet pin underneath.
Small crown twists give loose waves a little structure while keeping the length visible. For a balanced finish, take equal sections from each temple and pin them where they meet at the back. The look works especially well with soft curls and a simple crystal comb.
4. Sleek High Ponytail
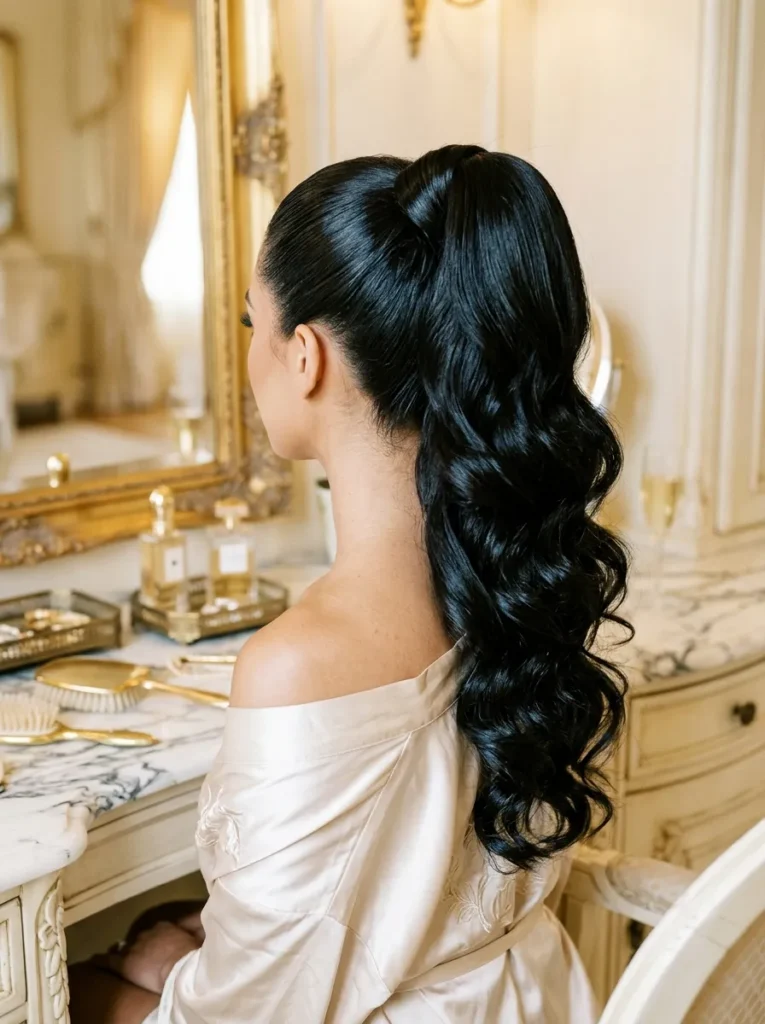
BEFORE:
Flat roots and loose hair can sometimes feel too casual for a glamorous evening celebration. An ordinary ponytail may also lack the volume needed to complement a formal dress.
AFTER:
A high ponytail with lifted roots and curled ends creates a polished, dressy appearance. Wrapping a small strand of hair around the elastic gives the style a professional finish.
Start by smoothing the sides with a fine-tooth brush and securing the ponytail near the crown. Curl the ends in sections, then gently loosen them with your fingers. I’ve noticed that wrapping hair around the elastic makes even a simple ponytail look considerably more refined.
5. Romantic Braided Updo

- Create a center or soft side part to frame the face naturally before styling.
- Divide the hair into three sections and loosely braid each section, securing the ends with small elastics.
- Wrap the braids around the back of the head and pin them together to form a textured updo.
- Pull out a few delicate strands around the temples and loosen the braids slightly for added volume.
The beauty of this hairstyle lies in its soft texture rather than perfect symmetry. Use bobby pins that closely match your hair color, and tuck their ends underneath the braids. A few pearl pins add a delicate finishing touch without making the overall look feel overly decorated.
Also Visit : 19 Mother of the Bride Hairstyles for an Elegant Glow
6. Hollywood Glam Waves

| Styling Detail | Option A: Loose Waves | Option B: Hollywood Waves |
| Curl Pattern | Soft, relaxed curls | Defined S-shaped waves |
| Styling Tool | Large curling wand | Medium-barrel curling iron |
| Final Texture | Airy and natural | Smooth and glossy |
| Best For | Relaxed evening dresses | Formal gowns and elegant outfits |
Nothing catches the light quite like glossy, sculpted waves flowing over one shoulder. For a classic finish, curl each section in the same direction, allow the hair to cool, then brush gently to connect the curls. Apply a small amount of shine serum to the ends, keeping the roots light and natural.
7. Elegant French Twist

DO:
- Brush hair backward gently to remove tangles before styling.
- Twist the hair upward from the nape toward the crown.
- Secure the folded section with long bobby pins placed vertically.
- Leave a few soft strands around the face for a relaxed finish.
DON’T:
- Don’t pull the sides so tightly that they flatten the crown.
- Don’t use oversized clips that remain visible.
- Don’t apply too much hairspray before shaping the twist.
A French twist looks especially sophisticated with high-neck dresses, satin gowns and delicate drop earrings. For extra hold, insert pins into the folded hair rather than simply sliding them across the surface. A small decorative comb can finish the look beautifully without adding unnecessary bulk.
8. Soft Bubble Ponytail

Time: 10 to 15 minutes
Skill Level: Beginner-friendly
Best For: Long and medium-length hair
Accessories: Small clear elastics, decorative gold ribbons or slim pearl bands
Result: Voluminous, playful and polished ponytail
A bubble ponytail is a lovely choice when you want something more interesting than a traditional updo. Secure your hair into a high or low ponytail, then add small elastics at regular intervals. Gently pull each section outward to create rounded bubbles. Keep the spacing consistent for a neat finish that looks especially striking in photographs.
9. Loose Braided Side Bun
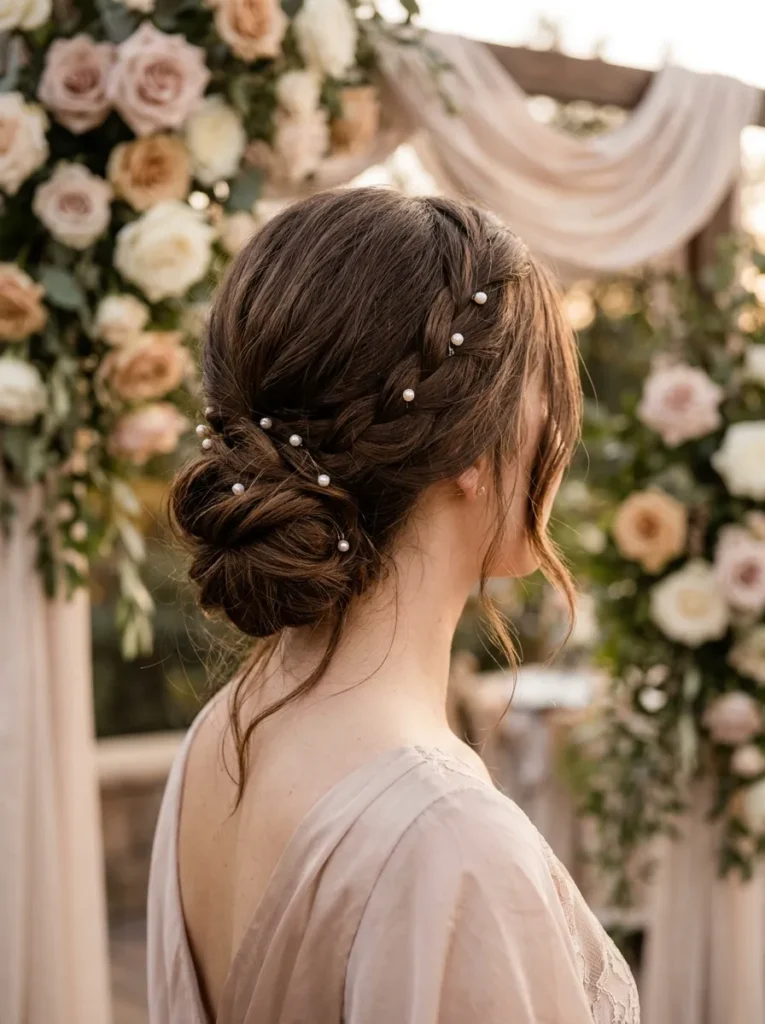
A side bun adds a graceful detail that makes a simple evening hairstyle feel more intentional. Start with a loose side braid, then wrap its length into a bun just behind one ear. Keep the braid slightly relaxed instead of pulling every section tightly. This creates beautiful texture and gives the finished style a softer appearance.
For extra security, anchor the bun with bobby pins around its outer edges, making sure they grip both the braid and the hair underneath. A few pearl pins can highlight the woven details. I’ve noticed that placing the bun slightly below the ear also helps balance statement earrings and one-shoulder dresses.
10. Sleek Low Ponytail

- A sleek low ponytail creates an elegant silhouette that complements almost every formal outfit.
- Create a clean center part using a fine-tooth comb for a neat, balanced appearance.
- Apply a small amount of smoothing cream to tame flyaways and add natural shine.
- Secure the ponytail at the nape with a hair elastic that matches your hair color.
- Wrap a thin strand around the elastic and secure it underneath with a bobby pin.
Among easy wedding guest hairstyles, this polished look is especially useful when you need something quick that still feels formal. Keep the ponytail smooth, but add soft curls at the ends for movement. Pair it with statement earrings and a strapless or high-neck dress for a refined finish.
Also Visit : 18 Trendy Haircuts That Deliver a Bold, Fresh Look
11. Pearl-Studded Bun

Quick Tip:
Place pearl pins in small groups of two or three rather than scattering them randomly. Keep the largest pearls near the center of the bun and smaller ones around the edges for a balanced appearance.
Start with a low twisted bun or a slightly messy chignon, then carefully insert the pearl accessories into the thicker sections. This detail works particularly well with satin dresses, delicate lace and simple jewelry. Choose pearl shades that complement your outfit, and avoid placing pins too close to the hairline.
12. Pinned Back Waves

BEFORE:
Loose hair can sometimes fall across the face during dinner, dancing or photographs. Frequently moving it away from the eyes can also disturb carefully styled curls.
AFTER:
Pinned-back waves keep the front sections controlled while allowing the rest of the hair to flow freely. Small decorative clips add a polished detail without requiring a full updo.
Take one section from each temple, twist gently toward the back and secure both sections with matching pins or a decorative barrette. Leave the remaining lengths in soft curls. This style is particularly flattering with off-the-shoulder dresses and works well for guests who prefer wearing their hair down.
13. Textured Messy Chignon
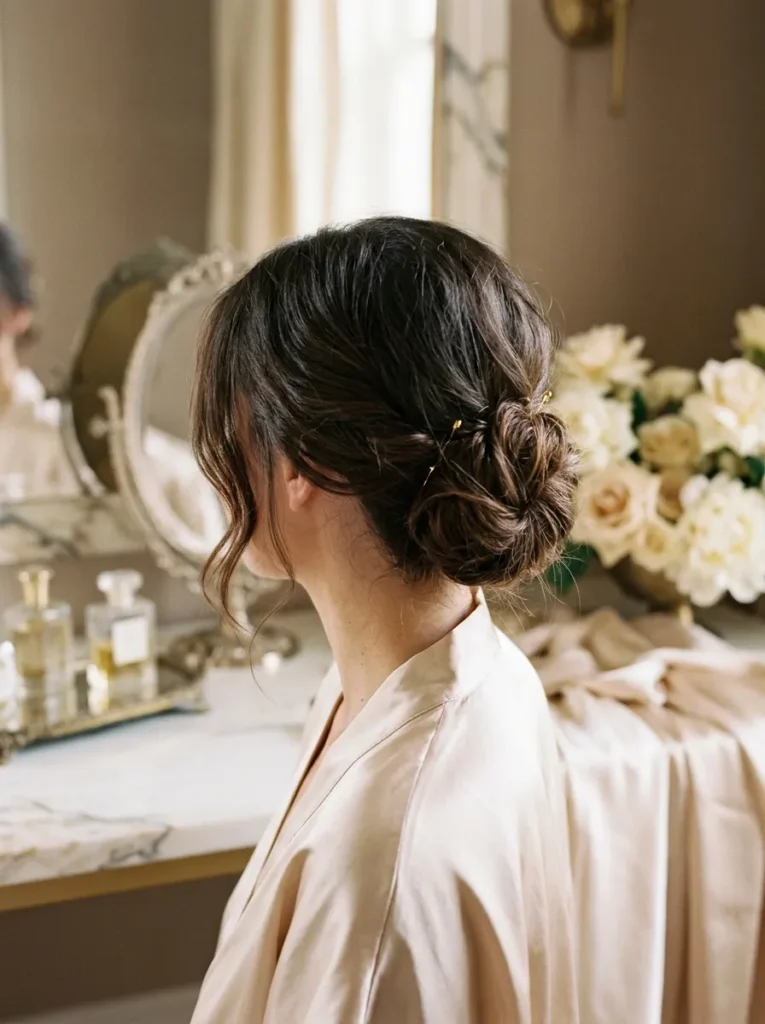
- Prepare the hair: Apply a little texturizing spray to dry hair to create grip and natural volume.
- Create a low ponytail: Gather the hair loosely at the nape and secure it with a small elastic.
- Form the chignon: Twist the ponytail gently and wrap it around its base to create a relaxed bun.
- Secure the shape: Use bobby pins around the bun, allowing a few ends to remain softly tucked or visible.
- Finish the look: Pull out two delicate face-framing strands and add a light mist of flexible hairspray.
The secret to a beautiful chignon is keeping its texture soft rather than making every strand perfectly smooth. This hairstyle works particularly well with medium and long hair. Add a pair of small gold pins for a sophisticated touch that complements evening gowns and delicate jewelry.
14. Fishtail Accent Braid
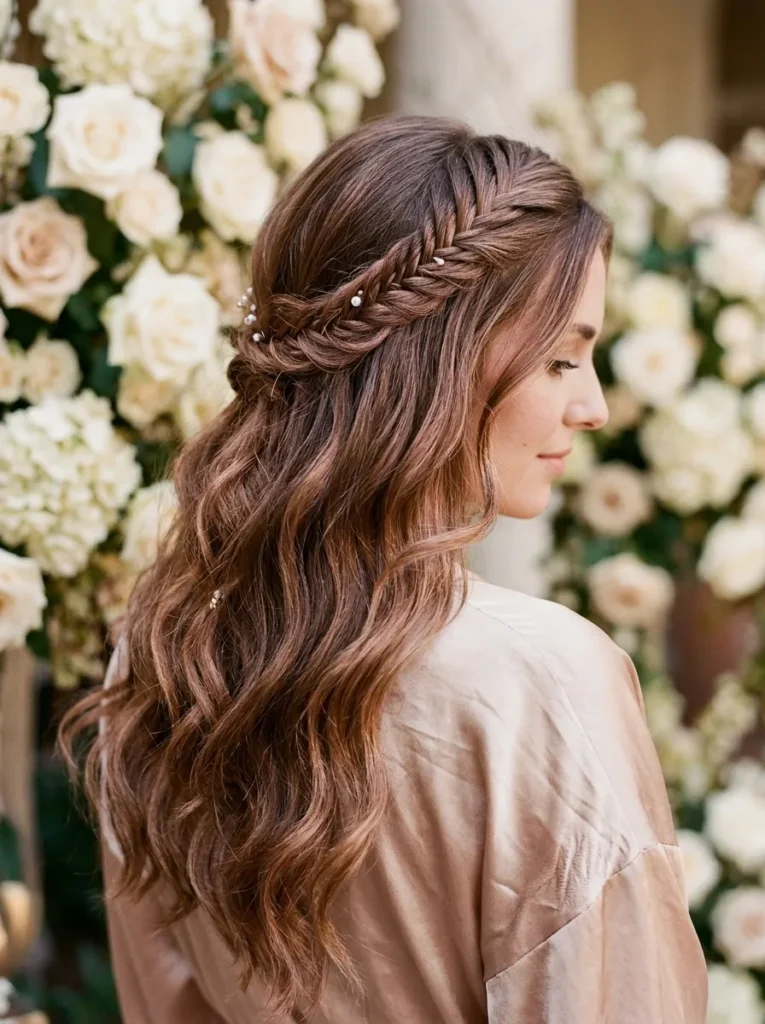
| Styling Detail | Option A: Thin Accent Braid | Option B: Fuller Fishtail |
| Hair Section | Small section near the temple | Larger section from the side |
| Appearance | Delicate and understated | Textured and noticeable |
| Styling Time | Around 5 minutes | Around 10 to 15 minutes |
| Best Pairing | Loose curls and waves | Half-up hairstyles |
| Accessories | Tiny pearl pins | Gold clips or ribbons |
A fishtail braid adds beautiful detail without requiring an elaborate hairstyle. Divide the selected section into two parts, then cross small outer strands from one side to the other until you reach the ends. Secure with a clear elastic and gently loosen the braid for extra texture. Keep the remaining hair in soft waves for a balanced evening look.
15. Curled Claw Clip Updo

DO:
- Choose a strong claw clip that comfortably holds your hair length and thickness.
- Curl the ends beforehand for extra movement and a dressier finish.
- Twist the hair upward and secure it at the back of the head.
- Allow a few curled ends to fall naturally above the clip.
DON’T:
- Don’t choose a clip that is too small for your hair volume.
- Don’t twist wet hair, as it may become loose or uncomfortable.
- Don’t pull every strand tightly against the scalp.
- Don’t overload the hairstyle with heavy accessories.
A claw clip updo is especially useful when you need a quick hairstyle before leaving for a wedding. Choose a pearl, tortoiseshell or metallic clip to make the finish more formal. Medium-length hair usually works particularly well, while a few loose curls soften the overall silhouette.
Also Visit : 17 Light Copper Hair Ideas for a Radiant, Sunlit Look
16. Deep Side Part
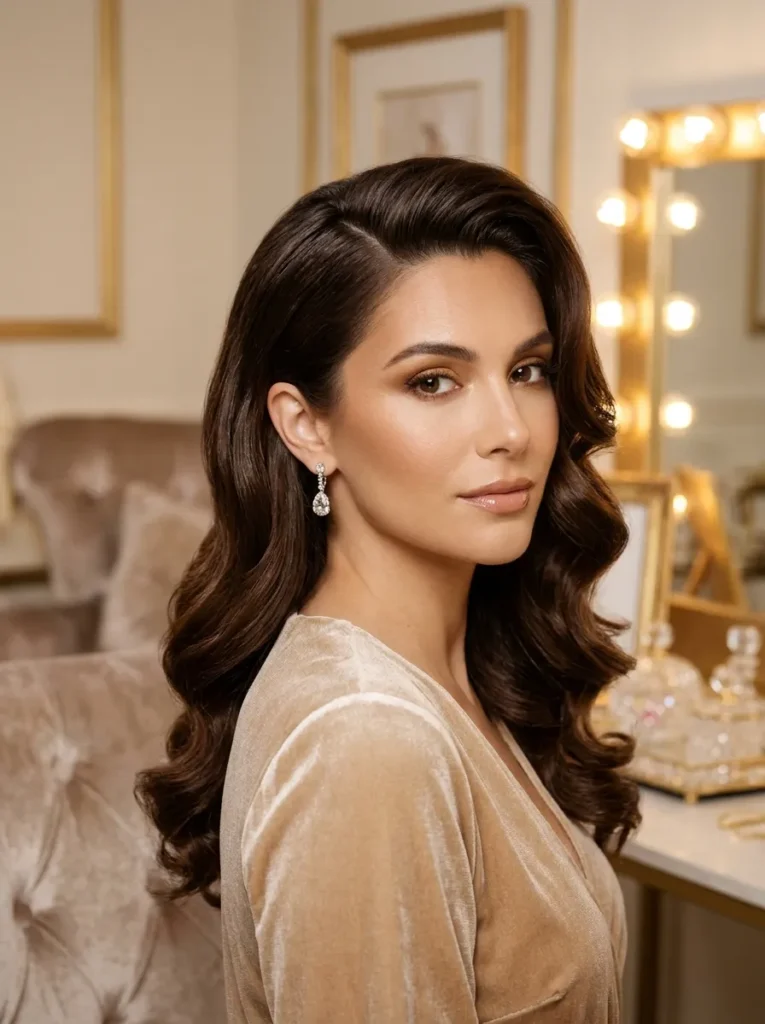
Time: 10 to 15 minutes
Skill Level: Beginner-friendly
Best For: Medium to long hair
Styling Tools: Fine-tooth comb, curling iron and flexible hairspray
Result: Dramatic volume with a sophisticated side-swept finish
A deep side part can make even simple curls look more glamorous without requiring an elaborate updo. Create the part above one eyebrow, then curl the lengths away from your face. Brush gently for softer movement and sweep the fuller section over one shoulder. A small crystal clip can hold the opposite side neatly in place.
17. Waterfall Braid Waves

A waterfall braid brings delicate detail to loose hair while keeping the overall hairstyle light and flowing. Start near one temple and divide a small section into three strands. Begin a regular braid, dropping the bottom strand after each crossover and replacing it with a fresh section of hair from above.
Continue weaving horizontally toward the opposite side, securing the braid discreetly behind the ear. Curl the remaining lengths with a large-barrel iron and gently separate the waves using your fingers. In my experience, keeping the braid slightly loose makes the woven pattern easier to see in photographs. Tiny pearl pins provide a lovely finishing touch.
18. Voluminous Curled Updo
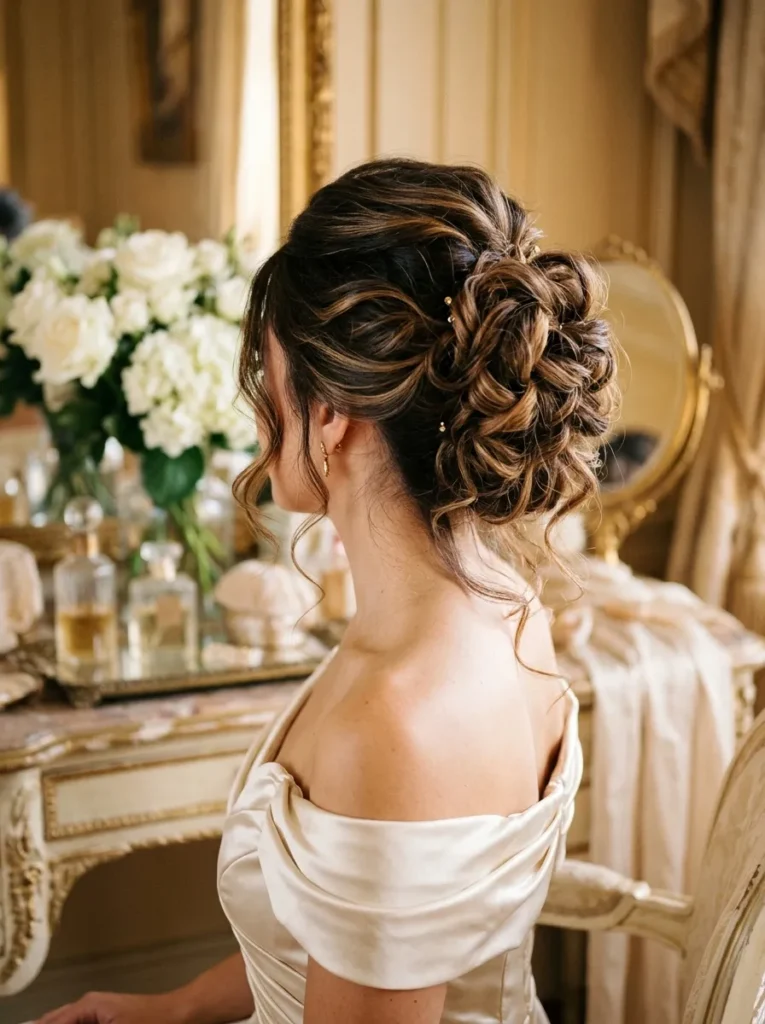
- Curl the hair in medium-sized sections using a curling iron.
- Allow each curl to cool completely before touching it to maintain volume.
- Gently separate the curls with your fingers instead of brushing them flat.
- Gather the curled sections at the back and pin them individually to create a full updo.
- Leave a few tendrils near the temples and finish with flexible-hold hairspray.
The beauty of this updo comes from its rounded shape and visible curl definition. Avoid pressing the curls too tightly together, as this can make the hairstyle look flat. Add a few delicate crystal pins for extra sparkle. This style is especially flattering with strapless dresses and elegant evening gowns.
19. Polished Tucked Bob
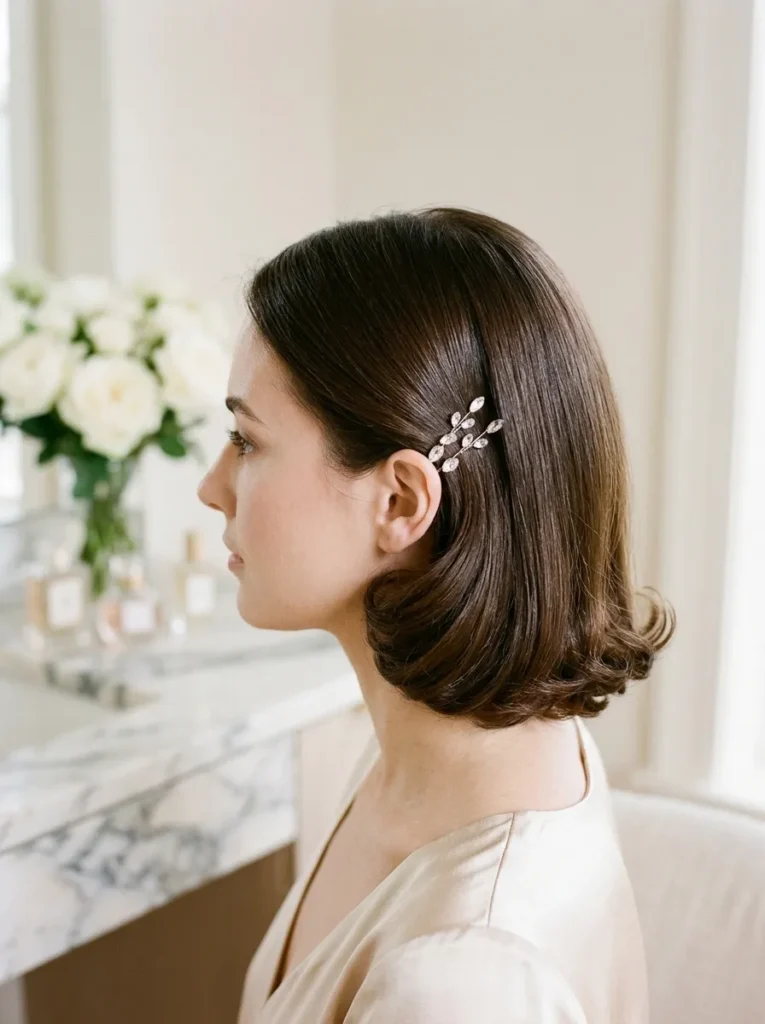
Best For: Short and medium-length hair
Time: 10 to 15 minutes
Skill Level: Beginner-friendly
Accessories: Bobby pins, small crystal clips and light-hold hairspray
Result: Sleek, refined and softly romantic finish
Short hair can look just as glamorous as long curls with a little thoughtful styling. Curl the ends inward, tuck both sides behind your ears and secure them with discreet pins. Add small crystal clips near one temple for extra sparkle. This look pairs beautifully with statement earrings and elegant evening dresses.
20. Satin Headband Waves

A satin headband is a simple accessory that makes loose waves look instantly more polished. Start by creating soft curls with a large-barrel curling iron, then brush them gently for natural movement. Position a padded satin headband just behind the hairline, allowing a little volume around the crown for a flattering finish.
This style works beautifully with floral dresses, satin gowns and delicate evening outfits. Choose champagne, ivory or black according to your dress color, and keep the accessories understated. Among easy wedding guest hairstyles, this is a particularly practical choice for beginners who want an elegant look without complicated braiding or extensive pinning.
Also Visit : 18 Cute Summer Hairstyles for a Radiant Holiday Glow
CONCLUSION
The right hairstyle does not need to be complicated to feel special. From soft waves and braided details to elegant buns and sleek ponytails, these easy wedding guest hairstyles offer ideas to suit the celebration, your outfit and your comfort.
Choose one look, gather your styling tools and practise before the wedding day. A few well-placed pins, a suitable accessory and light-hold spray can help your style last through the evening. Save this guide on Pinterest, and share it with a friend who has a wedding coming up. Enjoy getting ready, celebrate with confidence and enjoy every moment.