24 Gorgeous Braided Hairstyles You’ll Want to Try Now
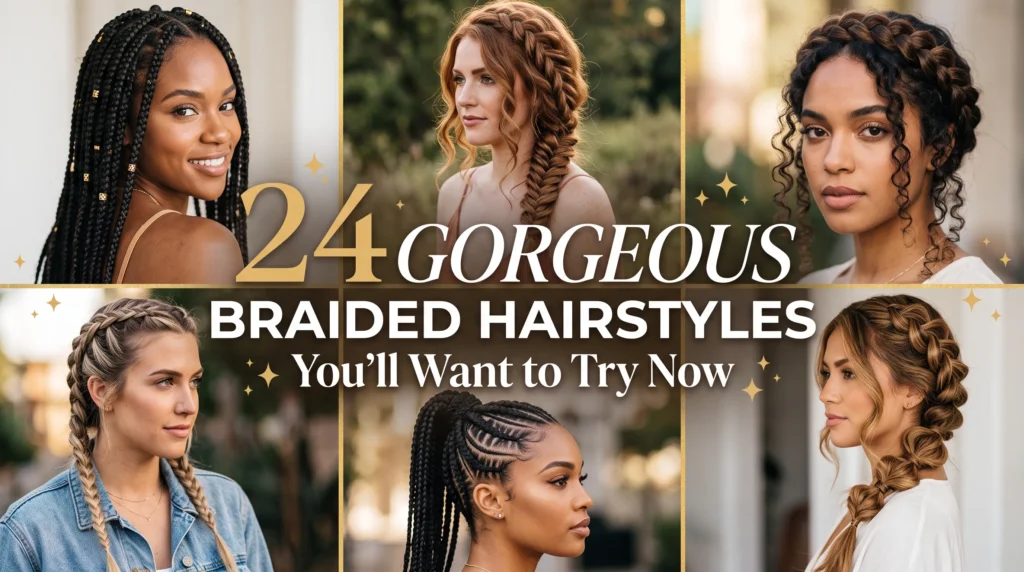
Some hairstyles look beautiful in seconds, while others turn a simple outfit into something truly special. The right braid can do both!
Whether you’re getting ready for a busy morning, a casual outing, or a special celebration, these braided hairstyles offer plenty of inspiration for your next look. From classic French braids and romantic fishtails to elegant updos and playful double braids, you’ll find styles for different hair lengths, occasions, and skill levels.
I’ve noticed that small details, such as loosening a braid for extra volume or leaving a few strands around the face, can make a hairstyle feel much softer and more natural. You’ll also find practical styling tips to help you recreate your favorite looks without feeling overwhelmed. Explore these 24 ideas, discover a style that suits your personality, and keep your favorites handy for the next time you want something fresh.
1. Classic French Braid
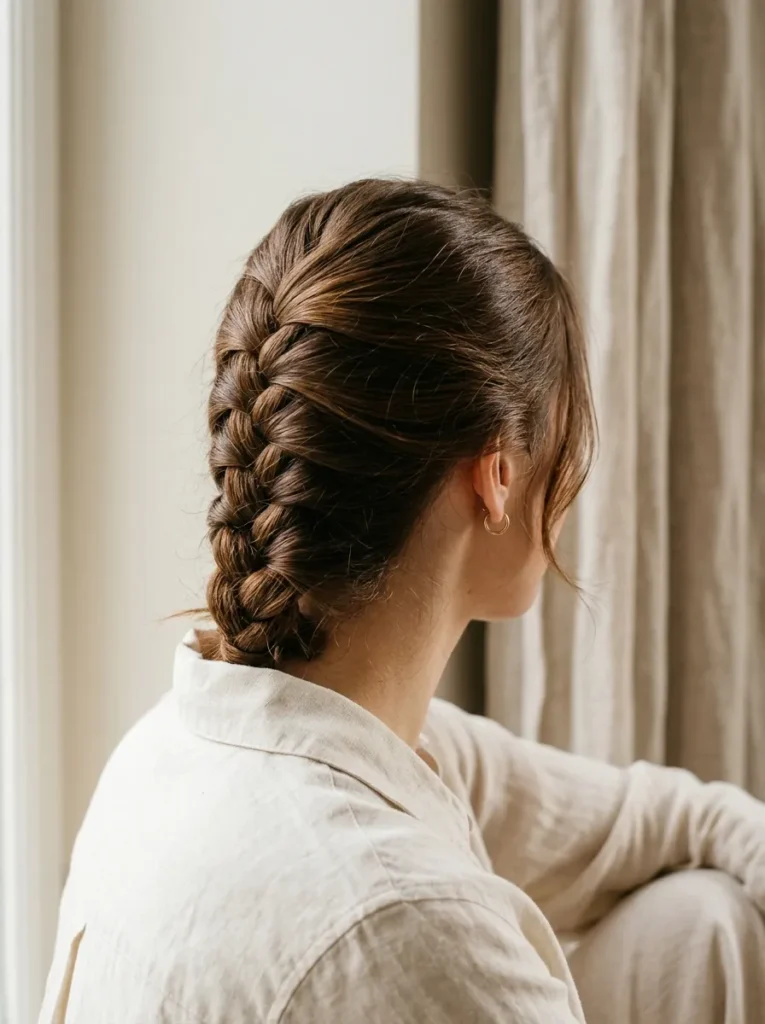
A classic French braid brings a polished finish to almost any outfit. Hair is woven gradually from the crown, creating a smooth pattern that follows the shape of your head. The result looks neat without feeling overly formal.
For the cleanest finish, start with detangled hair and take small, even sections as you braid. Keep your hands close to the scalp without pulling too tightly. A light mist of styling spray can help control flyaways, especially around the hairline.
This timeless style works beautifully for school, office days, weekend outings, and casual dinners. It also keeps longer hair secure when you need to stay active. Leave a few soft strands around your face for a relaxed finish, or tuck everything neatly away for a more professional appearance.
2. Double Dutch Braids
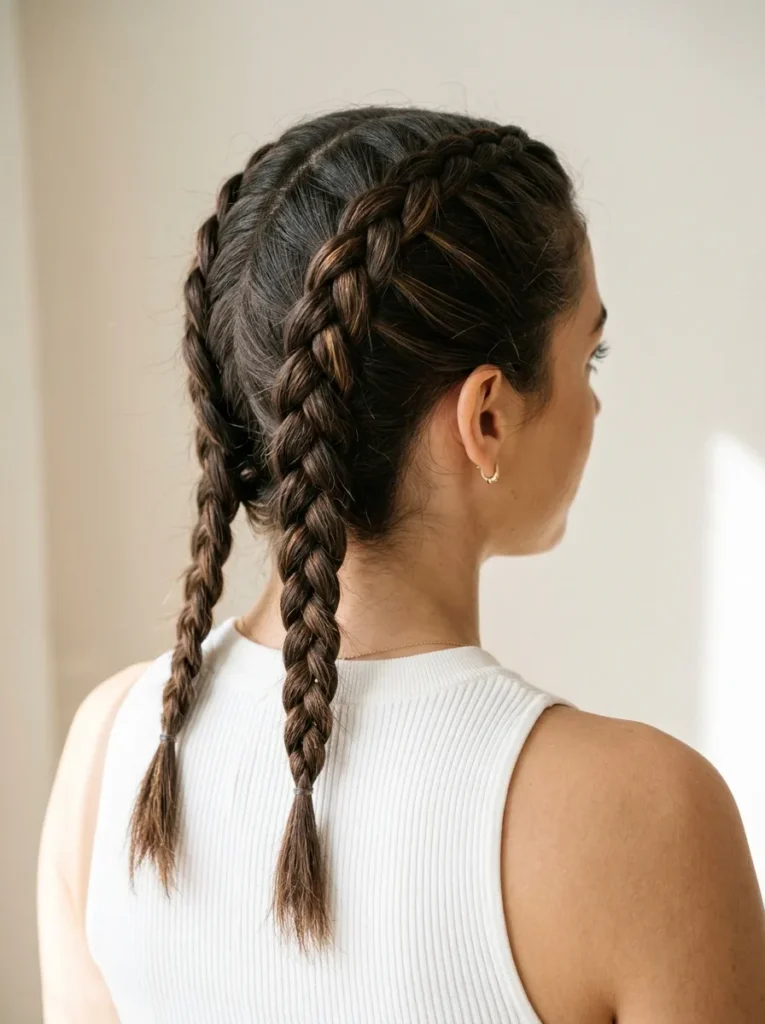
- Start with a center part. Use a fine-tooth comb to divide your hair into two equal sections, from the forehead to the nape.
- Braid underhand. Cross each outer section beneath the middle strand rather than over it to create the signature raised pattern.
- Add hair gradually. Pick up a small section from the same side before each crossover to keep the braid close to your scalp.
- Secure the ends. Use small elastic bands that match your hair color.
- Create extra volume. Gently loosen the outer edges with your fingertips once both braids are finished.
Double Dutch braids combine sporty practicality with a bold, defined look. They’re especially useful for workouts, travel days, festivals, and busy mornings when loose hair becomes distracting. For fine hair, a little texturizing powder at the roots can improve grip and help the raised plaits appear fuller without adding heavy product buildup.
3. Romantic Fishtail Braid
Quick Tip:
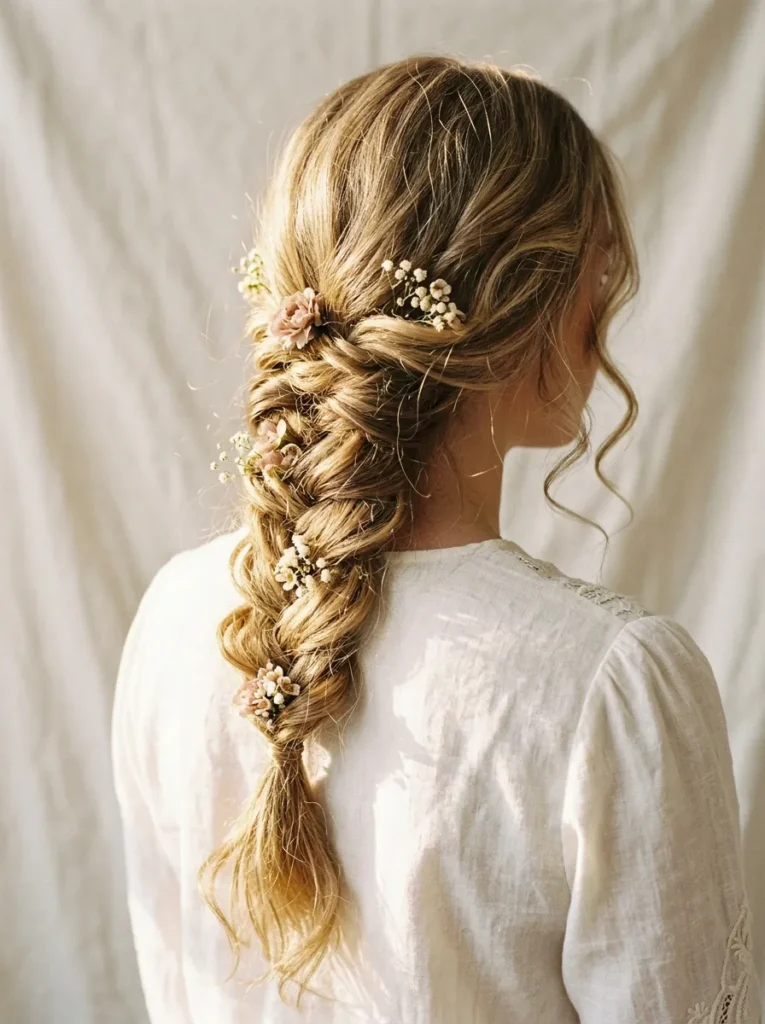
For a fuller fishtail, work with two main sections instead of three. Take a thin piece from the outside of the left section and cross it into the right, then repeat from the opposite side. Keep the pieces similar in thickness for a balanced pattern.
A fishtail braid creates an intricate, almost herringbone-like finish that looks especially lovely at weddings, garden parties, and romantic dinners. The secret is patience: smaller sections produce a finer pattern, while larger pieces create a relaxed, chunky effect. Once secured, gently pull the edges outward to add width. A flexible-hold hairspray helps preserve the texture without making the braid stiff. This style works particularly well on medium to long hair, and a few loose waves make the finished look even softer.
4. Half-Up Crown Braid
BEFORE
Loose hair can fall across your face throughout the day, while a simple ponytail may feel too ordinary for a special occasion. The top section can also look flat when there is little lift at the crown.
AFTER
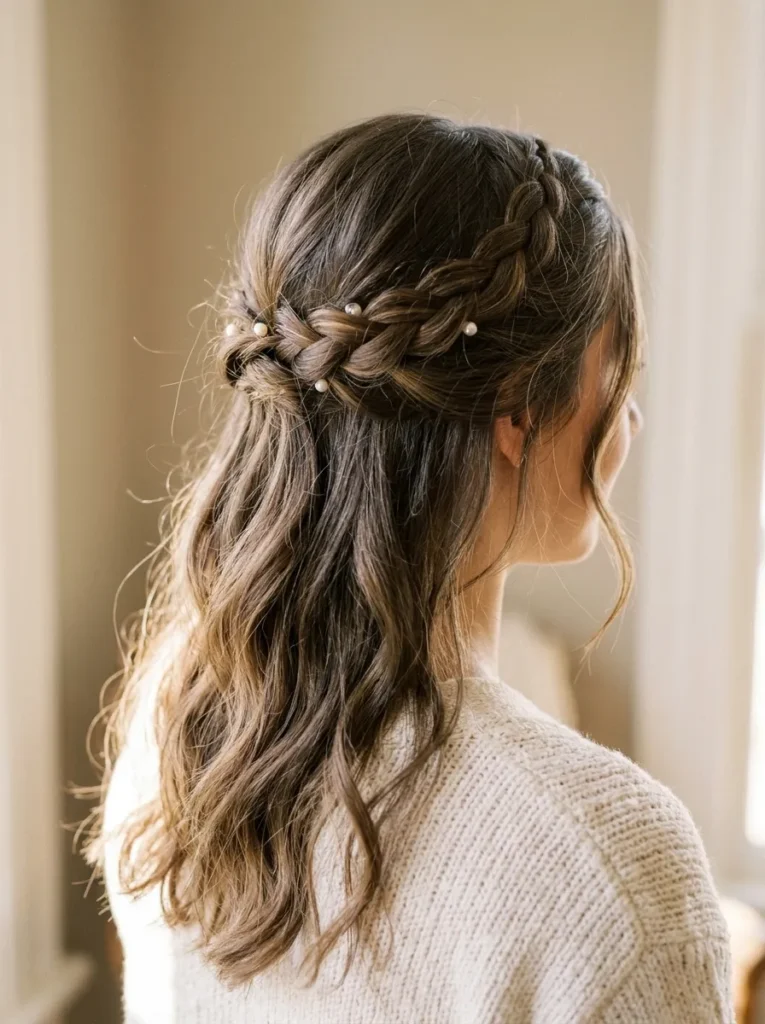
A half-up crown braid sweeps the front sections away from your face while leaving the remaining hair loose. The woven band adds detail around the back of your head, creating a graceful style with plenty of movement.
This look pairs beautifully with soft curls, natural waves, or straight hair. Take a small section from each temple, braid both sides, and secure them together at the back with discreet bobby pins. Hide the pins beneath the braid for a cleaner finish. For weddings, dinners, or outdoor celebrations, add a tiny pearl clip without overcrowding the style.
5. Side-Swept Loose Braid
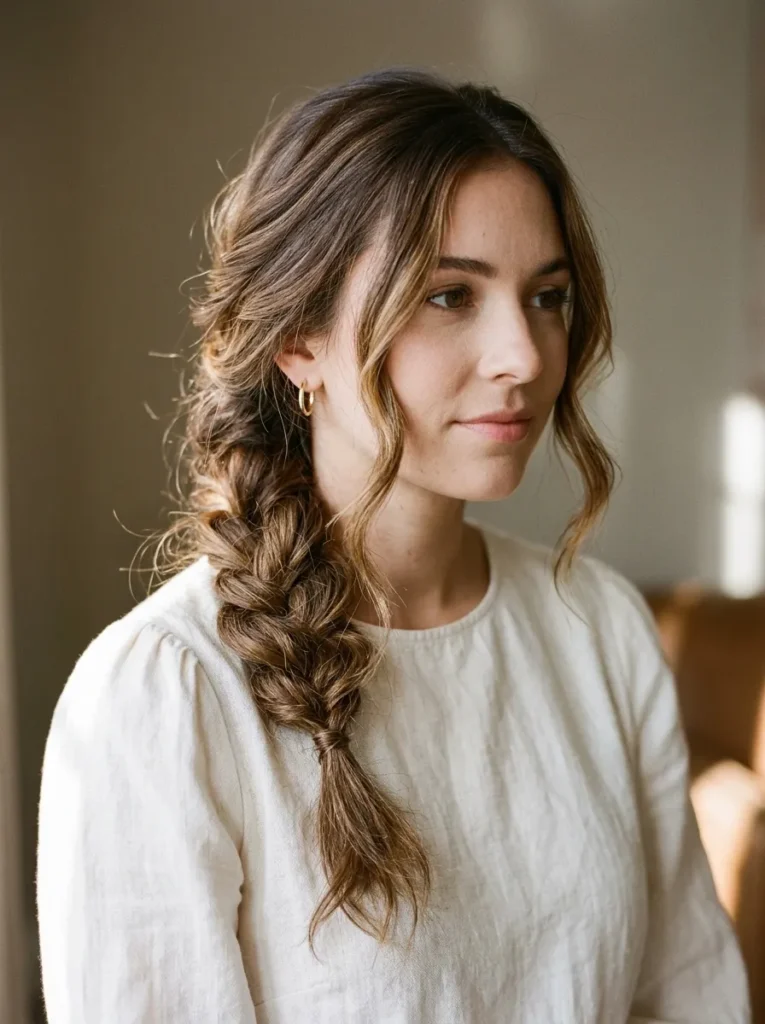
- Create a deep side part. Sweep your hair toward your preferred shoulder and gently smooth the roots with a brush.
- Gather the hair. Bring all your lengths over one shoulder, keeping the section loose rather than pulling it tightly.
- Braid from the neck. Create a traditional three-strand braid, crossing the sections evenly until you reach the ends.
- Secure and soften. Tie the braid with a small elastic, then gently loosen a few sections for a fuller appearance.
A side braid gives long hair a relaxed, feminine finish without requiring complicated techniques. It works particularly well for brunch dates, casual parties, and everyday outfits that need a little extra detail. For fine or slippery hair, apply a small amount of texturizing spray before braiding. Keep the upper section slightly loose, but secure the lower braid firmly enough to prevent it from unraveling during the day.
Also Visit : 20 Protective Hairstyles You Probably Haven’t Tried Yet
6. Braided Ponytail
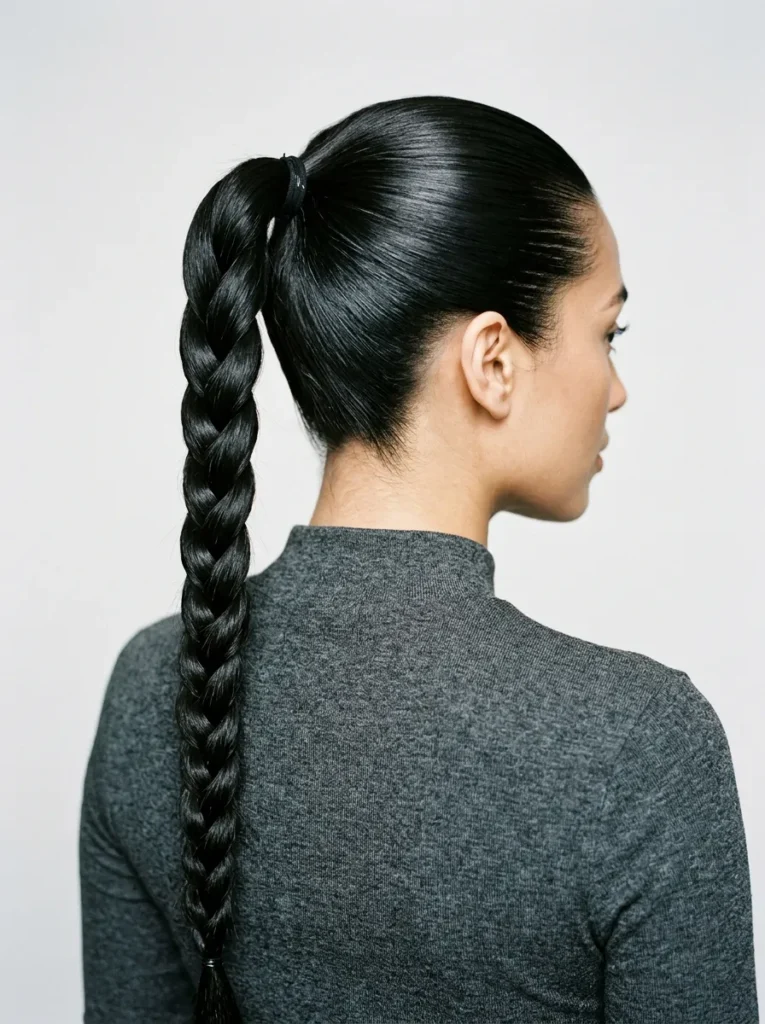
| Styling Detail | Sleek Finish | Relaxed Finish |
| Ponytail position | High at the crown | Mid-height or low |
| Crown texture | Smooth and controlled | Soft with gentle volume |
| Braid structure | Tight, defined plait | Looser, fuller plait |
| Best occasion | Parties and evenings | Everyday wear and outings |
A braided ponytail combines the convenience of a ponytail with the detail of a woven plait. Brush your hair into your chosen position and secure it with a strong elastic before braiding the length. Wrap a small strand around the elastic if you want a salon-inspired finish. For extra fullness, gently widen the braid after securing it. Avoid making the ponytail excessively tight, especially if you plan to wear it for several hours.
7. Boho Pull-Through Braid
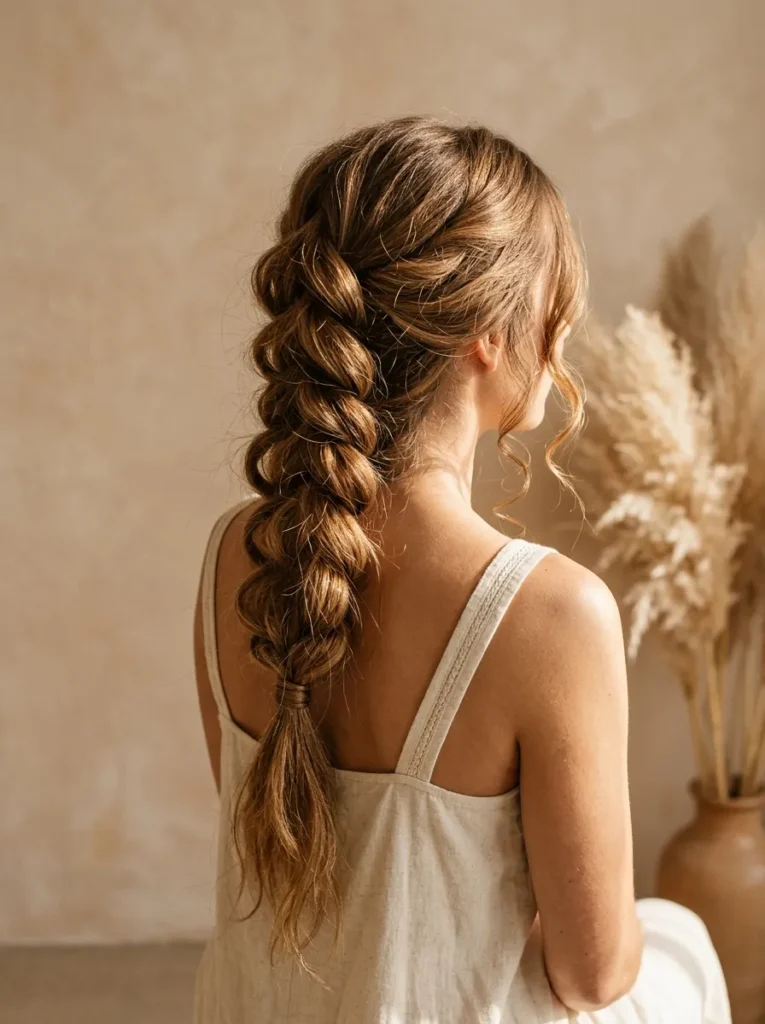
DO
- Use small clear elastics to create evenly spaced sections down the length of your hair.
- Gently pull the sides of each section outward to create a fuller appearance.
- Add loose waves before styling if your hair is naturally straight and slippery.
- Finish with flexible-hold hairspray to keep the shape intact.
DON’T
- Don’t make the elastics so tight that the sections become difficult to loosen.
- Don’t pull every section too far apart, or the braid may lose its definition.
- Don’t skip detangling, especially if your hair is long or prone to knots.
- Don’t use heavy oils that make the sections slide apart.
The pull-through technique creates the appearance of a thick, elaborate braid without traditional three-strand weaving. It works especially well for long hair and special occasions where extra volume looks beautiful in photographs. Keep the sections similar in size for a balanced result, and hide visible elastics beneath small pieces of hair for a more refined finish.
8. Waterfall Braid
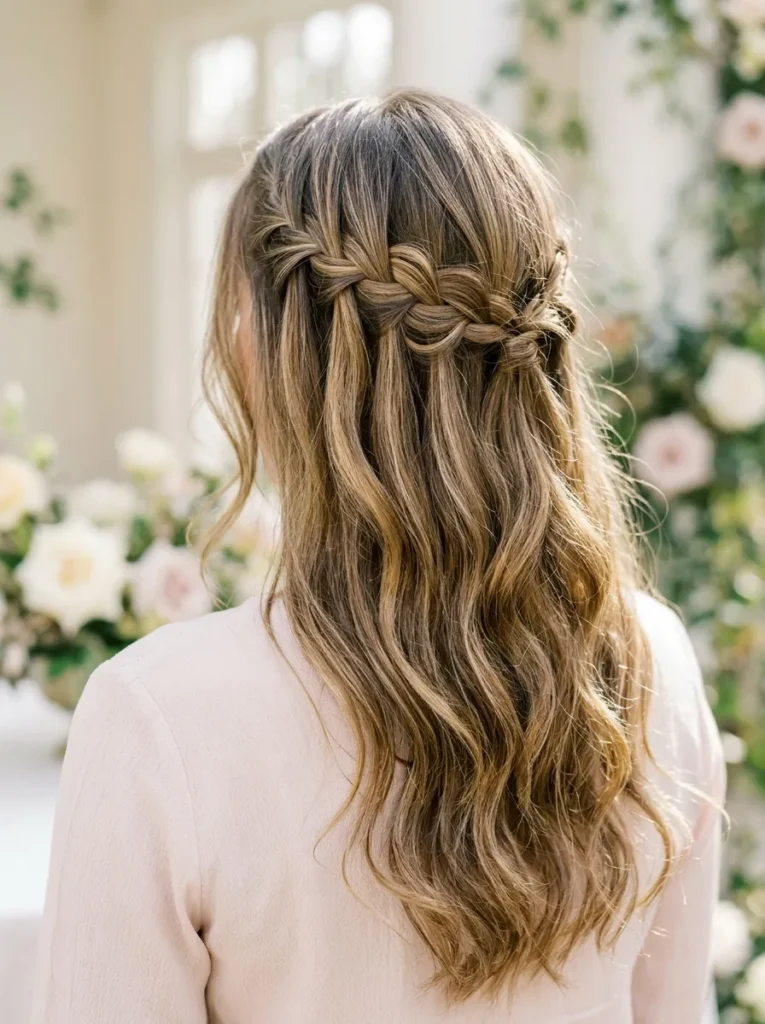
Skill Level: Beginner to intermediate
Time: Approximately 10 to 20 minutes
Best For: Weddings, date nights, garden parties, and formal photographs
Hair Length: Medium to long hair
Result: A horizontal braid with flowing strands that resemble a delicate cascade
A waterfall braid offers something special: a woven detail across the head while the rest of your hair remains loose. Start a French-style braid near one temple, but drop the bottom strand after crossing it and replace it with a fresh section of hair. Continue toward the opposite side, keeping the pattern level. Practice slowly in front of a mirror, since maintaining even spacing is often the trickiest part. Soft curls underneath help highlight the cascading strands.
9. Four-Strand Braid
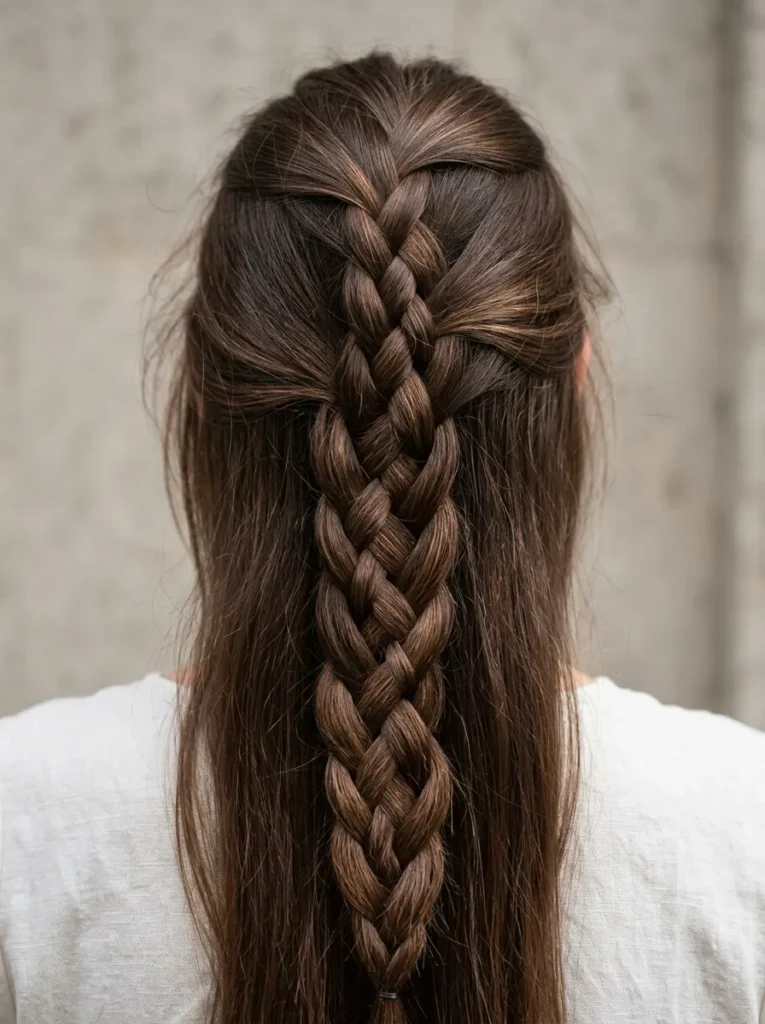
A four-strand braid adds an intricate woven pattern that stands out from traditional plaits. Although it looks complicated, the technique becomes easier when you divide the hair into four equal sections and follow the same crossing sequence consistently.
Start with detangled hair and hold the sections separately between your fingers. Cross the outer strands in a repeatable pattern, checking the braid after every few passes. Keep the tension even rather than pulling tightly. A small elastic at the end will secure the design, while gentle widening can make it look fuller. This style is especially attractive on long hair with subtle highlights, which help reveal the overlapping strands.
10. Braided Space Buns
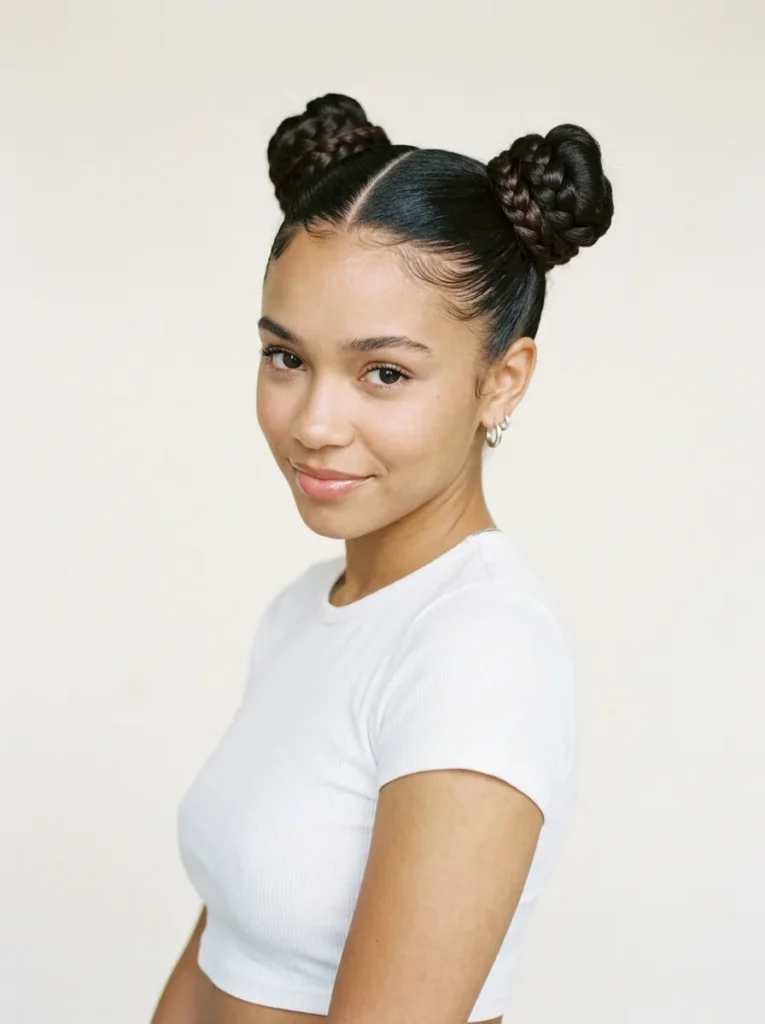
- Create a center part. Divide your hair into two equal sections, smoothing each side with a brush.
- Make two ponytails. Position them high on either side of your head and secure them with strong elastics.
- Braid each ponytail. Use a simple three-strand technique and secure the ends with small bands.
- Wrap into buns. Coil each braid around its base and tuck the ends underneath.
- Pin securely. Insert bobby pins around the buns and check that they feel comfortable when you move your head.
Braided space buns bring a playful twist to everyday styling. They’re especially fun for concerts, festivals, themed parties, and casual weekends when you want something more distinctive than a standard updo. For a sleek finish, smooth flyaways with a little styling cream before creating the ponytails. Prefer a softer look? Gently loosen the buns and leave a few wisps around your temples.
11. Rope Twist Braid
Quick Tip:
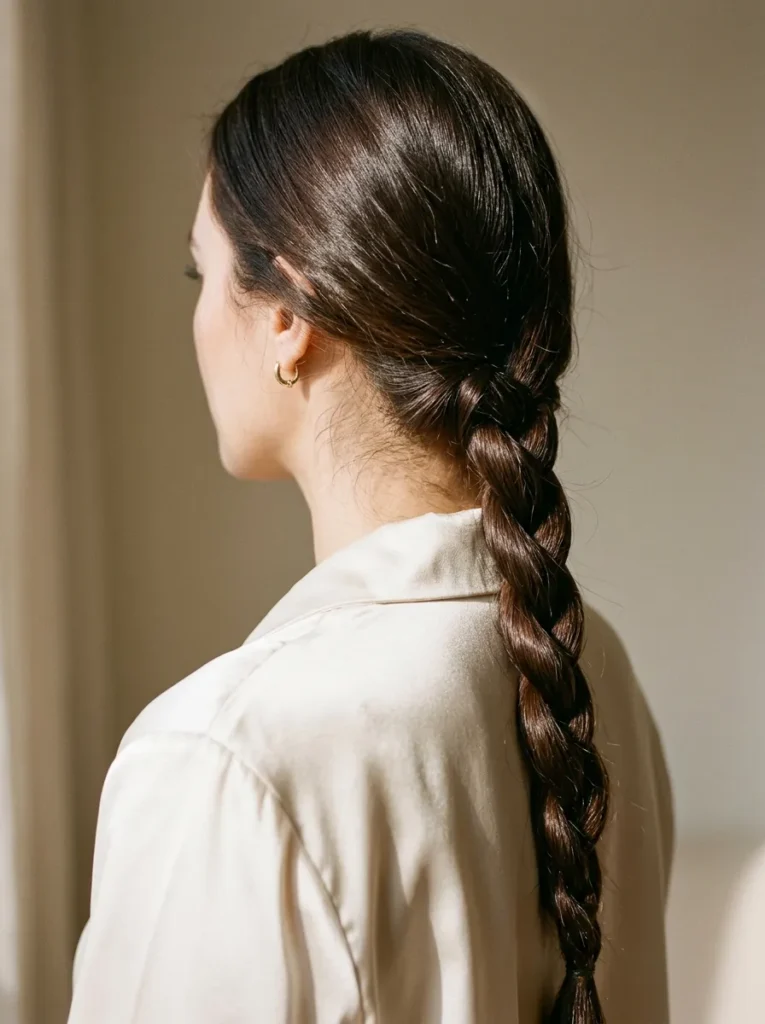
For a rope braid that stays together, twist both sections in the same direction first, then wrap them around each other in the opposite direction. This counter-twist helps prevent the style from loosening. A small amount of styling cream can improve grip on silky hair.
The rope twist creates a smooth, spiral effect with less weaving than a traditional plait. Start by dividing your ponytail into two equal sections, twisting each one firmly, and wrapping them together. Secure the bottom with an elastic that matches your hair. This style is useful on busy mornings and works beautifully as a low ponytail, side braid, or tucked-up hairstyle. It can loosen more easily than a conventional braid, so secure the ends well.
12. Braided Low Bun
BEFORE
A regular low bun can look plain, while loose strands around the nape may escape throughout the day. Fine hair can also make a simple bun appear smaller than expected.
AFTER
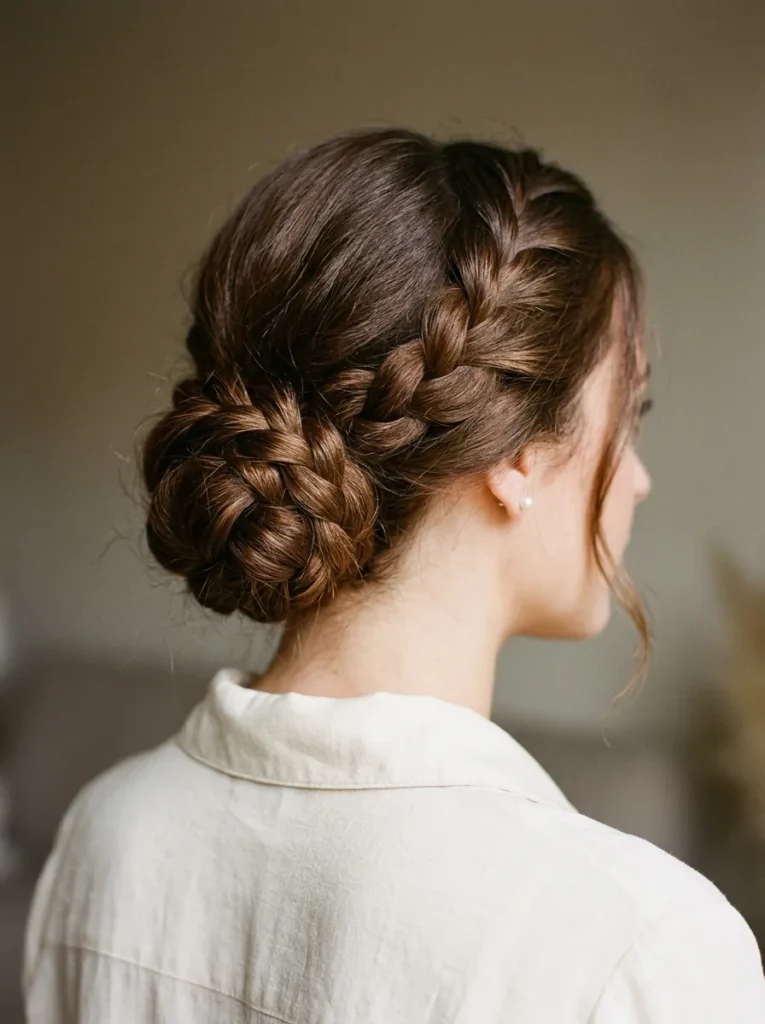
A braided low bun adds visible texture and helps organize the hair into a more detailed updo. The woven pattern creates dimension, while the bun keeps the overall silhouette neat and understated.
Gather your hair into a low ponytail, braid the length, and secure the end. Coil the braid around the base, then tuck the tip underneath and anchor it with bobby pins. For extra fullness, gently widen the braid before wrapping it. This hairstyle suits office events, formal dinners, and weddings. If your hair is heavy, use several sturdy pins rather than relying on one elastic to hold the entire bun in place.
13. Five-Strand Braid
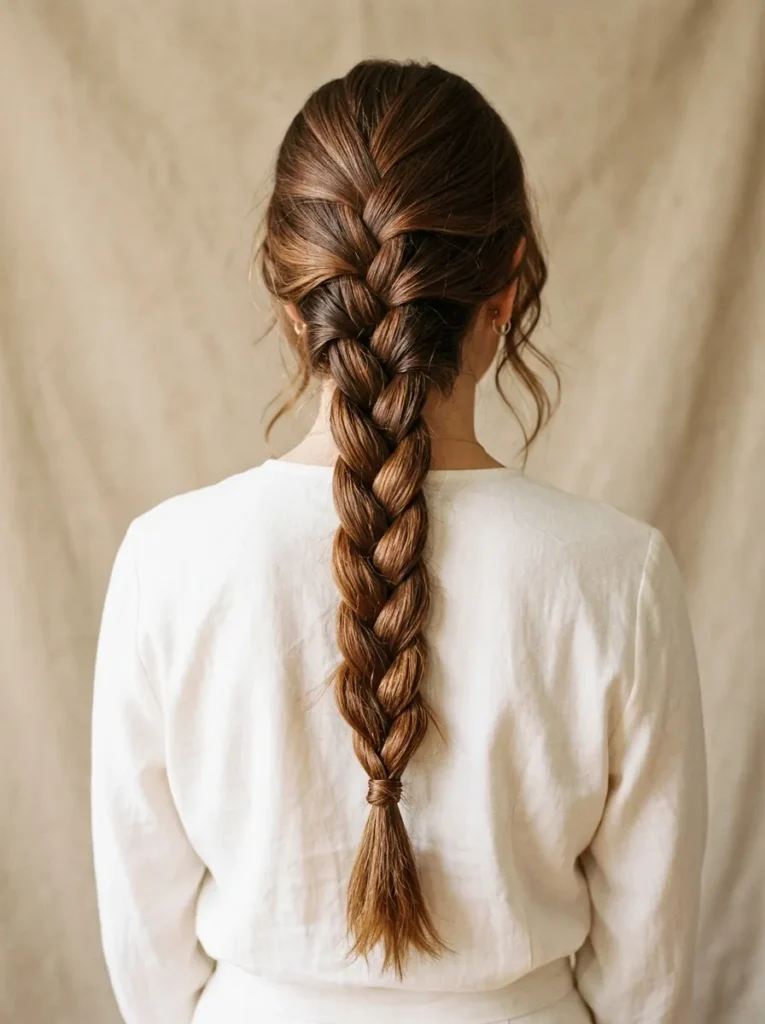
- Detangle thoroughly. Brush your hair until it is smooth, then divide it into five sections of similar thickness.
- Establish a pattern. Begin with the outermost strand and weave it over and under neighboring sections in a consistent sequence.
- Repeat carefully. Work across the strands, keeping your hands close to the braid so the pattern stays controlled.
- Secure the end. Tie the braid with a small elastic and adjust any uneven sections gently.
A five-strand plait creates a wider, more intricate design than an ordinary braid, making it an eye-catching choice for long hair. Start slowly because keeping track of five sections takes practice. A mirror and good lighting can help you spot mistakes early. Once the pattern feels familiar, experiment with a side placement or a loose finish for a softer look.
14. Braided Headband
| Styling Detail | Natural Hair Headband | Accessory Headband |
| Main material | Your own hair | Fabric, metal, or plastic |
| Appearance | Blends into the hairstyle | Adds a separate decorative accent |
| Hold | Secured with bobby pins | Depends on the headband fit |
| Best use | Romantic, polished looks | Quick everyday styling |
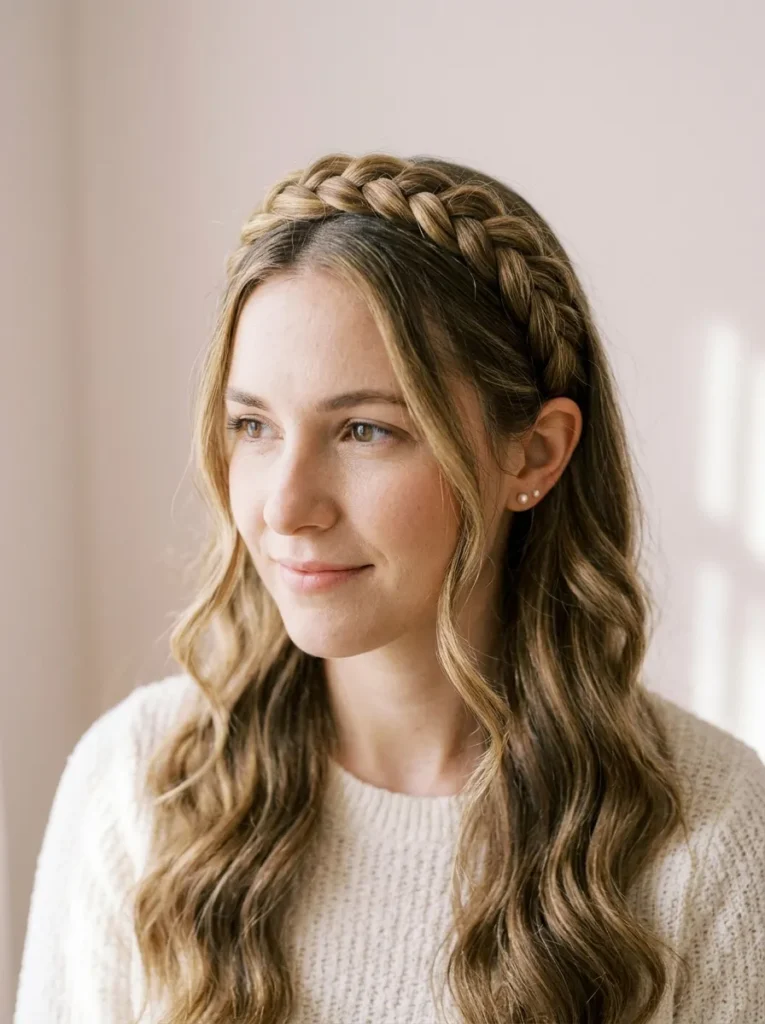
A braided headband keeps the front sections away from your face while adding a decorative detail across the crown. Take a section from behind one ear, braid it, and bring it over the top of your head toward the opposite side. Pin the end discreetly behind the other ear. For a fuller effect, loosen the braid slightly before securing it. This style works with loose waves, straight lengths, and low ponytails, making it useful for both everyday outfits and special occasions.
15. Messy Side Fishtail
DO
- Sweep your hair over one shoulder before starting the braid.
- Use small sections near the top for a clearly defined fishtail pattern.
- Gently widen the braid from the bottom upward for balanced volume.
- Leave a few face-framing strands loose for a relaxed finish.
DON’T
- Don’t pull the braid too tightly if you want a soft, undone appearance.
- Don’t use oversized sections throughout, or the fishtail pattern may disappear.
- Don’t skip a secure elastic at the bottom.
- Don’t brush the finished braid aggressively, as this can create tangles and frizz.
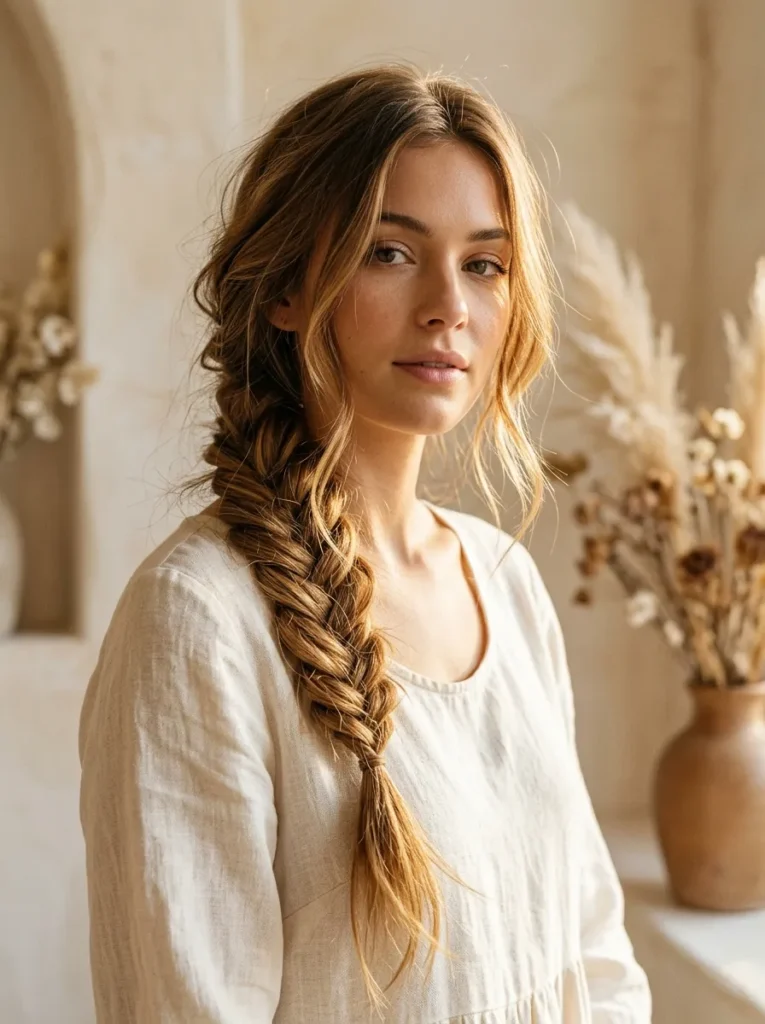
A messy side fishtail blends an intricate pattern with a relaxed finish that feels suitable for brunch, outdoor celebrations, or casual evenings. For added dimension, style your hair with loose waves before braiding. Subtle highlights can make the overlapping sections stand out in photographs. Keep the crown comfortable and secure, then loosen only the braid itself to preserve its shape.
Also Visit : 20 Curtain Bangs Redhead Ideas That Are Insanely Chic
16. Braided Mohawk Updo
Skill Level: Intermediate
Time: 20 to 35 minutes
Best For: Evening parties, formal events, and bold fashion looks
Hair Length: Medium to long hair
Result: A raised central braid with a voluminous, sculpted silhouette
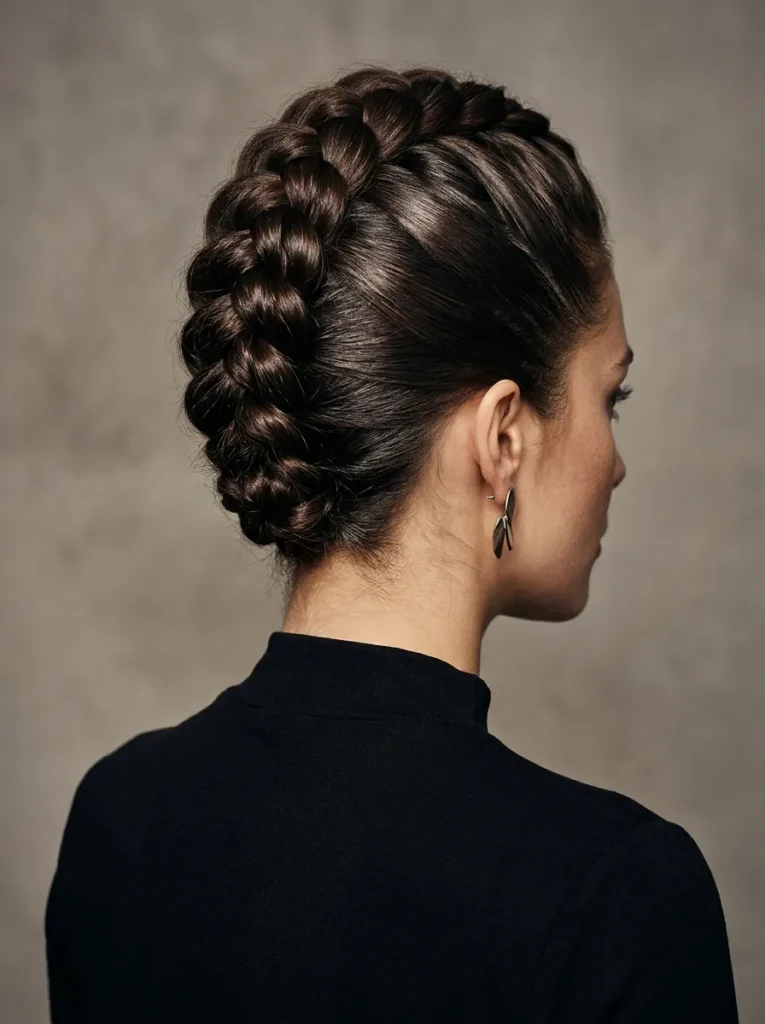
A braided mohawk creates height and definition without requiring a traditional haircut. Start by separating a wide section along the center of your head, leaving the sides free. Braid the central section using a Dutch technique, adding hair as you move toward the back. Secure the end, then smooth the side sections backward with styling cream and discreet pins. For extra volume, gently loosen the center braid. This look suits thick hair particularly well, but fine hair can also benefit from a little root-lifting product.
17. Bubble Braid Ponytail
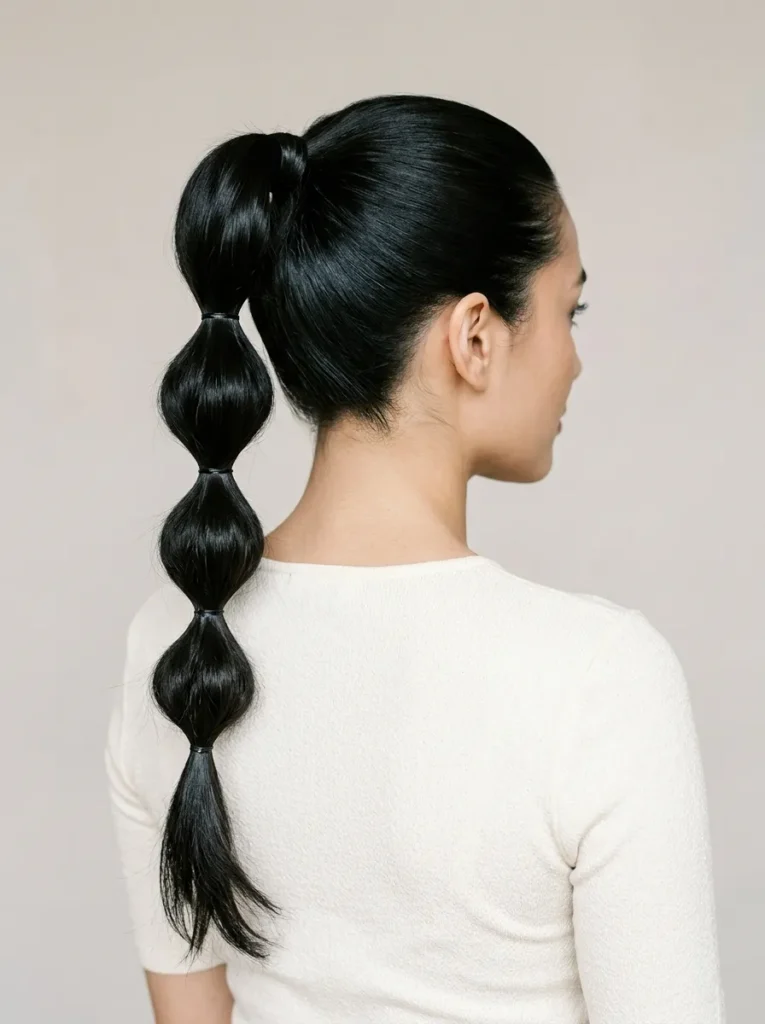
- Brush into a ponytail. Gather your hair at the crown or at mid-height and secure it firmly.
- Add elastics. Place small hair ties at regular intervals along the ponytail, leaving enough space between them.
- Create the bubbles. Gently pull the hair outward between each pair of elastics until the sections look rounded.
- Balance the shape. Adjust each bubble so the sizes look consistent from top to bottom.
- Finish neatly. Smooth flyaways with a light styling product and check that every elastic feels secure.
Although a bubble braid isn’t woven in the traditional sense, it offers a playful alternative for anyone who loves braided hairstyles with a bold silhouette. It is especially practical for long, thick hair and works well for parties, school events, and casual outings. Clear elastics create a subtle finish, while colorful bands add personality. Avoid pulling the bubbles too widely, as uneven sections can make the ponytail look lopsided.
18. Lace Braid Updo
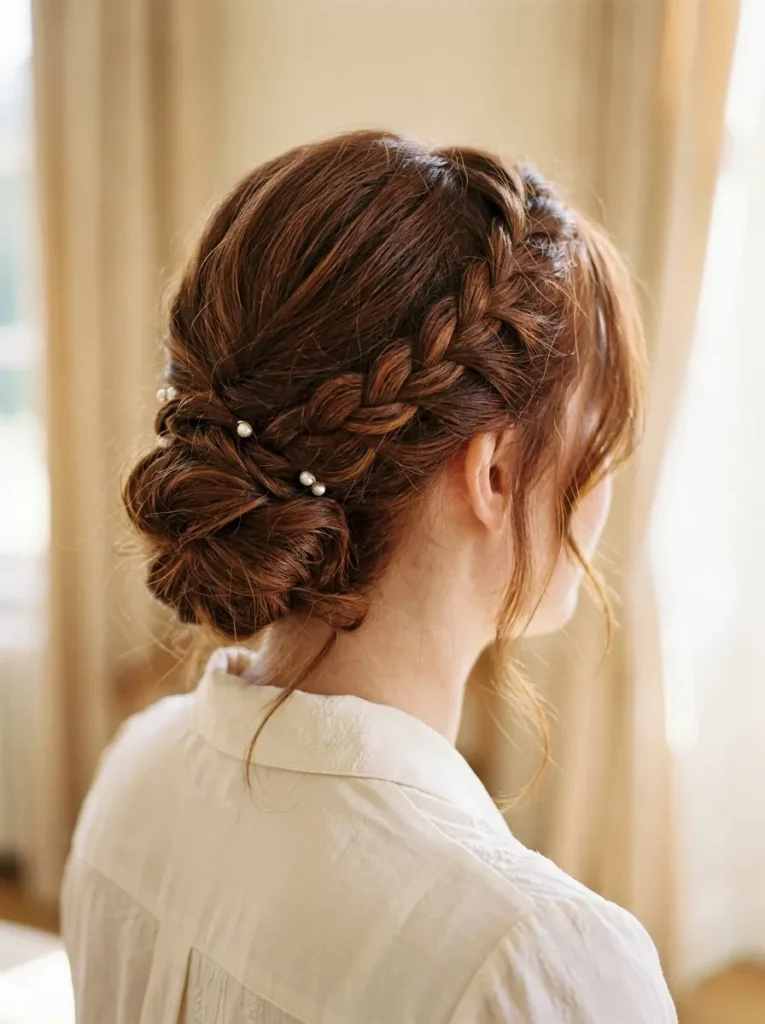
| Styling Detail | Side Lace Braid | Full Crown Braid |
| Hair added | From one side of the braid | From both sides |
| Visual effect | A delicate curved pattern | A fuller woven band |
| Placement | Along the temple or hairline | Around the crown |
| Best finish | Low bun or tucked updo | Loose hair or pinned updo |
A lace braid adds hair from only one side, allowing the woven pattern to follow a gentle curve along your hairline. Begin near one temple and add small sections from the side closest to your face as you braid backward. Once you reach the ear, secure the braid and tuck the remaining hair into a low bun. Pin the style firmly without making it uncomfortable. The result is a graceful updo for weddings, dinners, and occasions where subtle detail looks more appealing than an elaborate hairstyle.
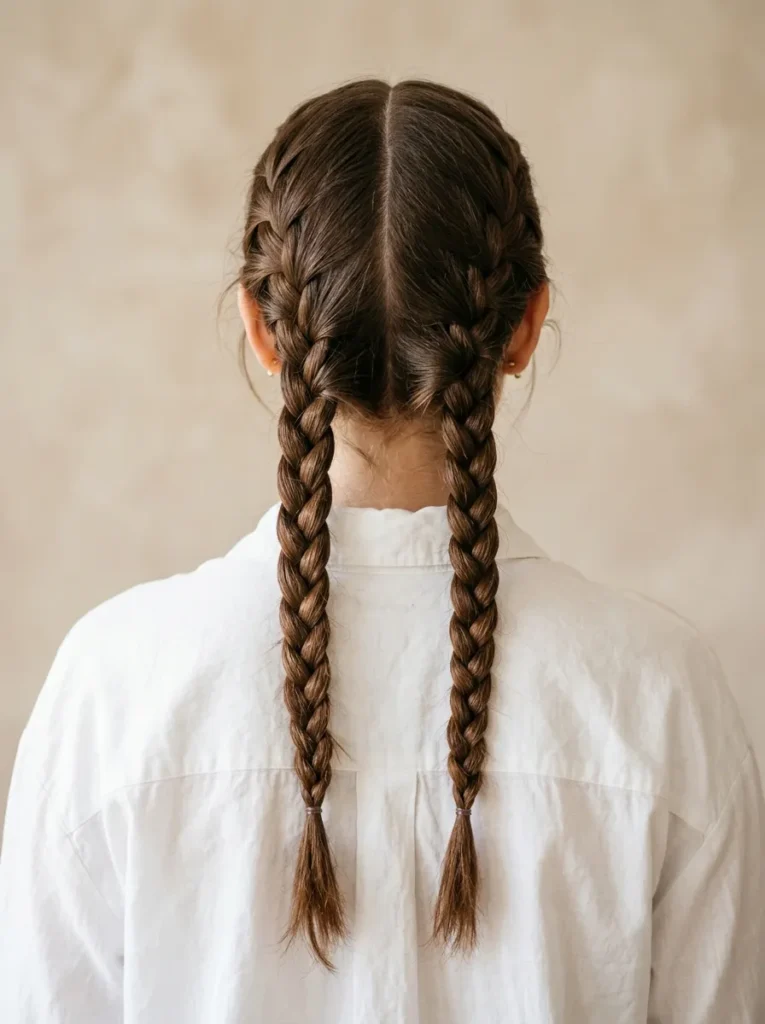
19. Braided Pigtails
DO
- Part your hair evenly down the center for balanced pigtails.
- Brush out knots before dividing the hair into two sections.
- Keep the braid tension consistent from the top to the ends.
- Use small elastics that coordinate with your hair color.
DON’T
- Don’t pull tightly around the temples, where tension can cause discomfort.
- Don’t start braiding over tangled hair.
- Don’t make one pigtail noticeably thicker than the other.
- Don’t forget to check the back for loose strands before leaving home.
Braided pigtails are a practical choice for school, workouts, travel, and relaxed weekend outfits. The classic version uses three-strand plaits, but you can switch to Dutch braids for a raised pattern that stays closer to the scalp. For a softer finish, loosen the lower sections slightly and leave a few wisps near your ears. A clean center part gives the style a balanced appearance, especially in photographs.
20. Infinity Braid
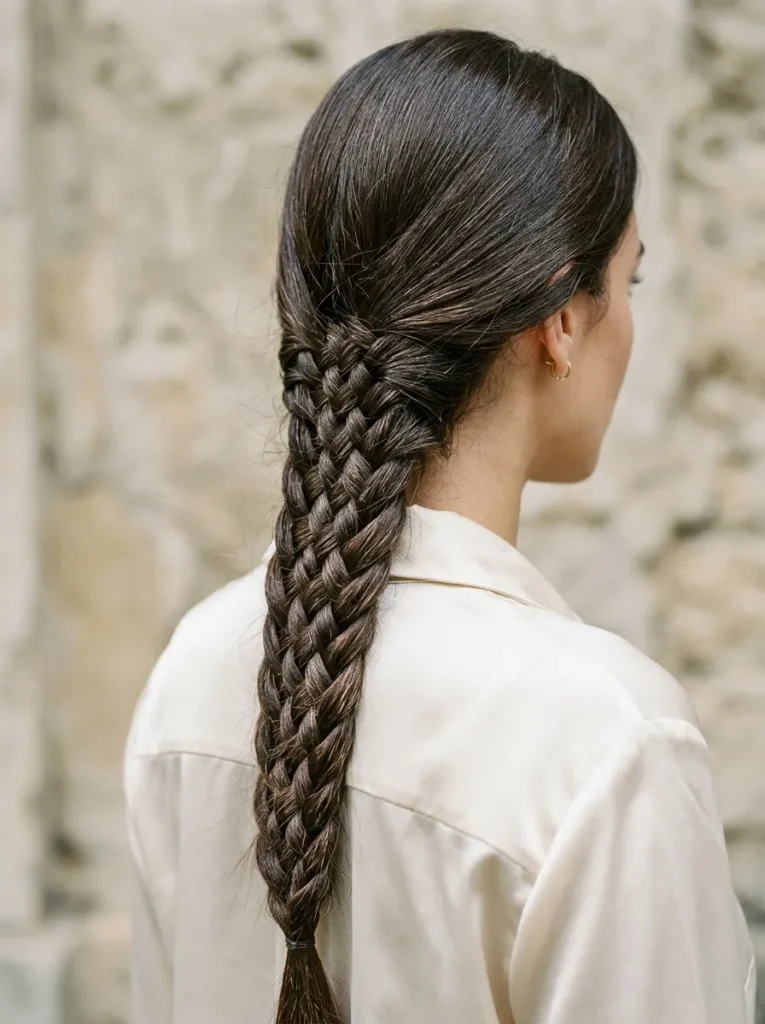
Skill Level: Intermediate
Time: 15 to 30 minutes
Best For: Special occasions, creative everyday looks, and hairstyle photography
Hair Length: Medium to long hair
Result: A distinctive woven pattern resembling a continuous figure eight
The infinity braid stands out because its strands loop around a central section in a repeated figure-eight pattern. Unlike a standard plait, it takes a little practice to maintain the same direction throughout. Begin with a small ponytail, separate the hair into sections, and weave one working strand around the central section in a consistent sequence. Keep the crossings snug but comfortable. A practice session with a smaller section of hair can help you learn the movement before attempting a full-length braid.
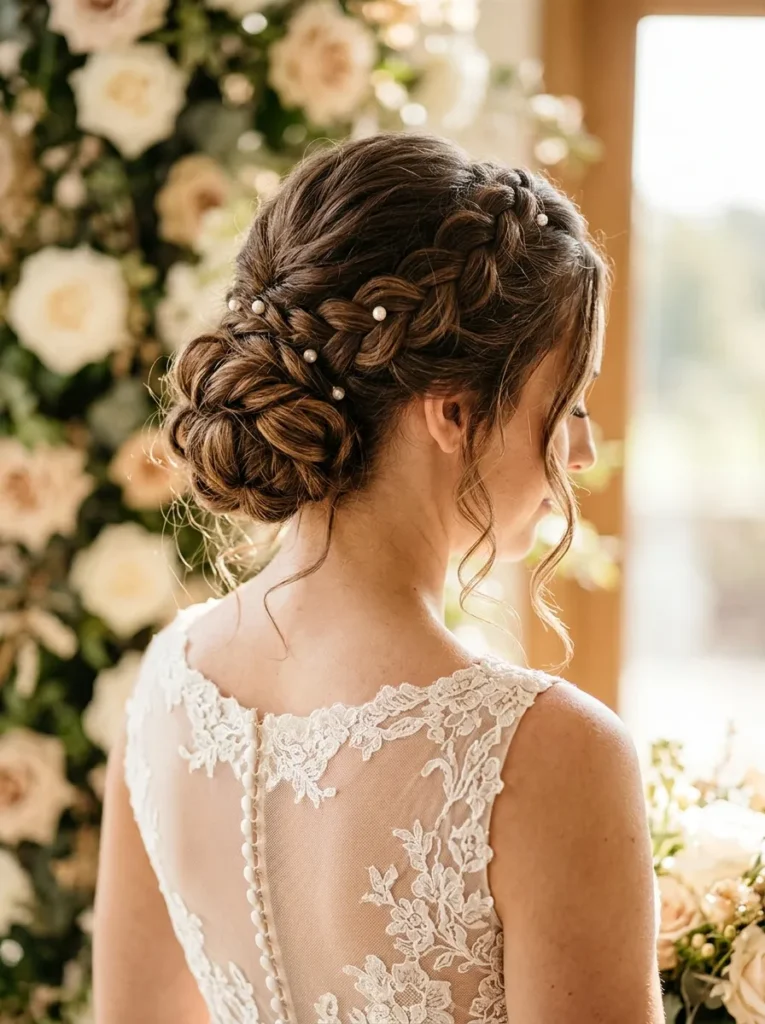
21. Braided Wedding Updo
BEFORE
A simple pinned bun may lack the texture you want for wedding photographs, while loose curls can shift during a long ceremony or reception. Fine sections may also slip from the updo if they aren’t secured properly.
AFTER
A braided wedding updo combines woven detail with a more structured shape. The braids create visual interest, while carefully placed pins help keep the style together throughout the event.
For a lasting finish, begin with dry hair and use a light texturizing product if your strands are slippery. Create one or two braids, arrange them around a low bun, and secure the sections with pins that match your hair color. Add pearl accessories or small floral pins sparingly. If you’re attending a wedding, test the hairstyle beforehand and wear it for an hour or two to check comfort and hold before the big day.
22. Heart-Shaped Braids
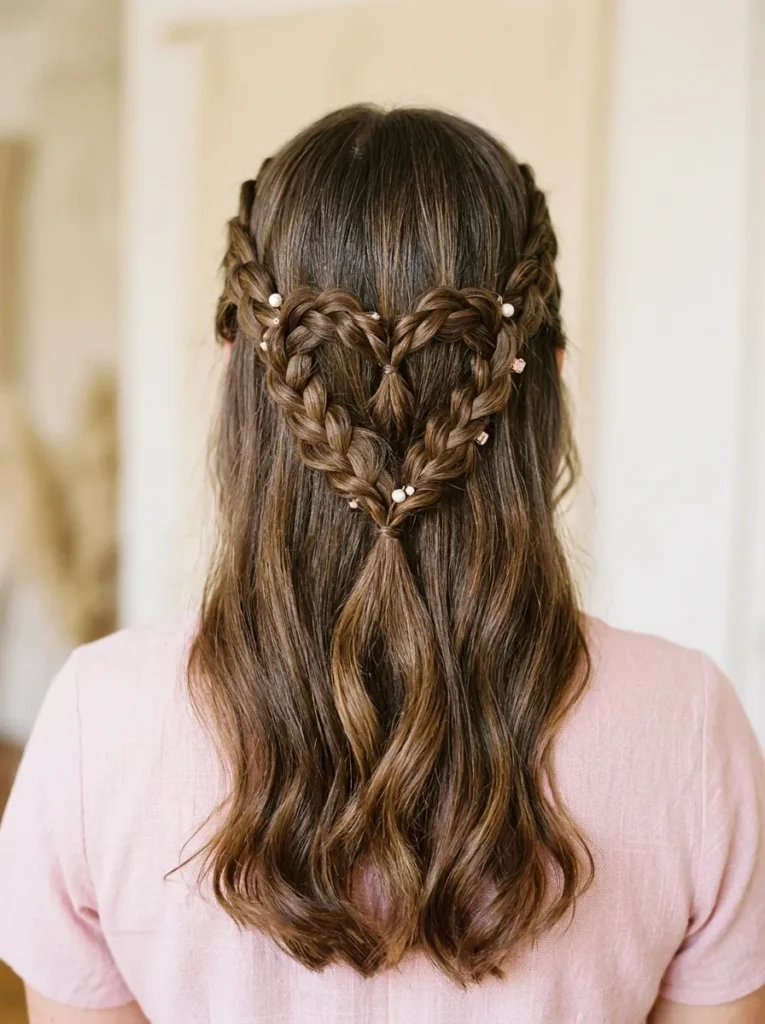
- Create a center part. Brush your hair and divide it into two equal sections from the forehead to the crown.
- Shape the curves. Take a small section near the top of one side and begin a curved Dutch braid, following the outline of half a heart.
- Mirror the other side. Repeat the same technique on the opposite side, aiming for a balanced shape.
- Join the braids. Bring the ends together at the back and secure them with a small elastic or discreet pins.
Heart-shaped braids add a creative detail that stands out in photographs, making them especially fun for parties, Valentine’s Day, and special celebrations. The key is to keep both curved sections similar in size so the heart looks balanced. Medium to long hair offers more room to shape the design, while a little styling cream helps control flyaways. Work slowly around the curves, since rushing can make the two sides uneven.
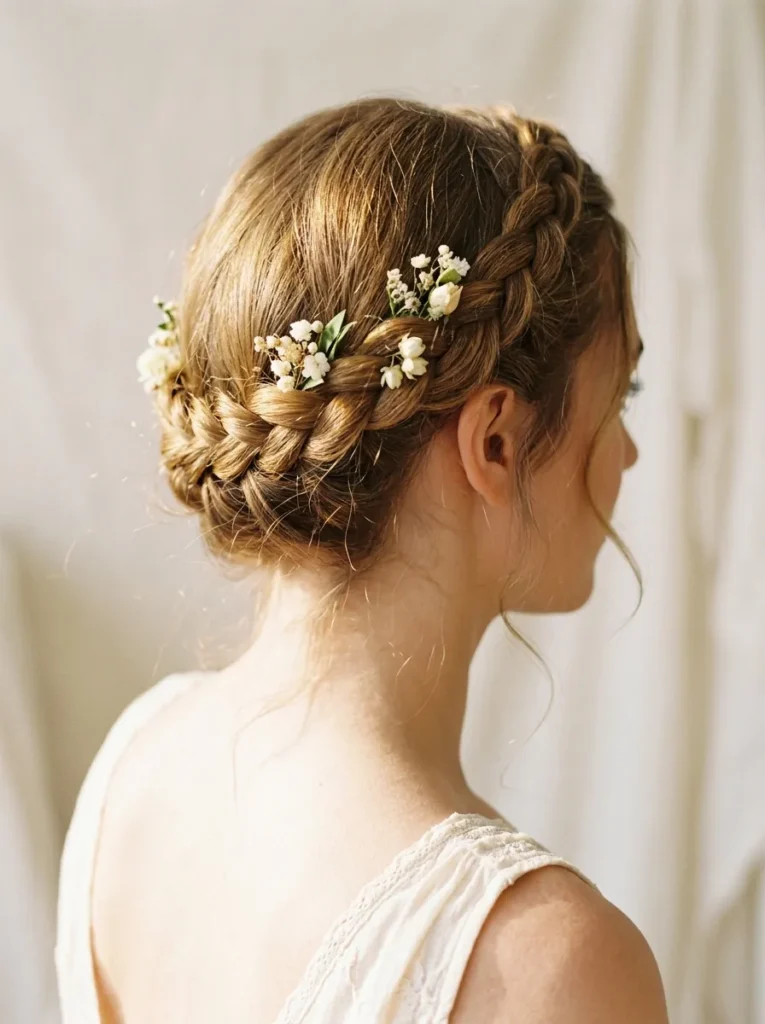
23. Braided Halo Updo
| Styling Detail | Full Halo Braid | Partial Halo Braid |
| Coverage | Wraps around the entire head | Covers one side or part of the crown |
| Hair length | Usually easier with long hair | Suitable for medium-length hair |
| Styling time | Around 20 to 40 minutes | Around 10 to 20 minutes |
| Best occasion | Weddings and formal events | Everyday wear and casual celebrations |
A halo braid frames your head with a continuous woven band, creating an elegant updo without needing a separate headpiece. Start near one ear and braid around the crown, gradually adding hair as you move along the hairline. Tuck the final length beneath the starting point and secure it with bobby pins. For a softer finish, loosen the braid slightly around the crown. If your hair is layered, use small pins to catch shorter strands before they escape.
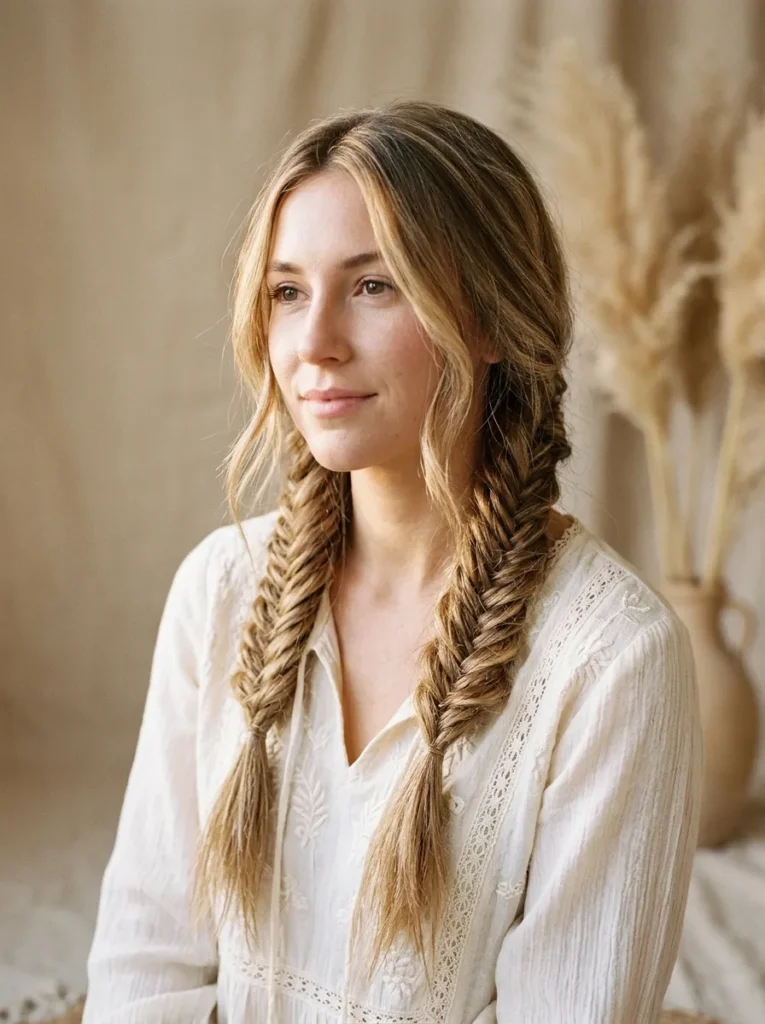
24. Boho Double Fishtails
Quick Tip:
For two balanced fishtail braids, divide your hair carefully with a straight center part and keep the sections similar in thickness. Use smaller outer strands for a more detailed pattern, then loosen the finished braids gently from the bottom upward.
Boho double fishtails combine the symmetry of pigtails with the delicate woven texture of fishtail braids. They’re a lovely choice for outdoor gatherings, festivals, vacations, and relaxed weekend outfits. A little texturizing spray can help slippery hair hold the pattern, while loose strands around the face soften the overall finish. Keep the braids slightly relaxed rather than pulling them tight against your scalp. For a cohesive look, make both braids similar in width and secure them with discreet elastics.
CONCLUSION
The best braided hairstyles are the ones that make you feel comfortable, confident, and excited about your look. Whether you love sleek Dutch braids, relaxed boho plaits, or elegant braided buns, there’s an idea here to suit your mood and occasion.
Start with a style that matches your skill level, then experiment with texture, volume, and accessories as you gain confidence. Sometimes, a small change in how you braid or secure your hair creates a completely different finish.
Save this article on Pinterest for your next styling session, try your favorite ideas, and share it with a friend who loves fresh hairstyle inspiration. Your next favorite look might be just one braid away!
Also Visit : 20 Lemonade Braids That Grow Out Without Losing Shape