22 Elegant Natural Hair Bun Styles for Effortless Days
Natural hair bun styles can make busy mornings easier without hiding the texture that makes your hair yours.
From a sleek low bun to a full curly updo, the right shape can keep your strands gathered while giving your look a polished finish.
This collection shares 22 ideas for different curl patterns, lengths, occasions, and styling preferences. You will find relaxed everyday options, more detailed braided designs, and simple ways to use scarves, satin scrunchies, and pins. Each style includes practical pointers to help you shape your bun while avoiding unnecessary tension. A useful detail to remember: moisturized, gently detangled hair is usually easier to arrange, and a soft tie can help reduce pulling. Browse the ideas, choose one that suits your routine, and save the looks you want to try.
1. Sleek Low Bun
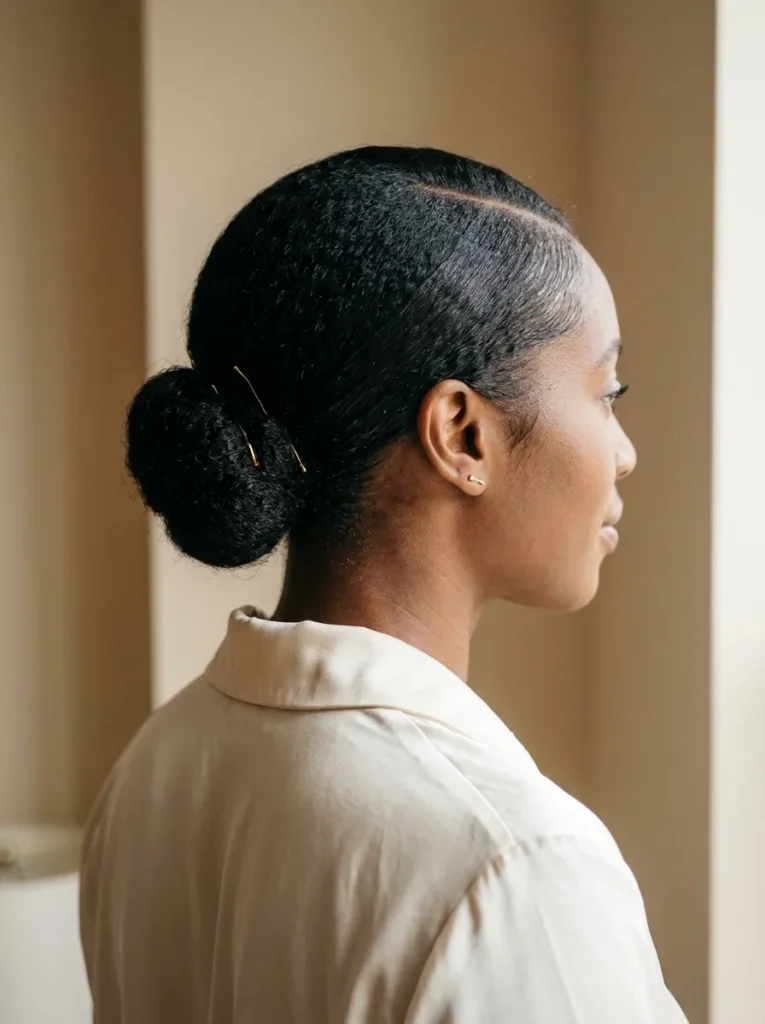
A sleek low bun brings instant polish to natural hair without requiring an elaborate styling routine. The hair is gathered smoothly at the back, creating a neat shape that works beautifully with oval, round, and heart-shaped faces. A middle or side part adds a little personality.
Start with moisturized, detangled hair and apply a lightweight styling cream before gathering your strands. Secure the bun with a satin-friendly scrunchie or covered hair tie. Among natural hair bun styles, this look stands out for its versatility, especially when you need something polished for work, dinner, or everyday errands.
2. High Puff Bun
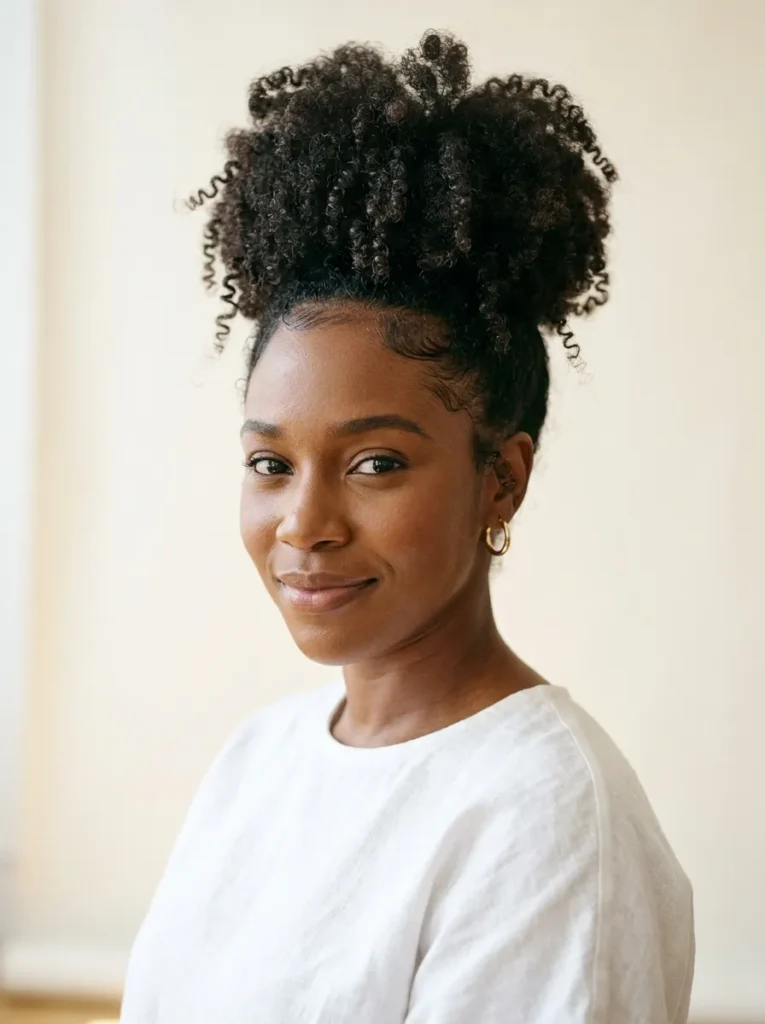
A little volume at the crown can make an everyday hairstyle feel much more striking. The high puff bun celebrates your natural curl pattern while keeping the sides tidy and your facial features visible.
- Start with stretched hair: Gently detangle and stretch your curls for easier gathering.
- Choose a soft band: Use a stretchy satin or fabric headband to avoid unnecessary tension.
- Shape the puff: Arrange the loose ends into a rounded, balanced shape.
- Define the curls: Apply a small amount of leave-in conditioner or curl cream.
- Finish the edges: Smooth them lightly without pulling tightly.
The beauty of this look lies in its natural volume. It works especially well for thick, coily hair and pairs nicely with casual outfits, statement earrings, and simple everyday accessories.
3. Braided Crown Bun
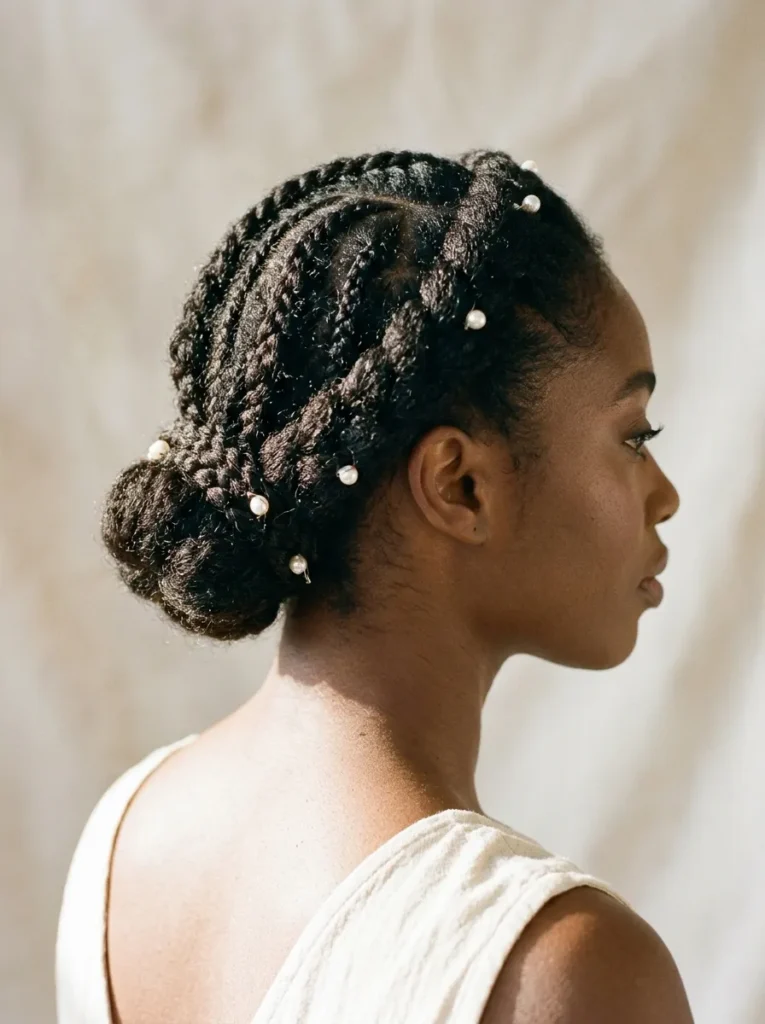
Quick Tip:
Create two or four sections before braiding so the crown looks even and balanced. Keep the braids comfortable rather than excessively tight, and tuck the remaining ends securely into a low bun with discreet hairpins.
The braided crown bun combines protective styling with a graceful finish. It keeps loose strands organized while creating beautiful detail around the head. For extra definition, apply a little styling butter before braiding. This look is especially lovely for weddings, family gatherings, formal occasions, and special photographs.
4. Twisted Low Bun

BEFORE:
Loose natural hair can sometimes feel difficult to manage, especially when you need a tidy style that lasts throughout the day. A simple ponytail may look unfinished for a formal outfit.
AFTER:
Two gently twisted sections create a beautifully structured bun with added texture and dimension. The result looks polished without hiding your natural hair’s character.
For this look, divide your hair into two sections, twist each section toward the back, and wrap them together into a low bun. Secure everything with bobby pins. I’ve noticed that applying a little styling cream beforehand helps control flyaways and keeps the twists looking defined.
5. Double-Strand Bun
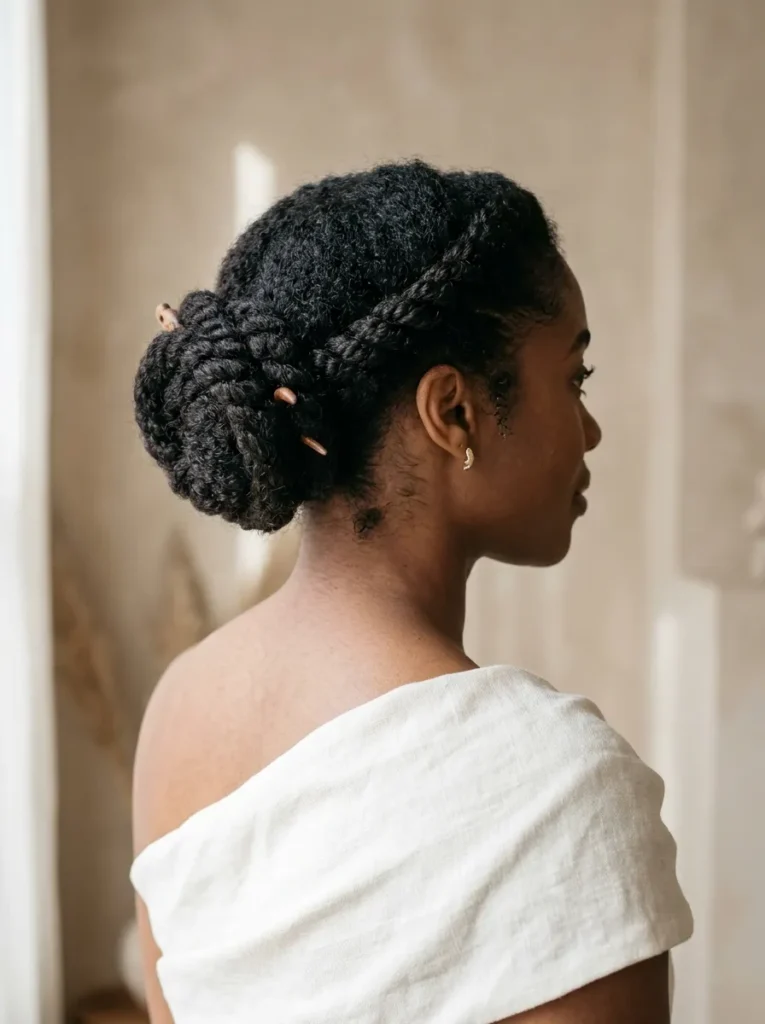
Getting a neat bun does not always require complicated braiding techniques. A double-strand version gives natural hair a textured, graceful appearance with just a few simple steps.
- Prepare your hair: Detangle gently and apply leave-in conditioner for softness.
- Divide into sections: Separate your hair into two equal portions.
- Create two-strand twists: Twist each section tightly enough to hold its shape without pulling your roots.
- Wrap into a bun: Cross the twists around each other and form a rounded bun.
- Secure the ends: Use discreet bobby pins to keep everything in place.
This style works particularly well on medium to long natural hair. It also gives you an excellent opportunity to show off your hair’s texture while keeping your ends tucked away during busy days.
Also Visit : 24 Collarbone Length Hair Looks for a Bold New Feel
6. Side-Parted Chignon
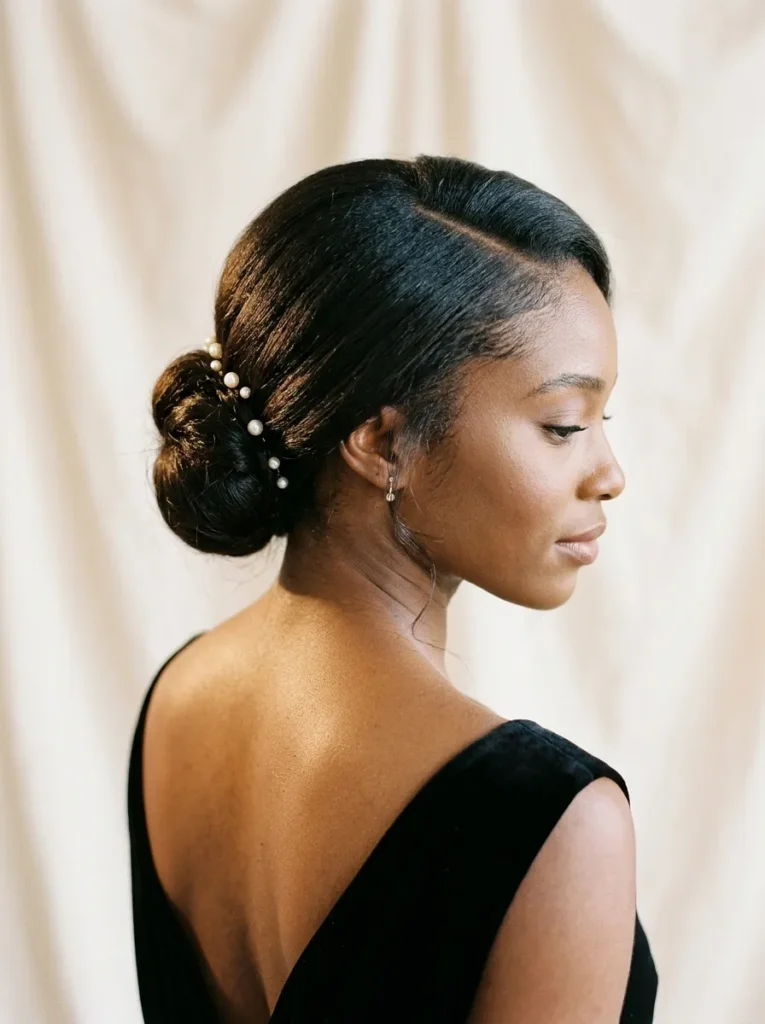
The placement of your part can completely change the appearance of a classic bun. Compare these two variations before choosing the finish that suits your face and outfit.
| Styling Detail | Option A: Middle Part | Option B: Side Part |
| Overall appearance | Balanced and symmetrical | Soft and sophisticated |
| Front sections | Evenly divided | Swept to one side |
| Face framing | Both sides equally | More volume on one side |
| Best occasion | Office and daily wear | Events and evening outings |
The side-parted version is especially flattering when you want a little extra shape around your face. Create a deep side part, smooth your hair backward, and secure a low chignon with pins. Finish with a pearl accessory for a refined touch.
7. Textured Top Knot
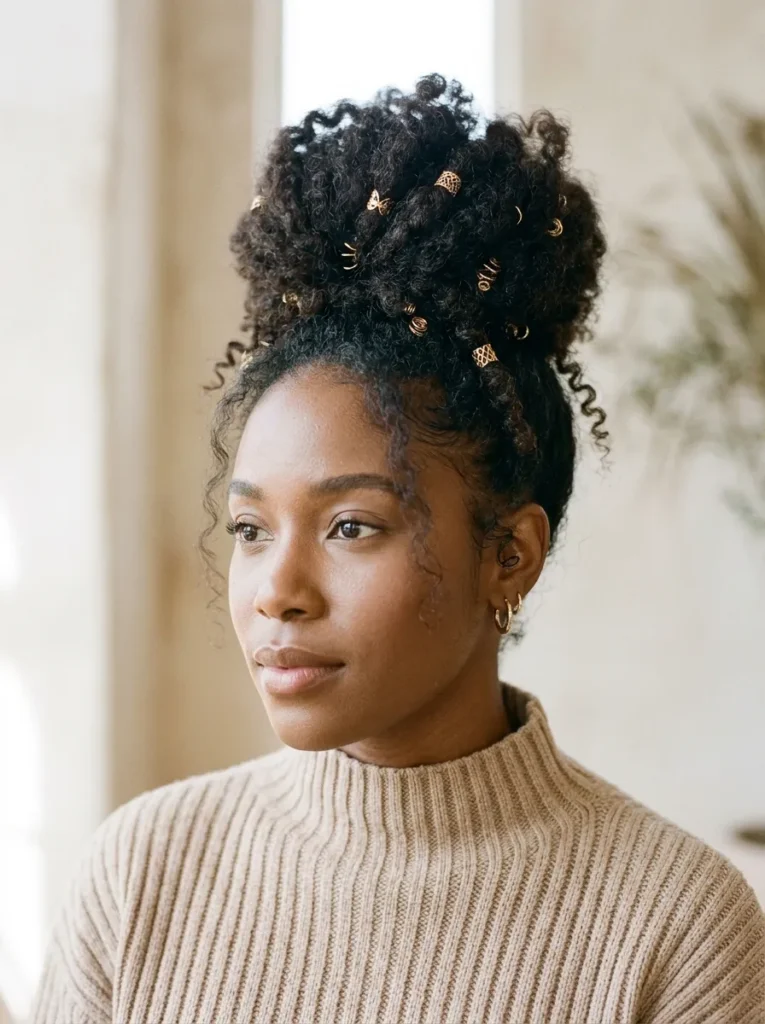
A top knot looks its best when you allow your natural texture to provide the volume. Follow these simple styling guidelines to create a balanced shape.
DO:
- Gather your hair gently toward the crown.
- Apply moisturizing cream to reduce dryness.
- Leave some natural texture visible around the bun.
- Secure the shape with large bobby pins.
DON’T:
- Pull your edges too tightly.
- Use thin elastic bands that snag curls.
- Overload your hair with heavy styling products.
- Force every strand into a perfectly smooth finish.
The textured top knot is especially useful on mornings when you need your hair off your neck. It works beautifully with medium and long natural hair, and a few loose curls can make the finished look feel softer and more relaxed.
8. Flat-Twist Bun
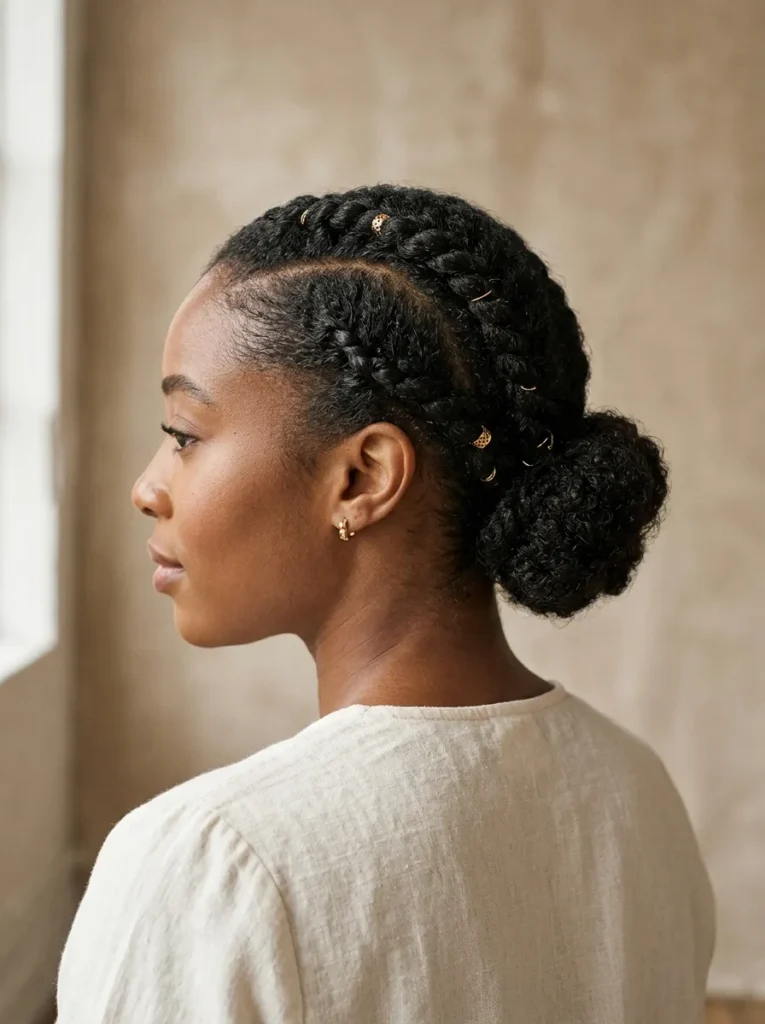
Time: Approximately 20 to 35 minutes
Skill Level: Beginner to intermediate
Best For: Medium to long natural hair
Occasions: Workdays, casual outings, family gatherings, and formal events
A flat-twist bun gives your hairstyle beautiful detail while keeping your strands neatly gathered. The twists create an attractive pattern that remains visible from the front and sides, making the style interesting even without decorative accessories. Apply a little leave-in conditioner before styling, and avoid twisting too tightly near your hairline.
9. Defined Curly Bun
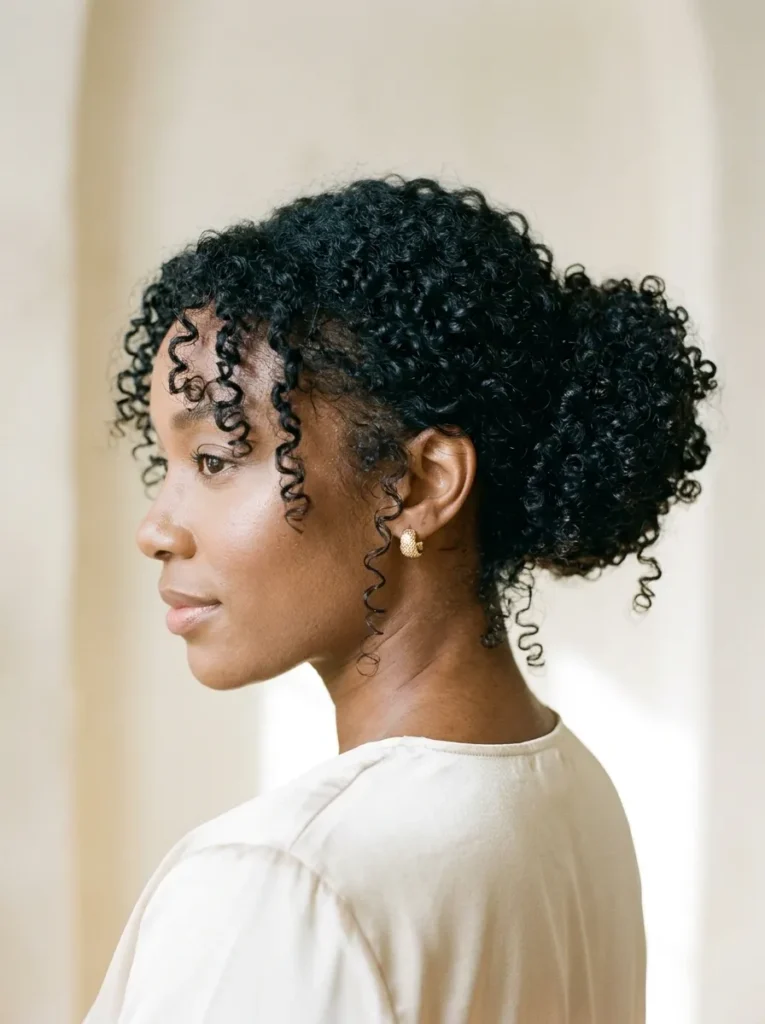
Some hairstyles look better when you allow individual curls to remain visible rather than hiding every strand. A defined curly bun does exactly that, combining a neat shape with the natural bounce and texture of your hair.
Begin with freshly moisturized curls and gently separate any tangled sections using your fingers. Gather your hair toward the back or slightly above the nape, leaving enough room to avoid flattening your curl pattern. A soft scrunchie helps hold the base without creating unnecessary tension.
Instead of tightly wrapping the entire length, arrange your curls loosely into a rounded shape and secure them with a few hairpins. I’ve noticed that working with slightly damp, conditioned curls often makes this style easier to shape. Finish by applying a small amount of curl-defining cream to any visible coils that need extra definition.
10. French Braid Bun
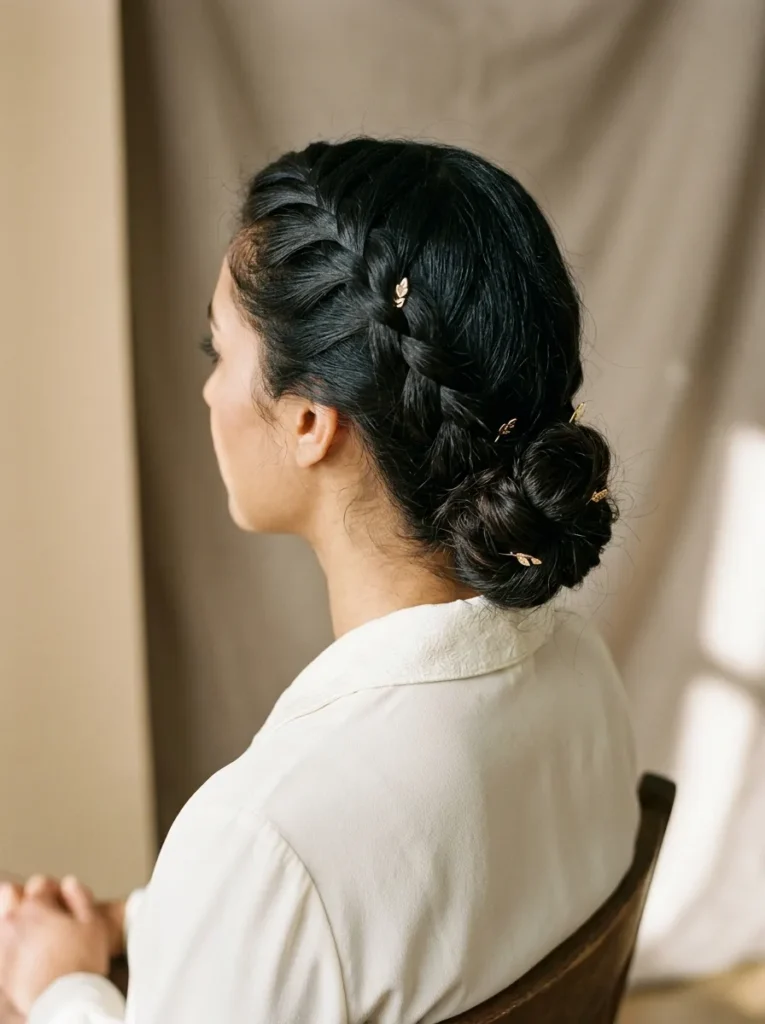
A French braid adds beautiful structure to an ordinary bun while keeping the front sections neatly in place.
- Prepare your hair: Apply a moisturizing leave-in conditioner and gently detangle your strands.
- Start at the crown: Take three small sections near the hairline and begin a traditional French braid.
- Continue backward: Add small sections of hair as you braid toward the nape.
- Form the bun: Gather the remaining hair into a low bun and secure it with pins.
- Finish neatly: Tuck away loose ends and add a lightweight styling cream.
The combination of braiding and gathering creates a hairstyle with lovely texture from every angle. It is especially suitable for thick natural hair and works beautifully with professional outfits, long dresses, and special occasion looks.
Also Visit : Which 21 Magical Christmas Hairstyles Get Noticed?
11. Knotted Low Bun

Quick Tip:
Use two equal hair sections and tie them into a loose knot before wrapping the remaining ends underneath. Secure the shape with U-shaped hairpins rather than pulling the hair tightly. A little styling butter helps keep the finished bun smooth and controlled.
The knotted bun offers an interesting alternative to a traditional rounded hairstyle. Its overlapping sections create natural dimension without needing complicated accessories. Keep the knot slightly loose for a softer finish, or arrange it firmly for a more formal appearance. It looks particularly striking from the side.
12. Loose Romantic Bun

BEFORE:
A tightly secured bun can sometimes make natural hair appear flat, especially when the curls are compressed. The finished shape may also feel too formal for relaxed daytime outfits.
AFTER:
A loosely arranged bun creates softer volume, while a few curls around the face add movement. The overall appearance feels relaxed without looking messy.
Start by gathering your hair gently at the back, leaving two small front sections free. Twist the remaining hair loosely and secure it with pins. Pull a few sections outward to create natural fullness. This style works particularly well for brunch dates, outdoor gatherings, and days when you want a softer hairstyle.
13. Bantu Knot Bun

Creating a Bantu knot bun is easier when you work with clean, evenly divided sections.
- Section your hair: Divide your hair into four to six manageable sections, depending on its thickness.
- Apply moisture: Work a small amount of leave-in conditioner or styling cream through each section.
- Twist the strands: Twist each section firmly from the roots toward the ends.
- Form small knots: Wrap each twist around its base to create compact knots.
- Secure the style: Use bobby pins where necessary to keep the knots arranged in a rounded bun shape.
The finished hairstyle has beautiful definition and plenty of visual detail. You can position the knots close together for a fuller appearance or leave small gaps for a more intricate pattern. It is a lovely choice for natural hair that needs a distinctive protective finish.
14. Wrapped Ponytail Bun
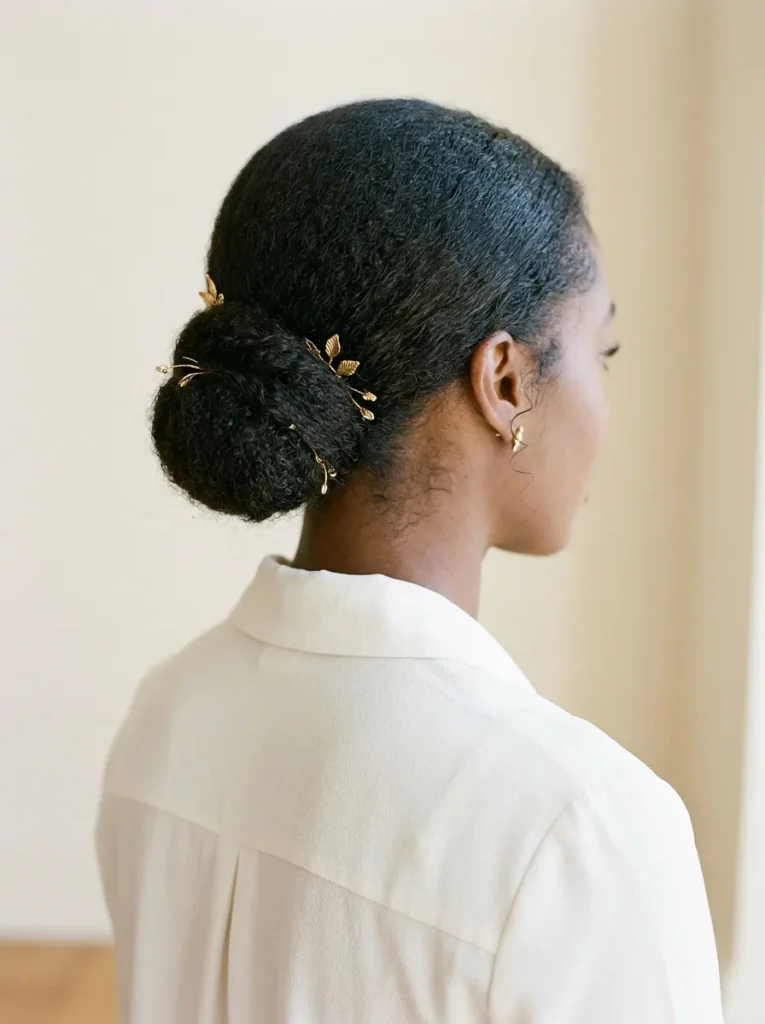
Sometimes a small styling detail makes the biggest difference. Compare these two approaches to a classic ponytail bun to find the finish you prefer.
| Styling Detail | Option A: Basic Bun | Option B: Wrapped Bun |
| Base appearance | Hair tie remains visible | Hair section covers the base |
| Overall finish | Simple and casual | Smooth and polished |
| Styling time | Approximately 5 minutes | Approximately 10 minutes |
| Best accessories | Satin scrunchie | Bobby pins and hair cuffs |
To create the wrapped version, gather your hair into a ponytail, form a bun, and leave one small section free. Wrap that section around the base and secure its end underneath. Among elegant natural hair bun styles, this simple detail adds a refined finish without requiring complicated techniques.
15. Scarf-Wrapped Bun
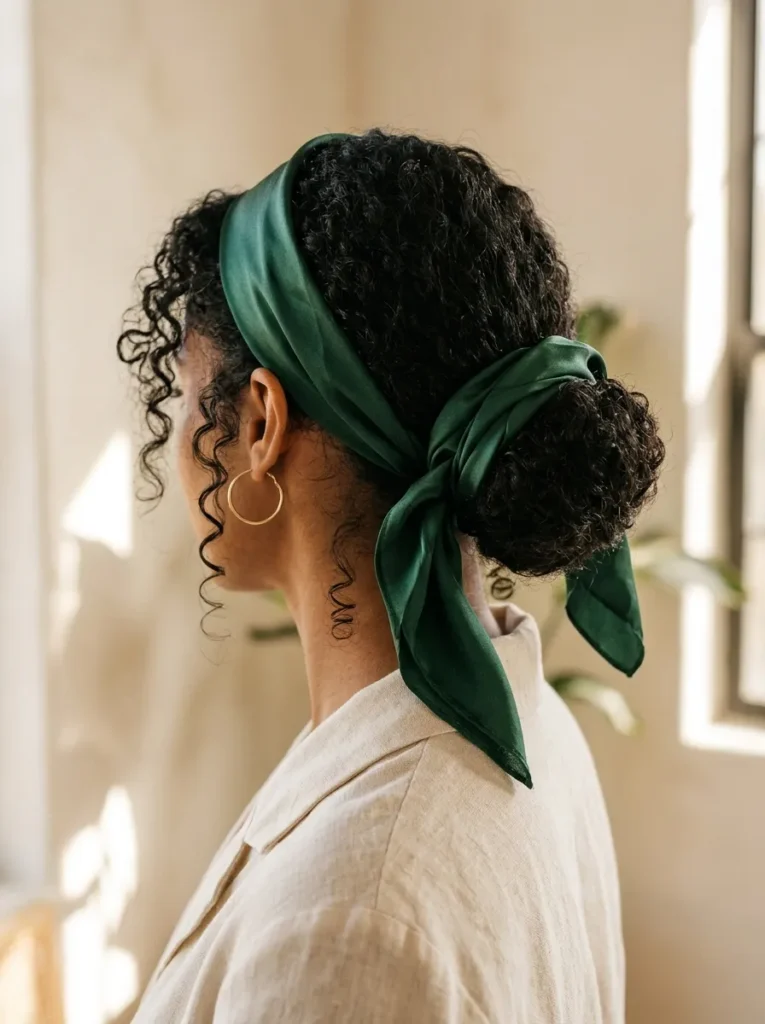
DO:
- Choose a satin or silk scarf to reduce friction against your hair.
- Gather your curls into a comfortable low bun before wrapping.
- Fold the scarf into a long, manageable strip.
- Secure the scarf with a gentle knot or bow.
DON’T:
- Wrap the scarf so tightly that it pulls your edges.
- Use rough fabrics that create friction.
- Leave loose scarf ends where they can easily catch on clothing.
- Place decorative pins directly against your scalp.
A scarf brings color and personality to even the simplest bun. Emerald green, burgundy, cream, and chocolate brown are especially attractive choices against dark natural hair. Match the scarf to your outfit for a coordinated daytime look, or choose a patterned design for extra visual interest.
Also Visit : 22 Stunning Side Swept Bangs for a Fresh, Flirty Look
16. Pinned Coil Bun
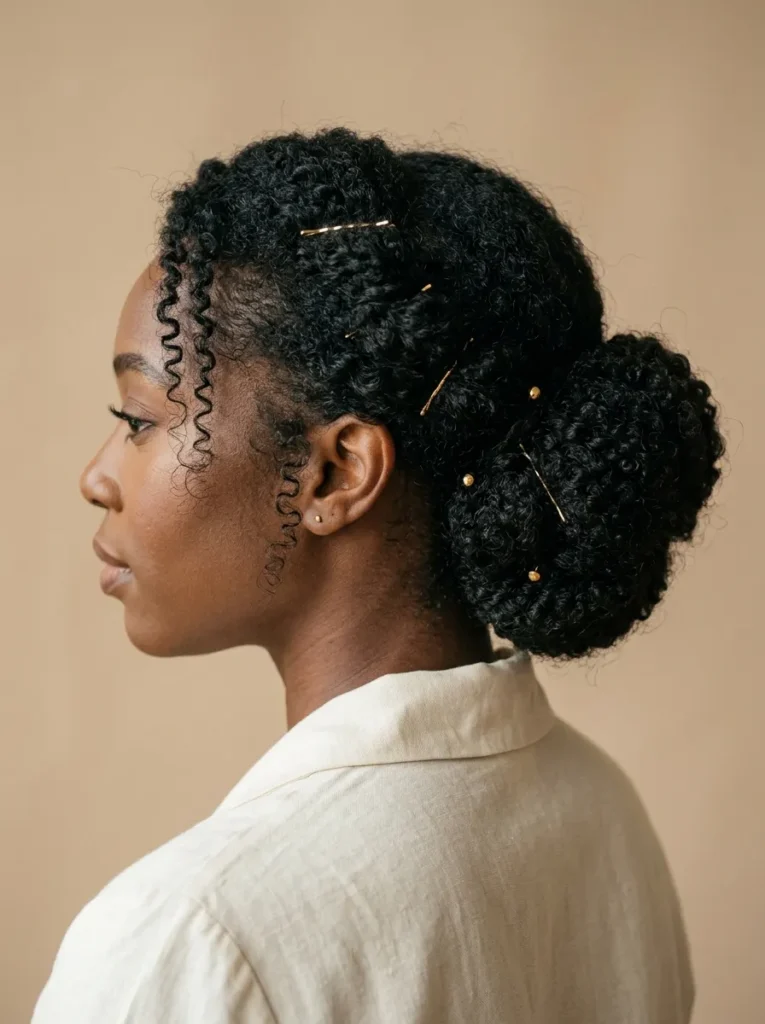
Time: Approximately 10 to 15 minutes
Skill Level: Beginner
Best For: Thick, coily natural hair
Result: A compact, textured bun with a softly rounded shape
A pinned coil bun is a practical choice when you want to keep your hair organized without stretching or flattening every curl. Gently gather your coils, arrange them into a rounded shape, and use several sturdy bobby pins to secure the sections. Place the pins underneath the visible coils so they remain discreet. This technique also lets you adjust the shape throughout the day without starting your hairstyle again.
17. Halo Twist Bun

A halo twist brings a beautiful curved detail to a simple low bun. The hairstyle begins with two sections twisted gently along the sides, creating a frame that leads toward the back of the head.
For a balanced result, keep both twists similar in thickness and secure them underneath the finished bun. A little styling cream helps define the sections without making natural hair feel stiff. The result is a graceful updo with visible texture and a lovely side profile.
18. Mini Bun Updo
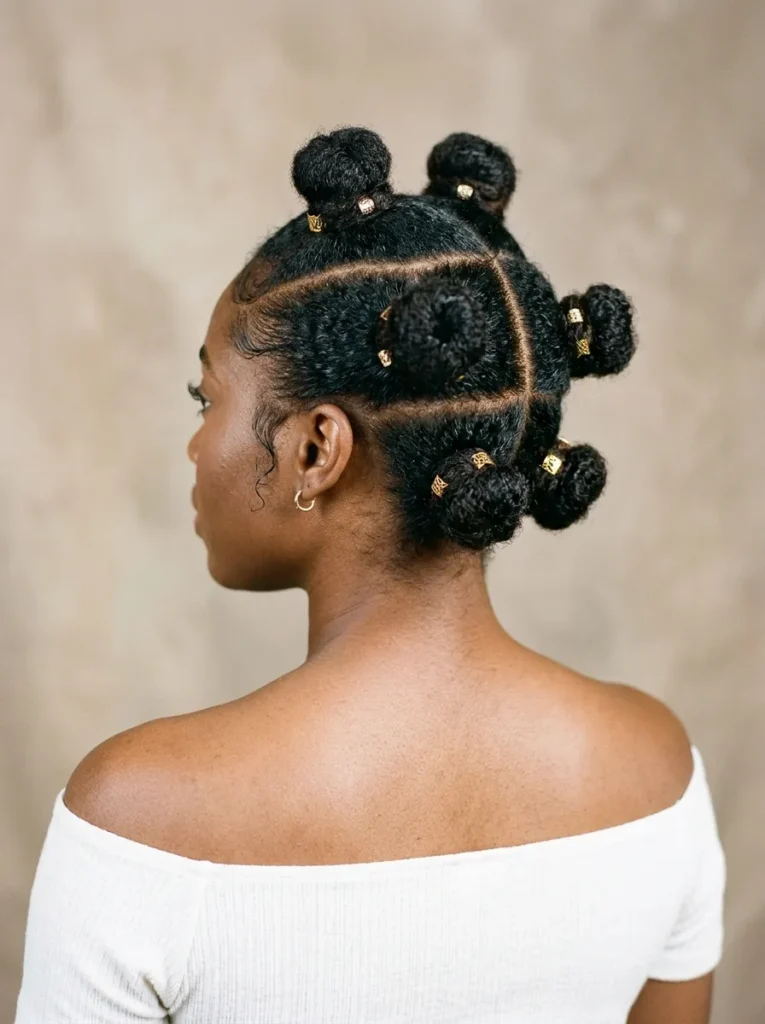
Small details can make a simple updo look surprisingly sophisticated. These mini buns create an attractive pattern while keeping your natural strands gathered neatly.
- Create clean sections: Divide your hair into four equal sections using a rat-tail comb.
- Moisturize each section: Apply leave-in conditioner or a lightweight styling cream.
- Form the mini buns: Twist each section and wrap it around its base.
- Secure carefully: Use small bobby pins or covered elastics to hold each bun.
- Check the arrangement: Make sure the buns look balanced from the front and back.
This hairstyle works particularly well for medium-length natural hair. You can arrange the buns in two rows or create a diagonal pattern for a different finish. Keep the sections comfortable around your scalp, especially when wearing the style for several hours.
19. Elegant French Roll Bun

Time: Approximately 15 to 20 minutes
Skill Level: Intermediate
Best For: Medium to long natural hair
Occasions: Office meetings, formal dinners, weddings, and celebrations
A French roll bun gives natural hair a beautifully structured appearance without requiring elaborate accessories. Gather your hair toward the back, gently roll it inward, and secure the folded sections with sturdy U-shaped pins. Leave a little natural volume around the crown rather than flattening everything. A lightweight styling cream helps control loose strands, while decorative pins add a subtle finishing detail. This sophisticated updo works especially well with tailored outfits and elegant dresses.
20. Voluminous Curly Updo
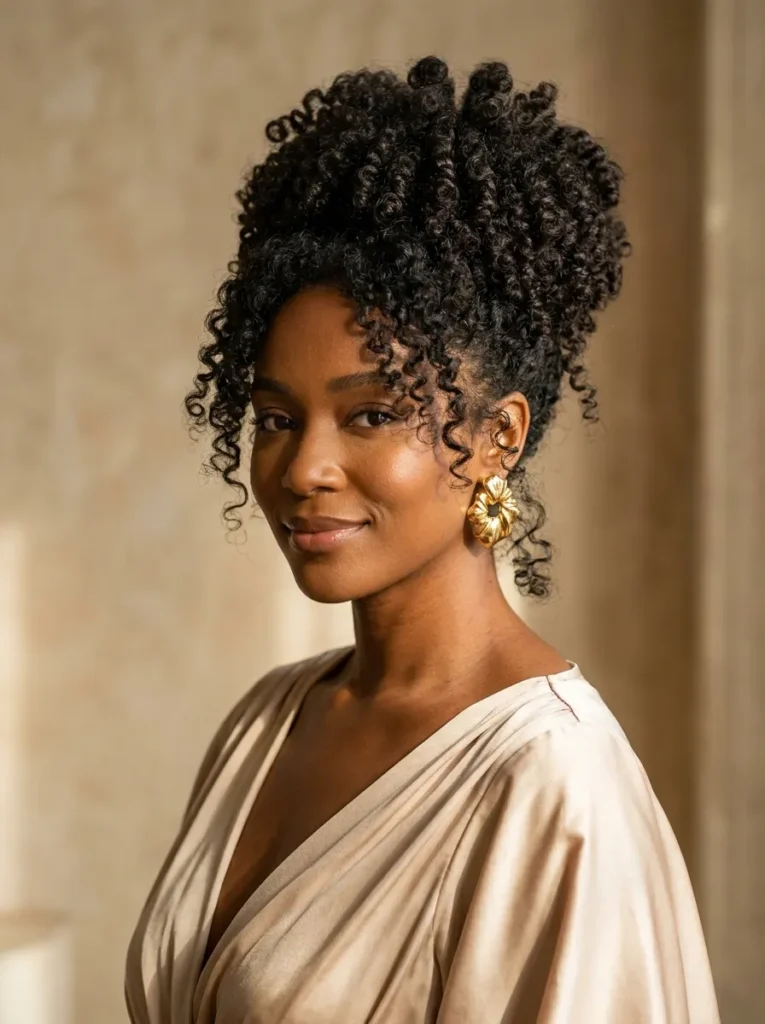
A little extra volume can make a curly updo look wonderfully sophisticated. Instead of compressing your curls into a tight bun, arrange them loosely to preserve their natural shape and fullness.
Start by gathering your curls toward the crown or upper back of your head. Secure the base with a soft hair tie, then use individual bobby pins to arrange the curls into a rounded shape. Leave a few defined ringlets around the front for a softer finish.
This hairstyle is especially attractive for naturally thick, curly hair. It adds height, keeps your neck clear, and pairs beautifully with statement earrings. For longer-lasting definition, apply curl cream before styling and avoid brushing through your finished curls.
Also Visit : 24 Effortless Short Bob Haircuts You’ll Want to Try
21. Elegant Low Chignon
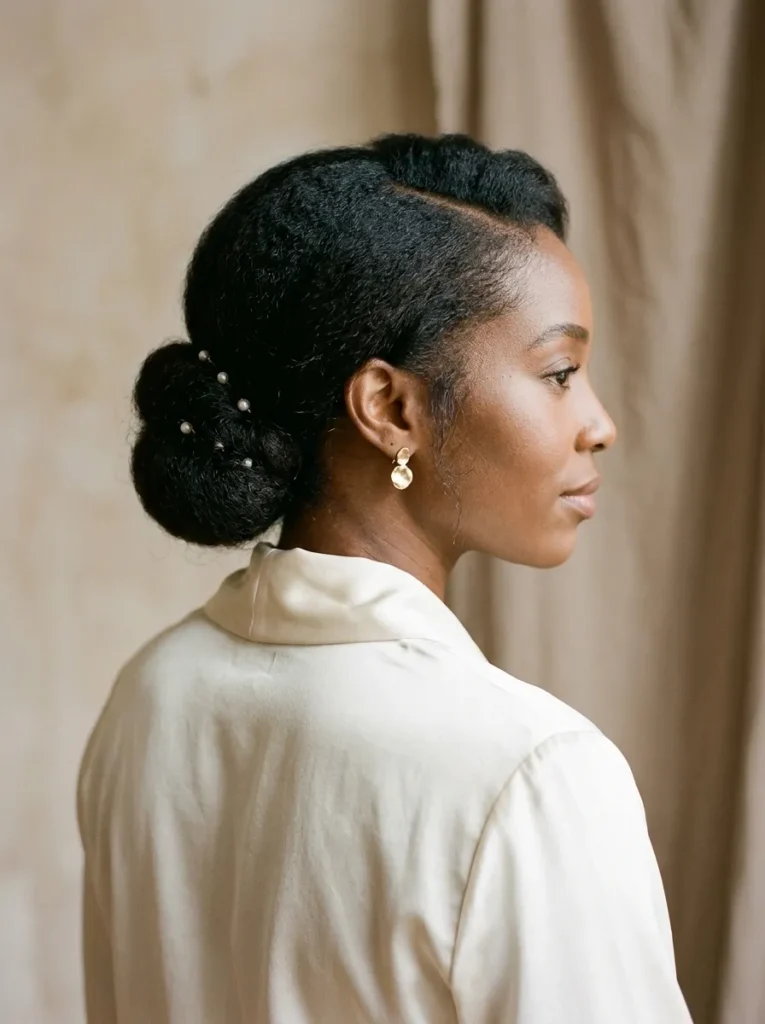
A classic chignon looks even more refined when every detail is carefully arranged.
- Create a side part: Use a rat-tail comb to make a clean, flattering part.
- Gather your hair: Bring your strands together at the nape without pulling tightly.
- Form the chignon: Twist your hair gently and fold it into a compact rounded shape.
- Secure with pins: Use U-shaped hairpins to hold the bun firmly in place.
- Add a finishing touch: Place a small pearl pin near the side of the chignon.
The finished look is neat, understated, and beautifully versatile. It works particularly well for professional settings, weddings, and elegant everyday outfits. A little natural volume at the crown keeps the hairstyle from appearing too flat.
22. Satin Scrunchie Bun

Time: Approximately 5 to 10 minutes
Skill Level: Beginner
Best For: Medium to long natural hair
Result: A soft, comfortable bun with a polished finish
A satin scrunchie is a simple accessory that can make your everyday bun look more stylish while helping reduce friction against your hair. Gather your strands into a low or high bun, secure them gently, and arrange the scrunchie so its fabric frames the shape. Choose champagne, ivory, chocolate brown, or dusty rose for an elegant appearance. This hairstyle is especially useful for busy mornings when you need something quick, comfortable, and presentable.
CONCLUSION
The right bun can keep natural hair neat while still showing off its texture, volume, and personality. These 22 ideas offer options for quick mornings, workdays, and special occasions, from simple gathered styles to detailed twists and braids. Choose a look that suits your hair length and comfort, and avoid pulling tightly at your roots. Save your favorite natural hair bun styles to Pinterest so you can find them when you need fresh inspiration. Try one this week, then share the article with a friend who loves practical, beautiful natural hairstyles. Small adjustments can make the same style feel entirely new.