24 Gorgeous Shoulder Length Hairstyles for Easy Styling

Shoulder-length hair can feel like the best of both worlds: long enough to style, but short enough to manage on busy mornings. The trick is finding looks that suit your texture and routine.
These 24 shoulder length hairstyles offer fresh inspiration, from soft beach waves and face-framing layers to sleek ponytails, claw-clip twists, and bouncy blowouts. Each idea includes practical styling guidance, so you can choose a look that feels achievable rather than complicated.
Whether your hair is straight, wavy, fine, or thick, small changes in your part, layers, or finish can make your everyday style feel new. I’ve included options for rushed mornings, polished workdays, and occasions when you want a little extra volume. Save your favorite ideas, then try one at a time to discover what works best for your hair.
1. Soft Layered Lob

Soft layers give a shoulder-grazing cut movement without asking for a complicated morning routine. Ask your stylist for long, blended layers that begin below the cheekbones, then use a round brush to turn the ends slightly inward. The finish feels tidy but still relaxed.
On second-day hair, mist the mid-lengths with water or lightweight leave-in spray and reshape a few pieces with a blow-dryer. Among shoulder length hairstyles, this cut is especially handy for straight or slightly wavy hair because the layers add shape without removing much fullness. Keep the ends trimmed to prevent the outline from looking heavy.
2. Curtain Bangs
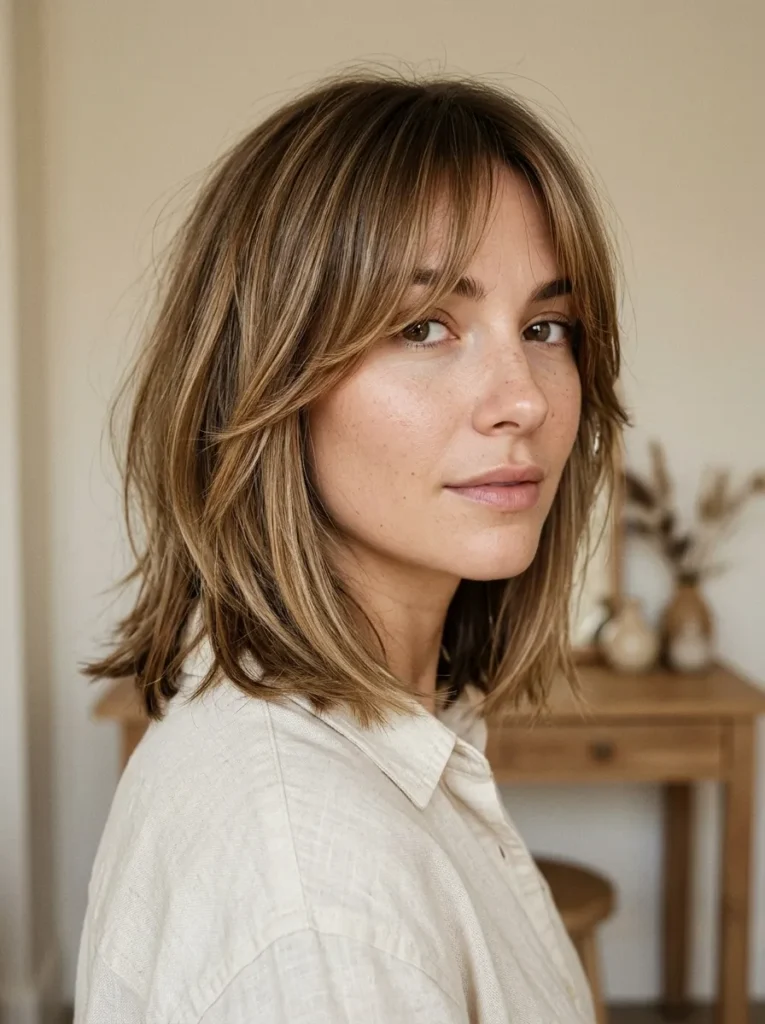
- Curtain bangs bring instant face-framing shape while keeping the length around your shoulders.
- Ask for a soft middle part and cheekbone-skimming pieces that blend into the rest of the cut.
- Blow-dry the fringe side to side with a small round brush, then roll the ends away from your face.
- Finish with a pea-sized amount of lightweight smoothing cream to control flyaways without flattening the roots.
The secret is drying the fringe first, before the rest of your hair has time to set in its natural part. This keeps the shape airy and helps the pieces fall into place. Curtain bangs suit straight and wavy textures, but a quick touch-up may be needed on humid days.
3. Loose Beach Waves
Quick Tip:
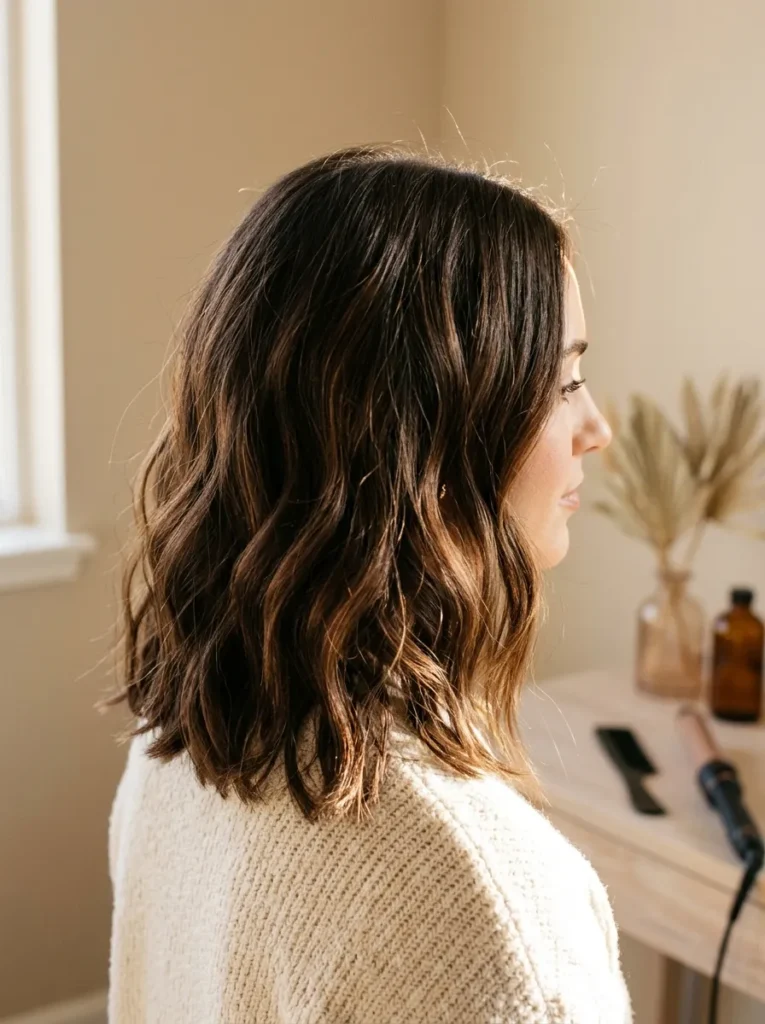
For beachy texture without crunchy ends, start with completely dry hair and a heat protectant. Alternate the direction of loose curls, leaving the last inch out of the curling iron.
Loose waves make a simple shoulder-grazing cut look fuller and add movement around the face. Use a 1-inch curling iron on medium heat, then let each curl cool before combing through with your fingers. A tiny drop of serum on the ends adds shine. Too much can weigh the waves down.
4. Blunt Ends

BEFORE: Uneven, wispy ends can make shoulder-length hair look thinner than it really is. The tips may flip in different directions, leaving an otherwise smooth style looking unfinished.
AFTER: A crisp, blunt outline creates the appearance of fuller ends and gives the haircut a clean shape. The result looks polished even with very little styling.
For a smooth finish, apply heat protectant and blow-dry in small sections using a paddle brush. Keep the airflow pointed downward to reduce frizz. Straighten only the pieces that need extra control, rather than passing the iron over every strand. Regular trims help maintain that sharp, healthy-looking edge.
5. Half-Up Twist
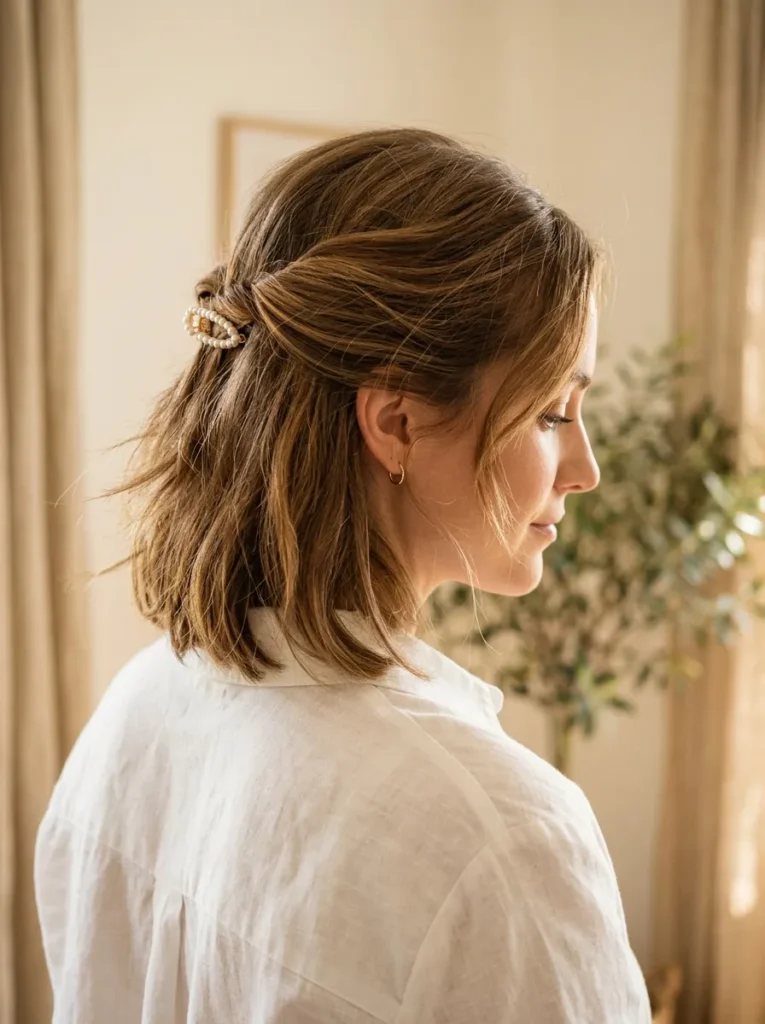
- Create texture. Brush through your hair and add a little texturizing spray if the strands feel slippery.
- Separate the top. Gather two small sections from above each temple, leaving a few face-framing pieces loose.
- Twist backward. Rotate each section toward the back of your head, keeping the twists relaxed rather than tight.
- Secure the style. Cross the sections and fasten them with a small claw clip, barrette, or discreet bobby pins.
The half-up twist keeps hair away from your face while letting the rest fall naturally over your shoulders. It works especially well for busy mornings, casual dinners, and days when your roots look better than your ends. For extra softness, gently loosen the crown with your fingertips after securing it.
Also Visit : 22 Elegant Hairstyles for a Stunning, Polished Look
6. Side-Parted Volume

| Styling Detail | Option A: Natural Part | Option B: Deep Side Part |
| Root volume | Softer, subtle lift | More noticeable lift |
| Face framing | Balanced on both sides | Fuller sweep across one side |
| Styling effort | Minimal daily adjustment | May need root blow-drying |
| Overall finish | Relaxed and understated | Glamorous and defined |
A deep side part can make shoulder-length hair appear fuller without adding extra layers. Start with damp roots and direct your blow-dryer against your usual part, lifting the hair with your fingers or a round brush. Once dry, flip it into place. Use a light mist of hairspray to help the lift last.
7. Face-Framing Layers

DO
- Ask for face-framing pieces that begin near your cheekbones or chin.
- Keep the shortest layer long enough to tuck behind your ear.
- Style the front sections away from your face with a round brush.
DON’T
- Avoid cutting the front pieces too short without discussing your styling preferences.
- Don’t overload the layers with heavy oils.
- Don’t skip heat protectant when blow-drying the face-framing pieces.
Face-framing layers add shape around your features without requiring a full restyle each morning. They are especially helpful when a single-length cut feels flat near the front. Ask your stylist to tailor the shortest pieces to your hair texture and how often you wear it tied back.
8. Textured Shag

Skill Level: Beginner to intermediate
Best For: Wavy, thick, or naturally textured hair
Styling Time: 5 to 10 minutes
Finish: Piecey volume with movement
A textured shag gives shoulder-length hair an intentionally undone shape, so small flyaways and natural bends become part of the look. Scrunch a little mousse into damp hair, then air-dry or use a diffuser on low heat. Separate a few ends with your fingertips instead of brushing the texture away.
9. Glass-Hair Finish
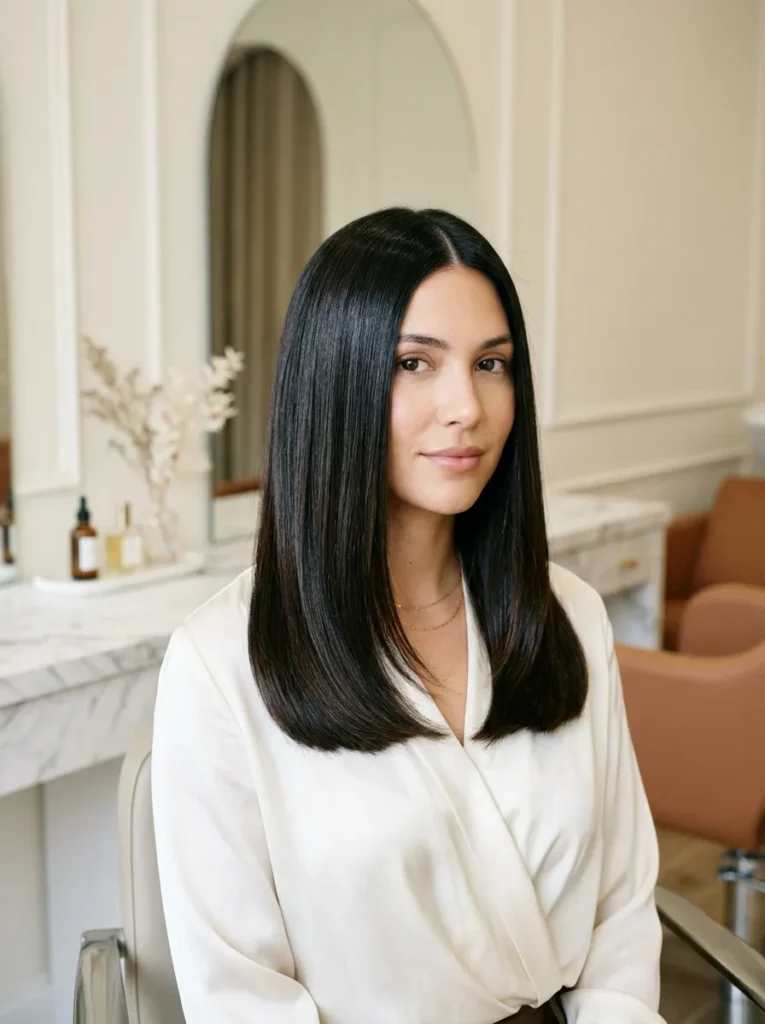
Few styles look as crisp as a smooth, glossy finish with ends that skim the shoulders. Start with a heat protectant and blow-dry in sections, keeping the nozzle pointed downward to smooth the cuticle. Work slowly around the nape, where damp patches can make the final result puff out.
Once fully dry, flat-iron only sections that need extra polish, then smooth a tiny drop of shine serum over the mid-lengths and ends. In my experience, less product keeps the finish bouncy rather than greasy. A center or side part works, depending on where your hair naturally falls.
10. Low Twisted Bun

- Start with texture. Work a small amount of styling cream through dry hair to help shorter layers stay in place.
- Gather loosely. Pull your hair into a low ponytail at the nape without tightening it too much.
- Twist and tuck. Coil the ponytail upward, tucking the ends underneath the twist as you go.
- Secure with pins. Use two or three bobby pins that match your hair color, adding more where shorter pieces escape.
- Finish softly. Pull out a few delicate strands around the temples for a relaxed look.
Shorter lengths can make a low bun feel tricky, but a slightly undone finish makes the style easier to manage. A small claw clip can also secure the twist when pins keep slipping. This look works beautifully for office days, family gatherings, and occasions when you want your hair off your neck.
Also Visit : 21 Stunning Blowout Hairstyles for Bouncy, Silky Hair
11. Polished Ponytail

Quick Tip:
For a fuller-looking ponytail, gather your hair at mid-height and secure it with a fabric-covered elastic. Wrap a thin strand around the elastic and pin it underneath for a neat, salon-inspired finish.
A ponytail does not need extra length to look put together. Smooth the crown with a soft brush, then leave the ends slightly curved with a round brush or curling iron. For fine hair, avoid heavy creams near the roots because they can flatten the shape. A few loose front pieces keep the result relaxed.
12. Mini Accent Braids

BEFORE:
Loose shoulder-length hair can sometimes fall forward throughout the day, especially around the temples. Constantly pushing those front pieces back can interrupt an otherwise simple style.
AFTER:
Two small accent braids hold the front sections away from your face while adding visible texture. The rest of your hair stays down, so the style feels playful without taking over your look.
Part your hair as usual, then braid a narrow section above each temple and secure the ends with tiny clear elastics. Keep the braids relaxed rather than pulling them tight, which helps them blend naturally with the surrounding hair. They look especially pretty with loose waves, but they also add detail to straight hair.
13. Flipped-Out Ends

- Start with dry hair. Apply a light heat protectant and brush through your ends to remove tangles.
- Section the hair. Divide your hair into manageable sections, clipping the upper layers out of the way.
- Turn the ends outward. Use a round brush and blow-dryer, or a flat iron with a gentle outward wrist movement, focusing on the last inch.
- Set the shape. Let the ends cool before running your fingers through them.
Flipped ends add movement to a simple shoulder-length cut without requiring full curls. Keep the bend soft rather than creating a sharp hook, especially if you prefer a modern finish. A lightweight hairspray can help the shape last, while a heavy styling cream may pull the ends back down.
14. Sleek Center Part
| Styling Detail | Option A: Air-Dried | Option B: Blow-Dried |
| Overall finish | Natural texture | Smooth and refined |
| Root appearance | Softer, less controlled | More polished and defined |
| Styling time | Minimal | Around 10 to 15 minutes |
| Best technique | Lightweight leave-in product | Paddle brush and heat protectant |
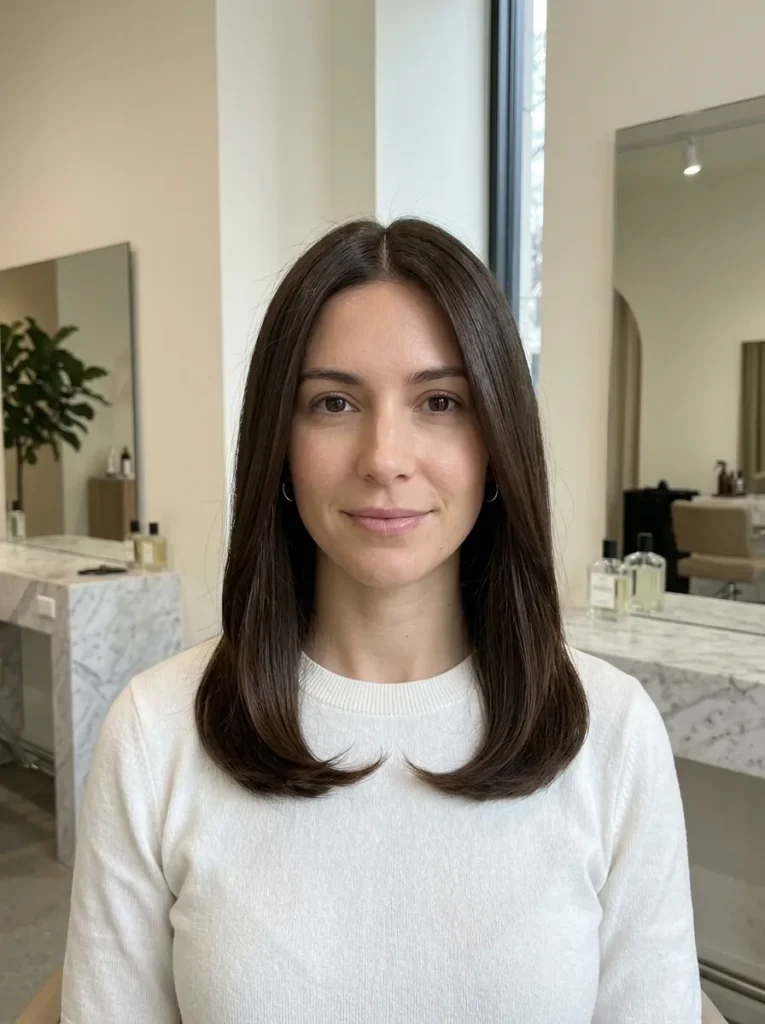
A center part creates a balanced outline that pairs well with straight hair, soft waves, and blunt cuts. For a smoother finish, make the part while your hair is damp, then dry each side downward. If your hair naturally separates elsewhere, use clips at the roots while it dries to help guide the shape.
15. Claw Clip Twist
DO
- Choose a medium claw clip with enough grip for your hair thickness.
- Twist your hair upward from the nape and fold the ends inward.
- Use a small clip or pins to secure layers that escape.
- Leave a little softness around the hairline for a relaxed finish.
DON’T
- Don’t force all your hair into a clip that is too small.
- Avoid twisting tightly if it creates scalp tension.
- Don’t clip wet hair tightly for long periods.
- Skip heavy oils if they make the clip slide out.
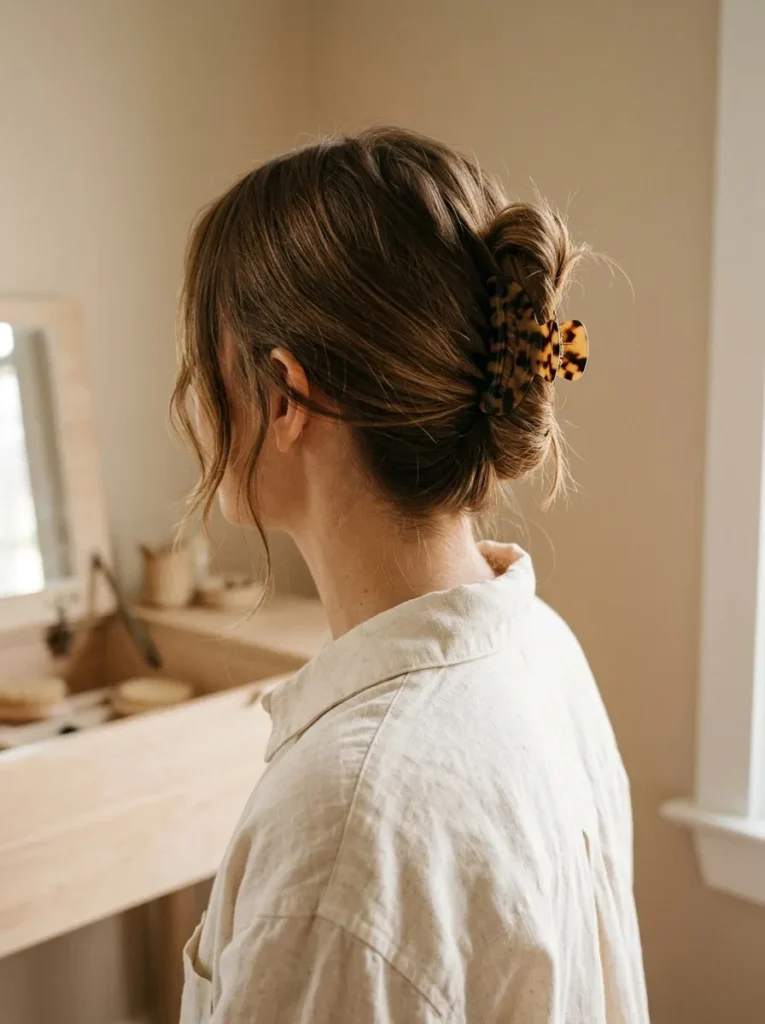
A claw clip is especially useful on busy mornings because it gathers your hair without the pulling that can come from a tight elastic. If your ends are too short to tuck in fully, let them fan out above the clip for a casual finish. A tortoiseshell or matte neutral design pairs easily with everyday outfits.
Also Visit : 24 Flattering Short Bob Hairstyles You’ll Absolutely Love
16. Soft S-Waves

Best For: Straight or slightly wavy hair
Styling Time: 10 to 15 minutes
Skill Level: Beginner to intermediate
Finish: Soft, flowing bends with natural movement
Soft S-waves give shoulder-length hair that polished salon finish without creating tight curls. Start with heat protectant, then use a curling iron to form alternating bends through the mid-lengths, leaving the ends mostly straight. Once the hair cools, gently brush through the waves to create a smooth, connected shape.
17. Air-Dried Natural Texture

Some mornings call for a style that works with your natural texture instead of fighting it. After washing, gently squeeze excess water from your hair with a soft cotton T-shirt or microfiber towel. Apply a lightweight leave-in conditioner, followed by a small amount of mousse if your waves need extra definition.
Resist the urge to brush your hair repeatedly while it dries, because that can separate the natural wave pattern and create frizz. Instead, detangle while the hair is wet, then scrunch gently and let it air-dry undisturbed. I’ve noticed that using less product often gives fine hair more movement, while thicker hair may benefit from a little extra hold.
18. Low Sleek Pony

- Create a clean part. Use a fine-tooth comb to make a center or side part before gathering your hair.
- Smooth the sides. Brush the hair toward the nape and apply a small amount of lightweight styling cream to flyaways.
- Secure the ponytail. Fasten it low with a snag-free elastic that matches your hair color.
- Polish the ends. Straighten or gently curve the ponytail ends to create a neat finish.
- Set the style. Mist a soft-bristle brush with hairspray and smooth the surface lightly.
A low sleek ponytail is a reliable choice for work, formal dinners, and days when you want a clean finish without wearing your hair fully up. Shoulder-length strands may not form a long, flowing tail, but the compact shape looks intentional. Keep the elastic secure without pulling so tightly that your scalp feels uncomfortable.
19. Messy Tousled Lob
Styling Time: 5 to 10 minutes
Skill Level: Beginner
Best For: Fine to medium hair with natural movement
Finish: Soft, undone texture with relaxed volume
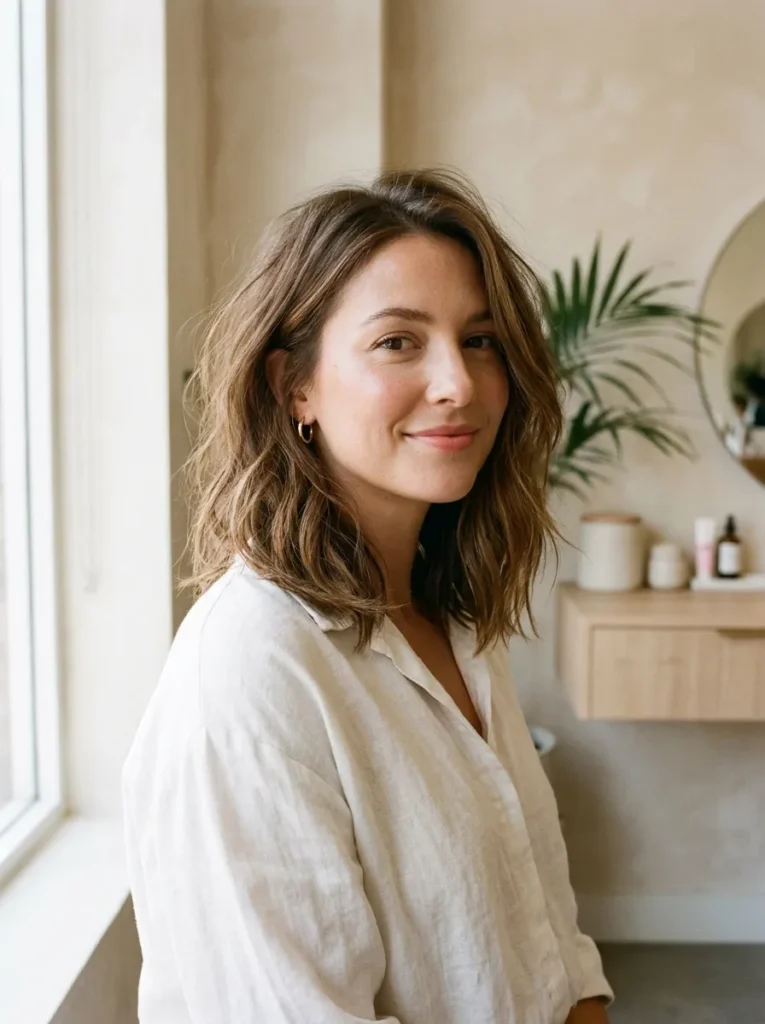
A tousled lob looks best when the strands have movement rather than perfect uniformity. Work a small amount of texturizing spray through dry hair, then twist a few random sections around your fingers. Gently lift the roots and separate the ends with your hands. Leave some pieces smoother for a natural, slightly undone finish.
20. Curled Under Ends

Curled-under ends give shoulder-length hair a neat, rounded shape that works beautifully for everyday outfits and office wear. Start by blow-drying small sections with a round brush, turning the brush inward as you reach the tips. Keep the bend gentle so the hair follows the jawline and neck naturally.
For a quick refresh, lightly mist the ends with water and reshape them with a brush and blow-dryer. A small amount of smoothing cream helps control flyaways, especially around the nape. This finish works well on blunt cuts and soft layers, giving the outline a tidy appearance without making the whole hairstyle look overly formal.
Also Visit : 22 Edgy Short Haircuts for a Bold, Confident New Look
21. Headband Hairstyle

- Choose the right band. A fabric or padded headband adds a stylish detail, while a slim band creates a more understated finish.
- Position it comfortably. Place the band just behind your hairline without pressing too tightly against your temples.
- Add root volume. Lift the hair gently at the crown with your fingertips before positioning the band.
- Style the lengths. Wear your ends straight, softly waved, or naturally textured.
- Tame flyaways. Smooth a little lightweight styling cream over loose strands around the hairline.
A headband can make second-day hair look more intentional without requiring heat styling or complicated sectioning. It is especially useful when the front pieces refuse to stay in place or your roots need a quick refresh. Choose a shade that complements your outfit, and make sure the band feels comfortable throughout the day.
22. Elegant Side Sweep
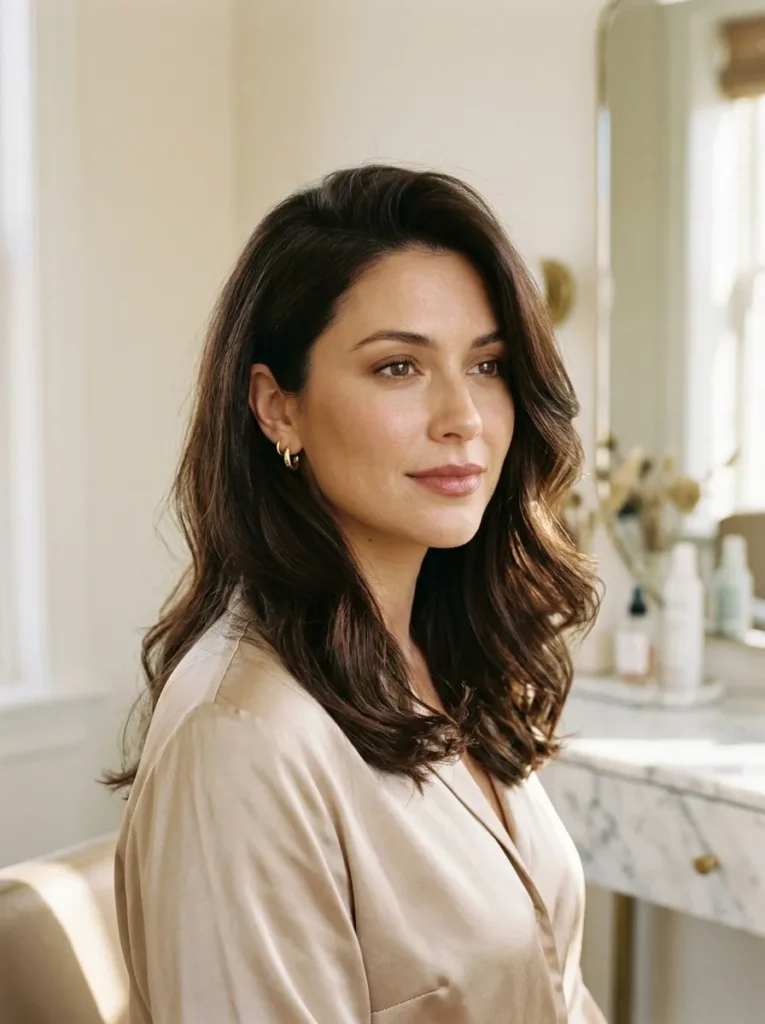
Best For: Straight, wavy, or softly layered hair
Styling Time: 5 to 10 minutes
Skill Level: Beginner
Finish: Side-swept volume with a polished outline
A simple change in your part can give familiar shoulder length hairstyles an entirely different feel. Create a deep side part while your hair is slightly damp, then blow-dry the roots in the opposite direction before sweeping them into place. Add a loose bend through the ends if you want more movement. A light mist of flexible-hold hairspray helps maintain the shape without making the hair stiff.
23. Braided Crown Detail

A delicate braided crown adds detail to shoulder-length hair without requiring a long ponytail or elaborate updo. Begin by parting your hair slightly off-center and taking a small section near one temple. Create a simple three-strand braid, guiding it across the top of your head toward the opposite side.
Secure the braid discreetly with bobby pins that match your hair color, then loosen its edges gently for a fuller appearance. Leave the remaining lengths loose and add soft waves if desired. This style works particularly well for outdoor gatherings, brunches, and casual celebrations. For fine hair, a little texturizing spray can help the braid hold its shape.
24. Voluminous Blowout

- Apply heat protectant. Distribute it evenly through towel-dried hair before using a blow-dryer.
- Build root lift. Direct the airflow upward at the roots while lifting sections with a round brush.
- Shape the lengths. Work in manageable sections, rolling the brush through the mid-lengths and gently turning the ends.
- Let sections cool. Allow each section to cool in its rounded shape before brushing through the hair.
- Finish lightly. Use a small amount of shine serum on the ends and flexible-hold hairspray for lasting movement.
A bouncy blowout gives shoulder-length layers a fuller, salon-finished appearance while keeping the overall style wearable. Choose a medium round brush for controlled volume or a larger one for softer curves. Keep the dryer moving to avoid concentrating heat in one spot, and finish with your fingers rather than repeatedly brushing away the bounce.
CONCLUSION
The right shoulder length hairstyles can make your daily routine simpler while giving you plenty of ways to change your look. Choose soft waves for movement, a sleek ponytail for busy days, or a claw-clip twist when you want your hair up in minutes. Start with the idea that best matches your texture, tools, and schedule, then adjust it until it feels like you. Save this guide on Pinterest so your favorite styles are easy to find later, and share it with a friend looking for fresh hair inspiration. A small styling change can be the start of a look you love.