20 Space Buns for Natural Hair Ideas That You’ll Love
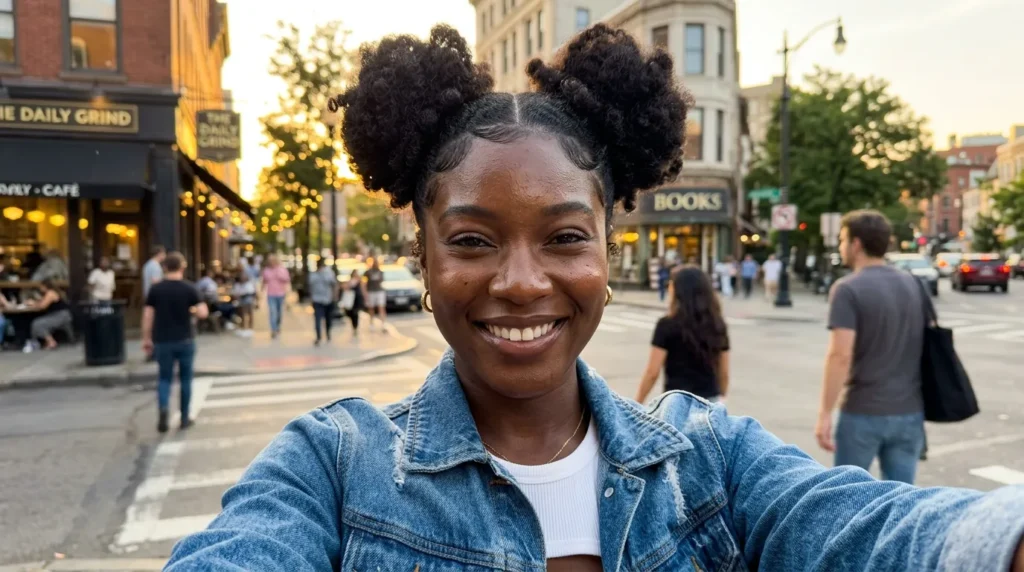
Looking for a quick way to style your curls that is both incredibly cute and keeps your ends protected? You are in the right place.
Double knots are the ultimate style hack when you want a fun look that completely protects your hair. Mastering space buns for natural hair gives you an easy, go-to style for busy mornings or weekend hangouts.
In my experience as a stylist, these playful buns are unmatched for locking in moisture. They keep your delicate ends tucked away safely while celebrating your gorgeous natural volume and texture.
1. Space Buns for Natural Hair
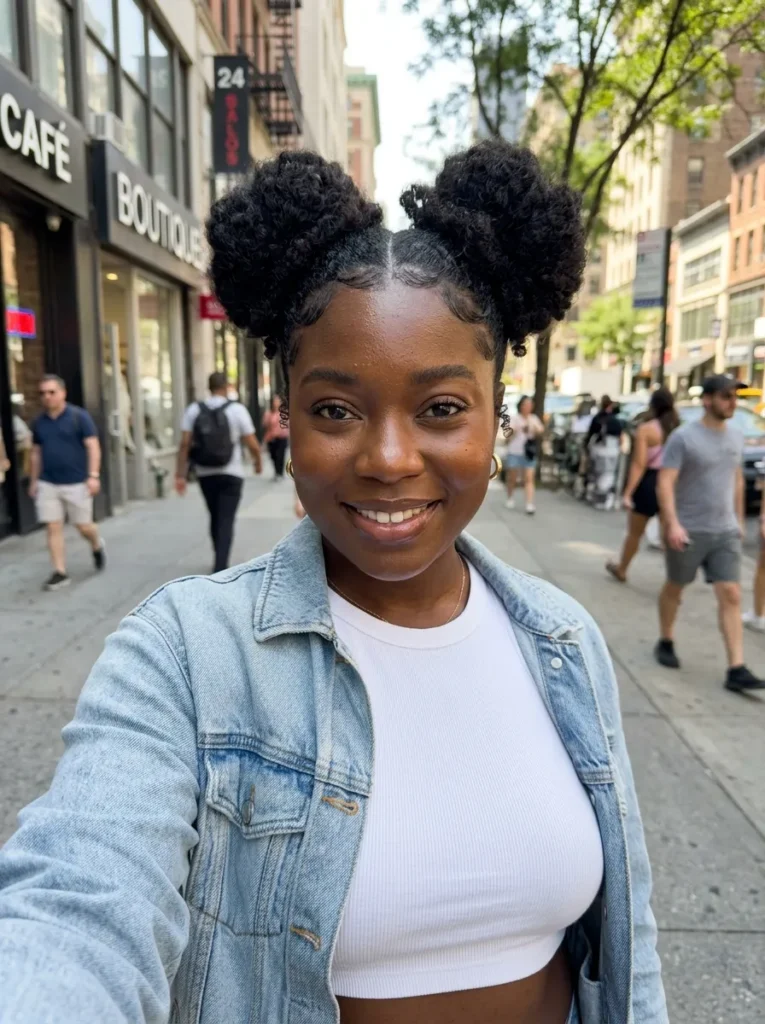
Rocking this classic look is a surefire way to bring fun energy to your everyday style. I always love how these double buns frame the face while keeping your curls tucked away safely. It is a fantastic choice for running errands or grabbing coffee with friends.
In my experience, you do not need completely straight roots to make this work. Embrace your natural texture and let those curly edges show. A good edge control gel will hold the front smooth while your natural volume gives the buns that perfectly thick, beautiful shape.
- Best For: Thick type 4 curls, medium length, round face shapes.
- Maintenance Level: Low. Just tie them up with a silk scarf at night.
- Time Needed: 15 minutes.
- Pro Tip: Use gentle, snag-free hair ties to prevent breakage when wrapping your thick curls.
2. Half Up Space Buns
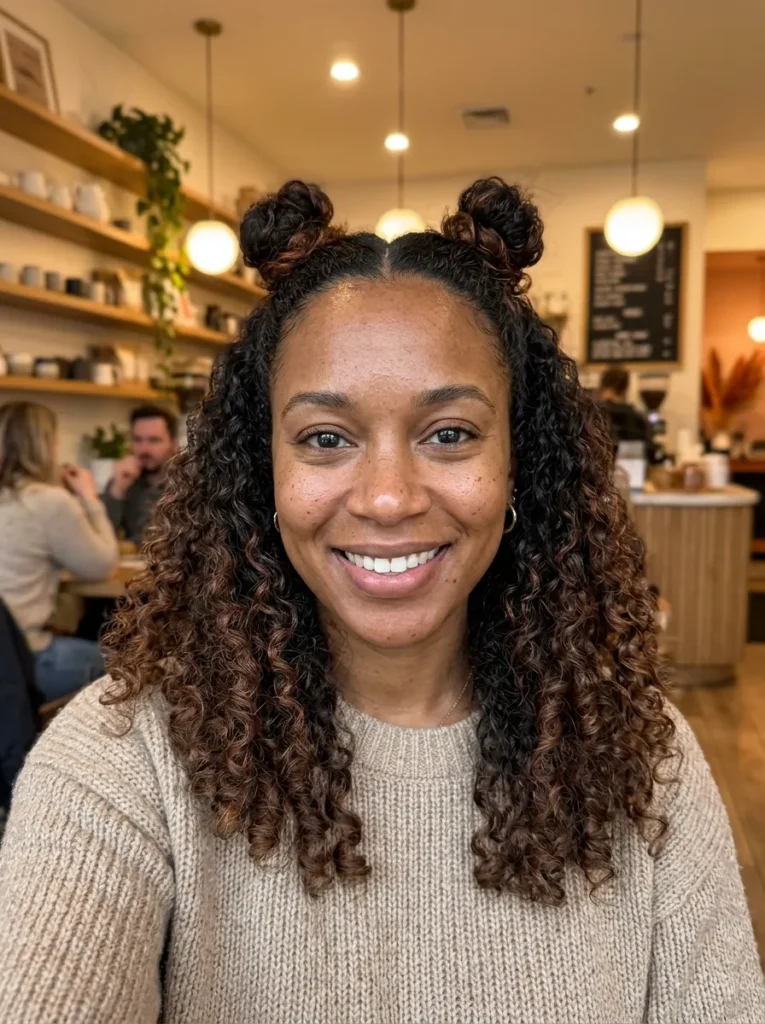
If you cannot decide between wearing your curls down or putting them up, this is your answer. I have noticed this half-up look is super popular right now on social media. It gives you the best of both worlds with a really playful, cute energy.
Leaving the back section of your natural curls loose shows off your length and texture. You just section off the top half to create two mini buns. It is a great way to style an old wash-and-go when the front starts getting a little frizzy.
- Best For: Type 3 and 4 hair, shoulder-length, oval face shapes.
- Maintenance Level: Medium. The loose hair in the back needs daily refreshing.
- Time Needed: 20 minutes.
- Pro Tip: Fluff the loose curls in the back with a hair pick to add extra volume.
3. Braided Front Double Buns
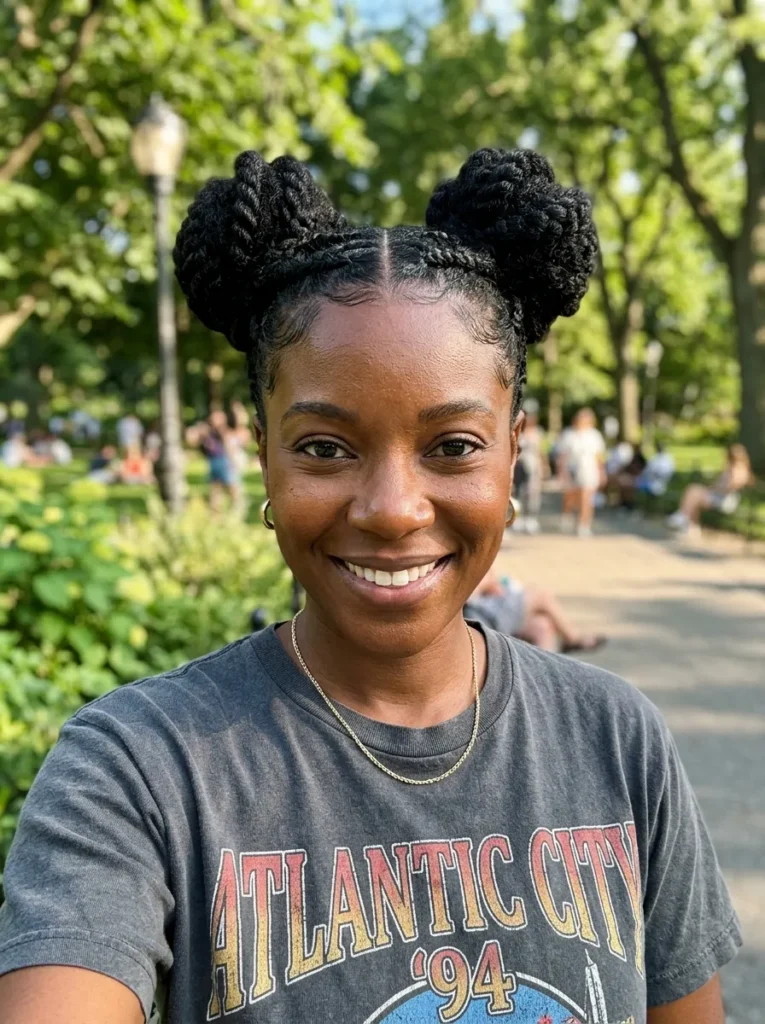
Adding braids to the front of your style brings a really cool, detailed look to your everyday buns. I love how a couple of simple cornrows or flat twists completely change the whole vibe. It adds a neat, polished touch that looks like it took hours.
This is an amazing protective option because it secures your delicate front edges. Once you braid the front sections back, gather the rest of your hair into two high buns. Your curls stay protected and tucked away, helping you lock in moisture for days.
- Best For: Thick natural hair, medium to long length, heart-shaped faces.
- Maintenance Level: Low. The braids keep the front neat for almost a week.
- Time Needed: 35 minutes.
- Pro Tip: Apply a light oil to your scalp between the braids to stop any itching.
4. Messy Curly Space Buns
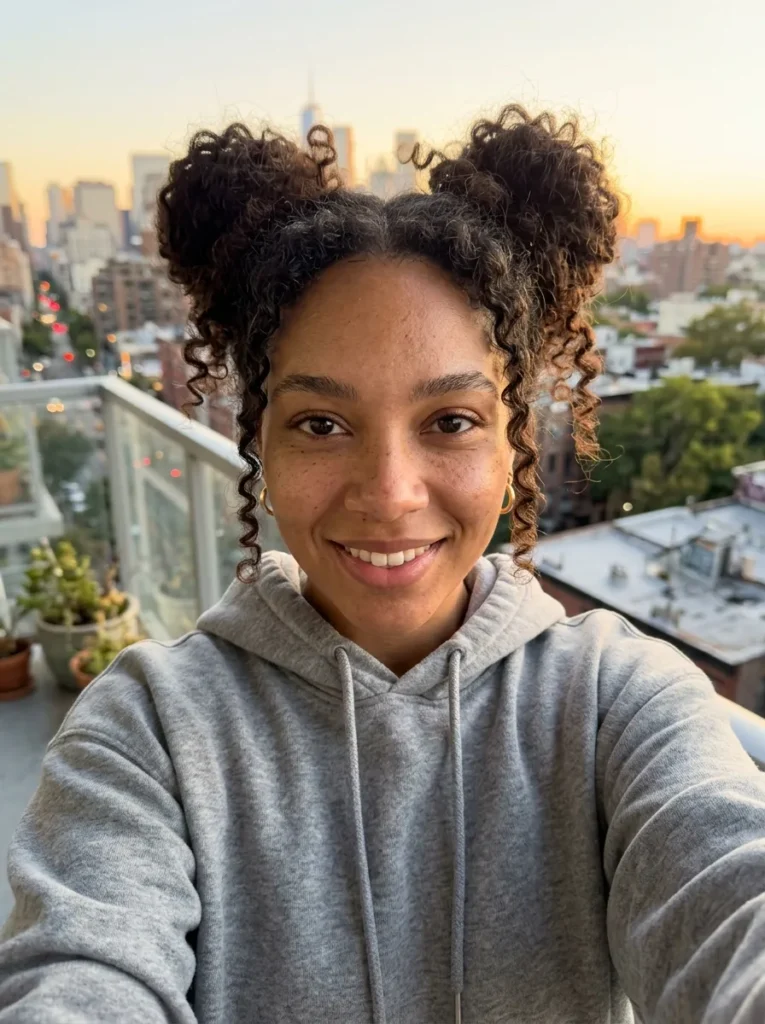
Sometimes perfection is totally overrated. These messy double buns celebrate the wild, beautiful nature of your thick curls. I think leaving some pieces loose and letting the buns look slightly undone gives off a really effortless, cool street style attitude that works for any casual day.
You do not need to worry about slicking down every single flyaway here. Just loosely gather your curls and pin them into shape, letting the ends stick out a bit. It is my favorite quick fix for days when your twist-out does not go as planned.
- Best For: High density natural hair, short to medium length, square face shapes.
- Maintenance Level: Low. The messier it gets over time, the better it looks.
- Time Needed: 10 minutes.
- Pro Tip: Pull out two small curly pieces right at the front of your ears to soften the look.
5. Low Chunky Space Buns
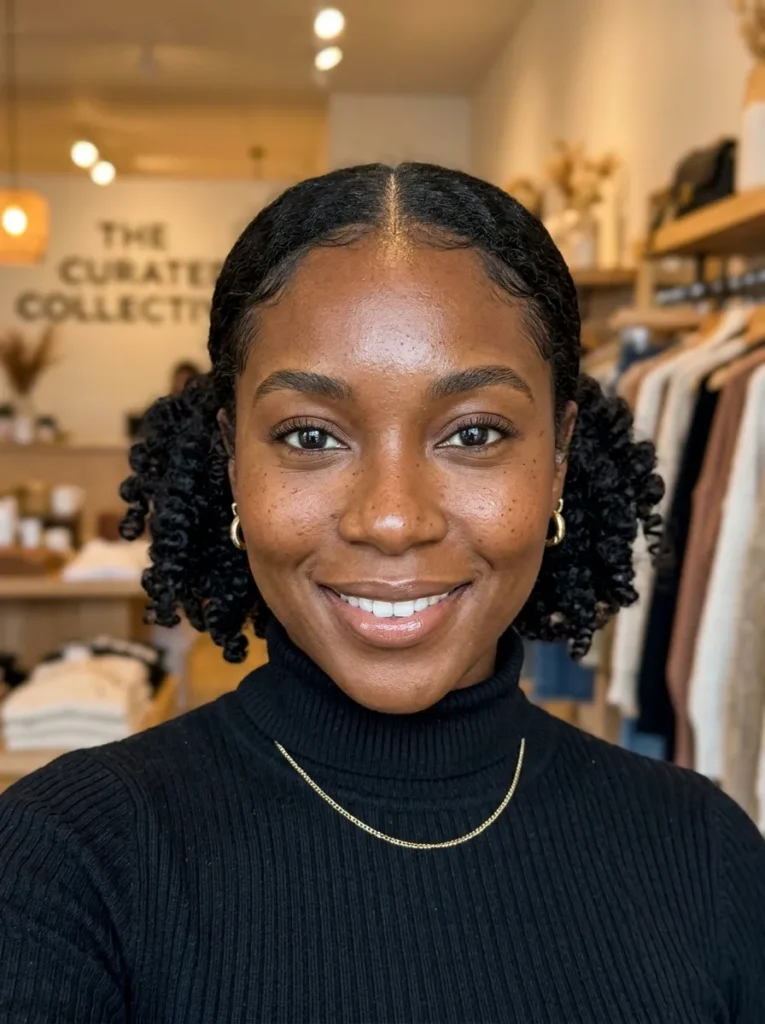
If high styles give you a headache, dropping the buns down to the nape of your neck is totally the move. This low placement feels very chic and relaxed. It is a fantastic option if you are wearing hats during winter but still want a cute style.
I always suggest this look for people with super thick hair who find high puff styles too heavy. Part your hair down the middle and secure two thick buns right behind your ears. It keeps the hair off your neck while showing off your amazing volume.
- Best For: Very thick hair, all lengths, diamond and oval face shapes.
- Maintenance Level: Low. They are easy to sleep on without ruining the shape.
- Time Needed: 15 minutes.
- Pro Tip: Use bobby pins instead of tight bands to secure the buns if your scalp is sensitive.
Also Visit : 20 Curly Crochet Hair Styles You’ll Want to Copy Now
6. Zig Zag Part Double Buns
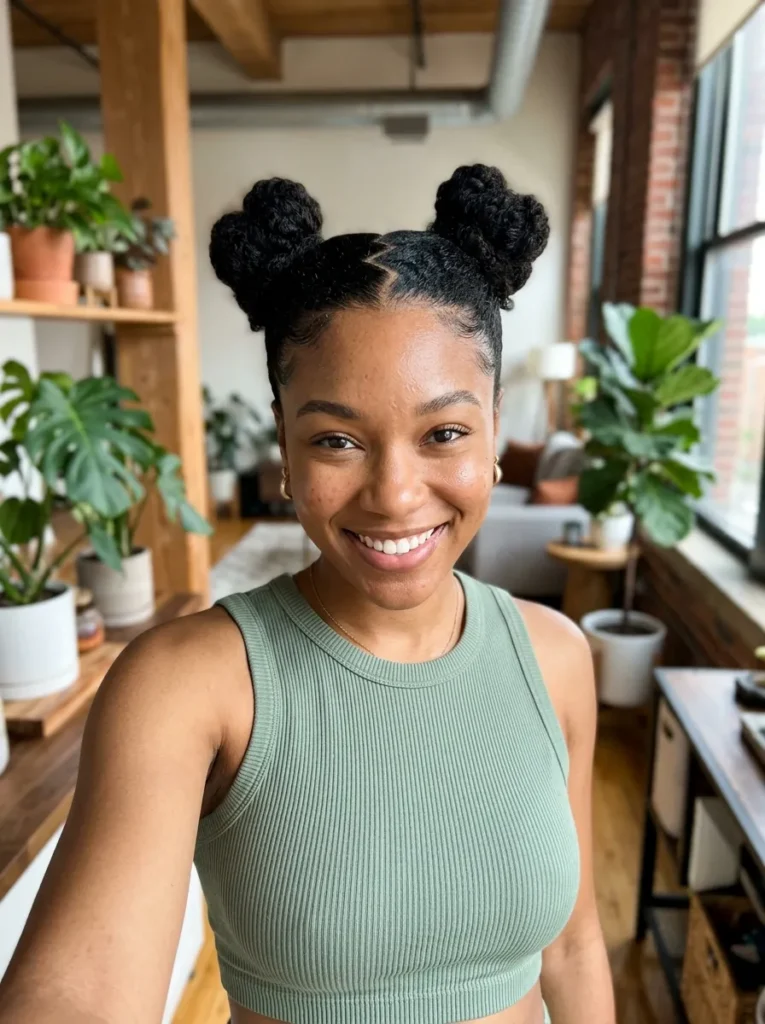
A fun part is the easiest way to make a simple style pop. I absolutely love how a zig zag part adds instant character to double buns. It takes a classic look and gives it a trendy 90s twist without needing any extra accessories.
You do need a little patience and a rat tail comb to get the lines straight. In my experience, using a styling gel right on the part helps the sections stay clean. Once the part is done, just twist up your thick curls into two cute knots.
- Best For: All curl types, medium length, oval face shapes.
- Maintenance Level: Medium. The part needs to stay crisp to look good.
- Time Needed: 20 minutes.
- Pro Tip: Use the metal tip of your comb to draw the zig zag lines for the sharpest finish.
7. Mini Twists Top Knots
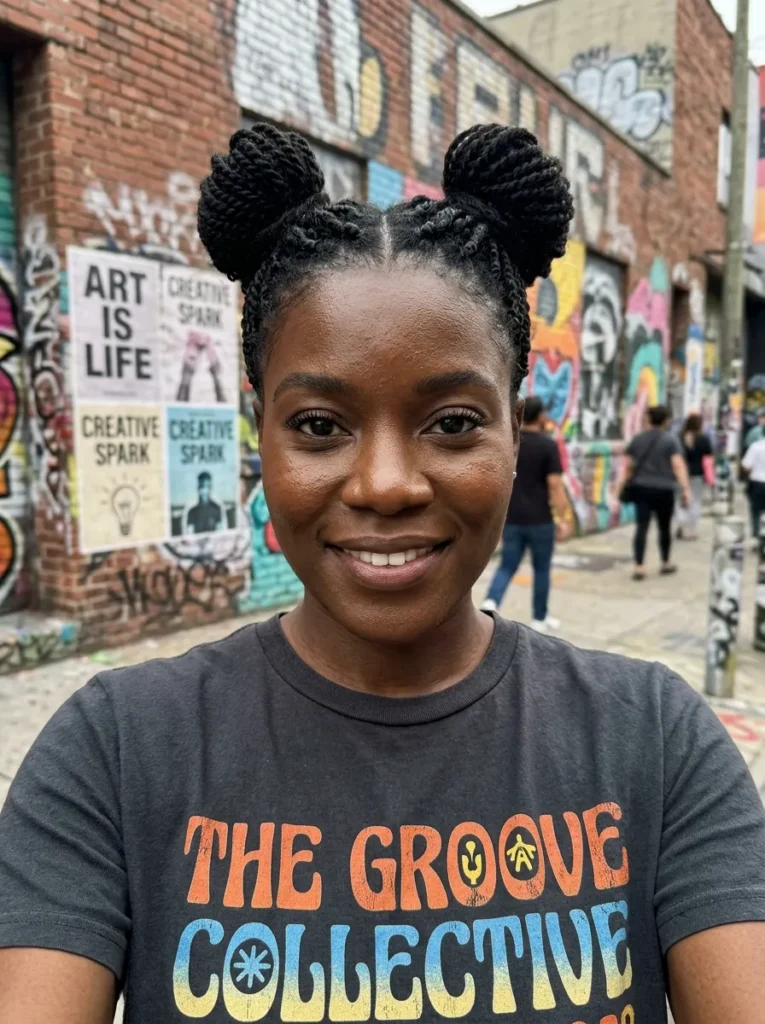
If you already have your hair in mini twists, this is a great way to switch things up. I think gathering those twists into two high knots looks incredibly stylish. It gets the hair out of your face while showing off all your hard work.
This is basically a protective style on top of another protective style. I have noticed it keeps your ends super safe from the weather. Just grab the top sections of your twists and wrap them around each other gently so you do not cause any tension.
- Best For: Pre-twisted natural hair, medium to long length, round faces.
- Maintenance Level: Low. Twists hold their shape beautifully inside the buns.
- Time Needed: 5 minutes (if hair is already twisted).
- Pro Tip: Tuck the ends of your twists carefully under the bun base to hide them cleanly.
8. Bantu Knots Meets Buns
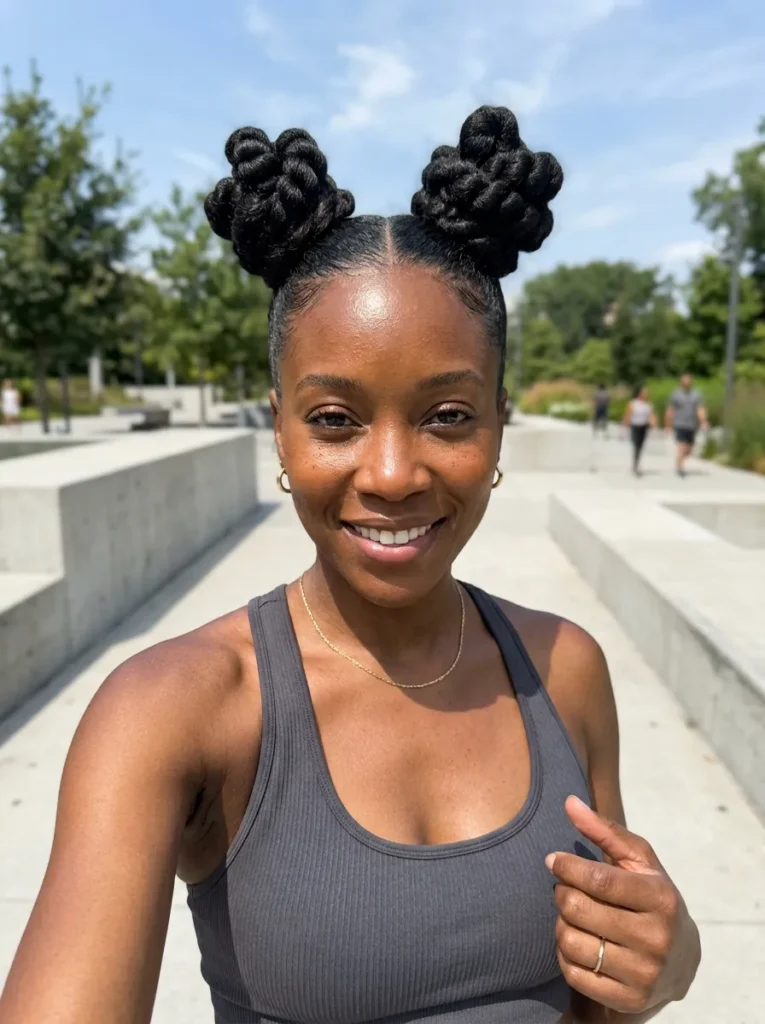
Combining the tight, coiled look of bantu knots with larger buns is a genius move. I love doing this when I want a really sculpted, artistic shape. Instead of making standard loose buns, you twist the hair tightly until it wraps completely around itself.
The result is two sleek, structured knots that sit high on your head. In my experience, this style holds up against wind and humidity better than anything else. It is perfect for outdoor events or busy days when you cannot check a mirror often.
- Best For: Type 4 hair, medium length, heart-shaped faces.
- Maintenance Level: Low. They are wrapped tight and stay put all day.
- Time Needed: 15 minutes.
- Pro Tip: Apply a little edge control down the length of the hair before twisting for a smooth finish.
9. Jumbo Puff Double Buns
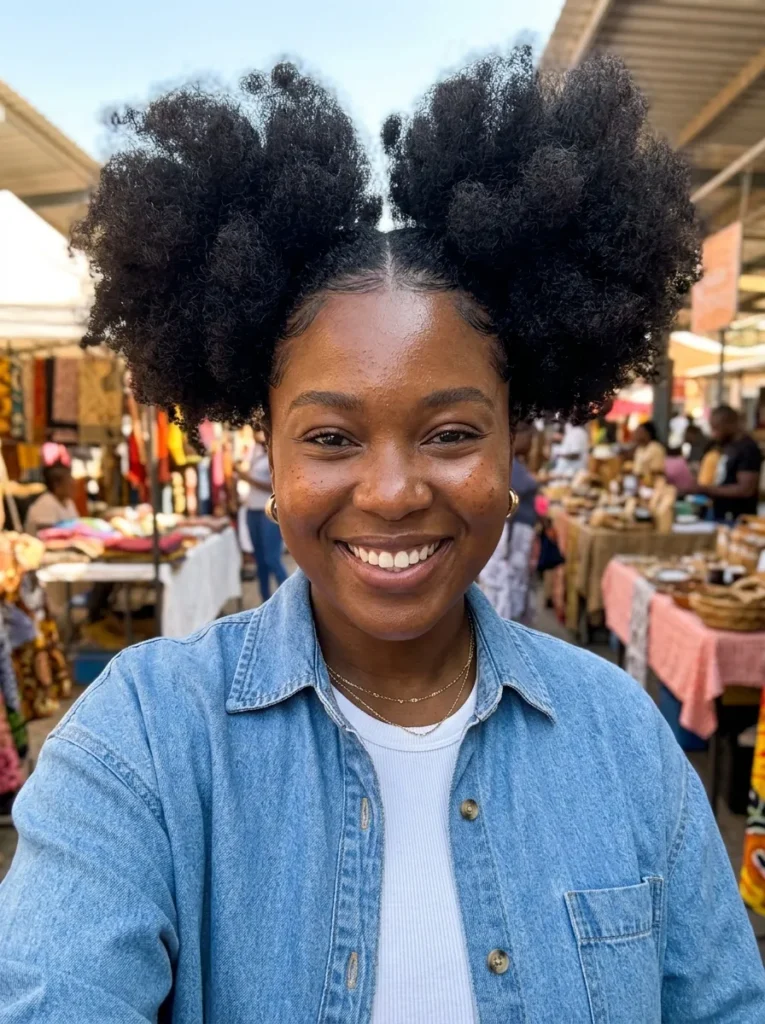
Big hair is always a good idea, and these jumbo puffs bring massive volume. I always recommend this style for girls with super dense curls who want to show off their texture. It makes a huge statement and looks incredibly beautiful from every single angle.
Instead of wrapping the hair tight, you want to leave the buns loose and puffy. I have found that picking out the roots slightly helps create that giant, fluffy shape. Just secure the base lightly and let your curls explode outwards into two massive clouds.
- Best For: High density type 4 hair, medium to long length, square faces.
- Maintenance Level: Medium. The puffs might shrink throughout the day in humid weather.
- Time Needed: 10 minutes.
- Pro Tip: Sleep with your hair in a banding method the night before to get maximum stretch and size.
10. Slicked Back Elegant Buns
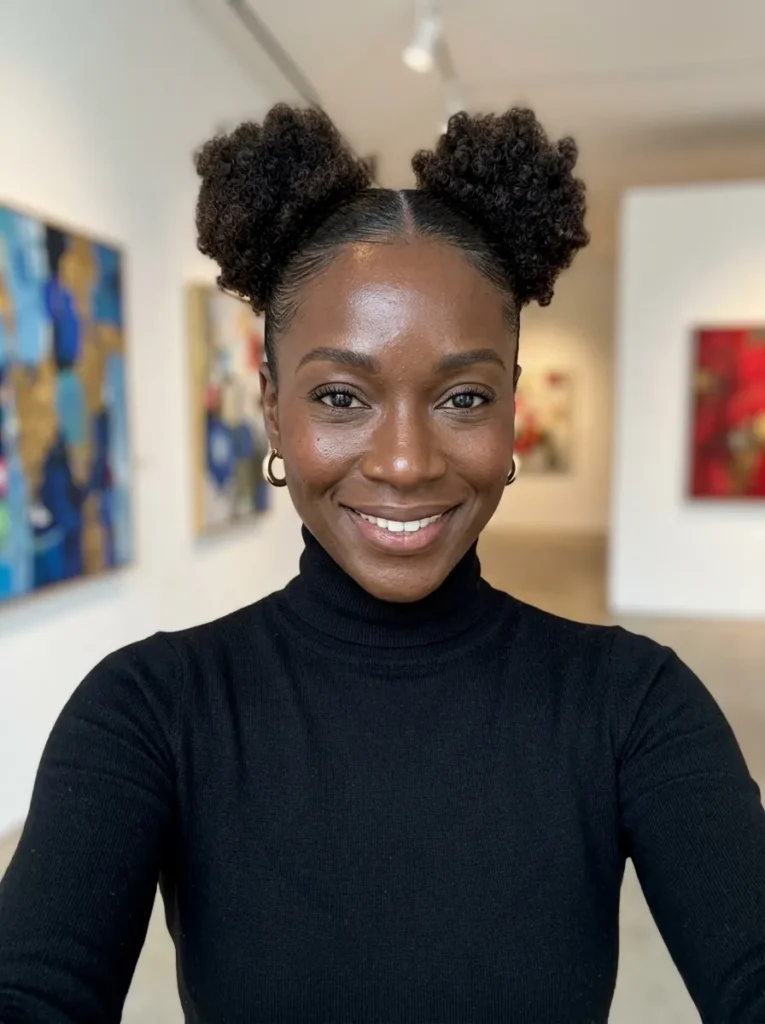
For a date night or formal event, this slicked back version is incredibly classy. I love how a super smooth front contrasts with the textured curls in the buns. It gives you a clean, gorgeous look that pairs perfectly with nice earrings and pretty makeup.
To get this right, you need a firm hold gel and a good bristle brush. I always apply the gel on slightly damp hair to help it lay down flat. Brush it back tightly into two ponytails, then softly pin your curls into neat rounds.
- Best For: All natural hair types, any length, diamond face shapes.
- Maintenance Level: High. You need to keep the front perfectly slicked down.
- Time Needed: 25 minutes.
- Pro Tip: Tie a silk scarf around your edges for 10 minutes after styling to lay them perfectly flat.
11. Locs Double Buns
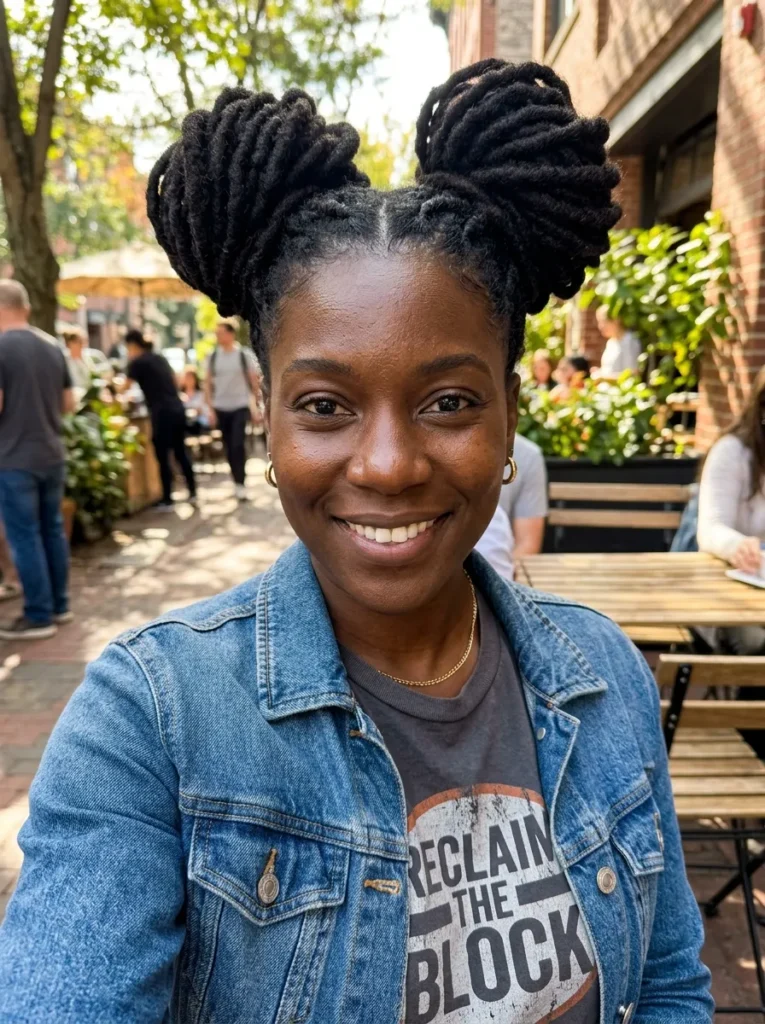
If you have dreadlocks, this double bun style is an absolute must-try. I love how thick locs give these buns amazing texture and a huge, bold shape. It is a super easy way to keep long locs out of your face during busy days.
You do not need tight hair ties that might damage your hair. In my experience, you can just use two of your own locs to wrap and tie the bases securely. The result looks incredibly neat and works for any casual or dressy event.
- Best For: Thick locs, medium to long length, round face shapes.
- Maintenance Level: Low. Locs hold their shape perfectly all day.
- Time Needed: 10 minutes.
- Pro Tip: Use strong open-ended hair pins to secure heavy locs without causing tension at the roots.
12. Glitter Roots Two Buns
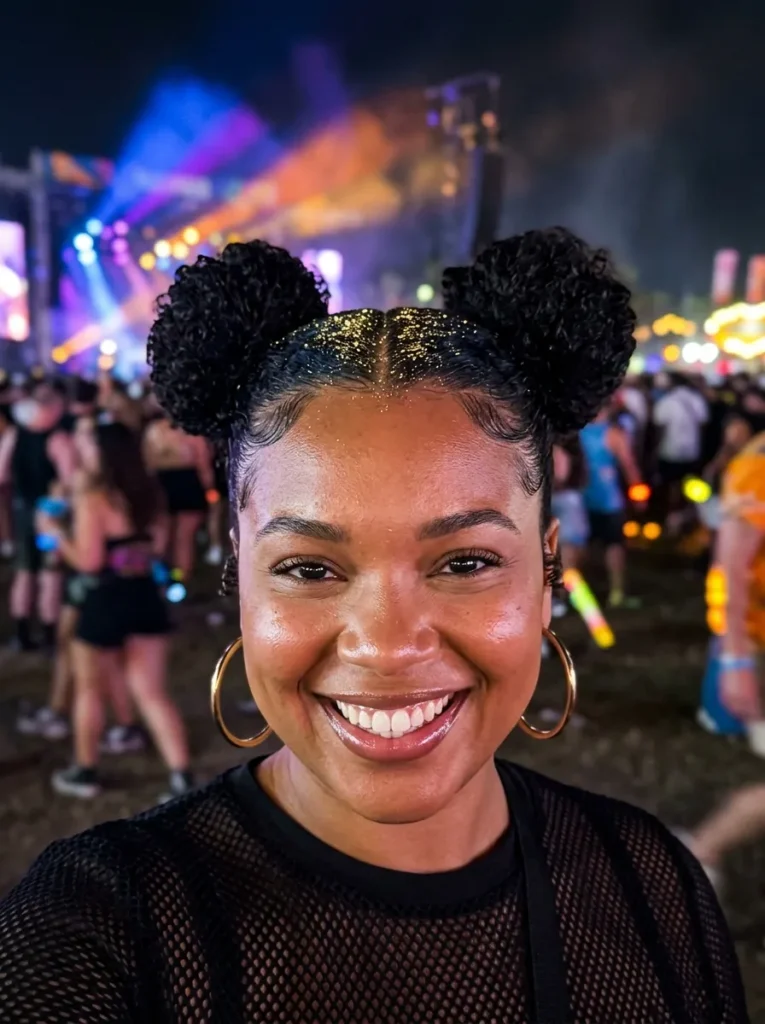
Heading to a festival or a fun party? Adding glitter to your middle part takes your double buns to a whole new level. I think it is the perfect excuse to play with color and make your natural hair the center of attention.
Keep the buns simple and let the shiny roots do all the talking. I have noticed that mixing chunky cosmetic glitter with clear hair gel makes it super easy to apply. You just paint it right down your middle part with a small makeup brush.
- Best For: All natural curls, any length, oval face shapes.
- Maintenance Level: High. Glitter can get messy and flake if you touch it.
- Time Needed: 20 minutes.
- Pro Tip: Wash the glitter out easily by soaking your roots in a cheap conditioner before using shampoo.
13. Accessorized Gold Cuff Buns
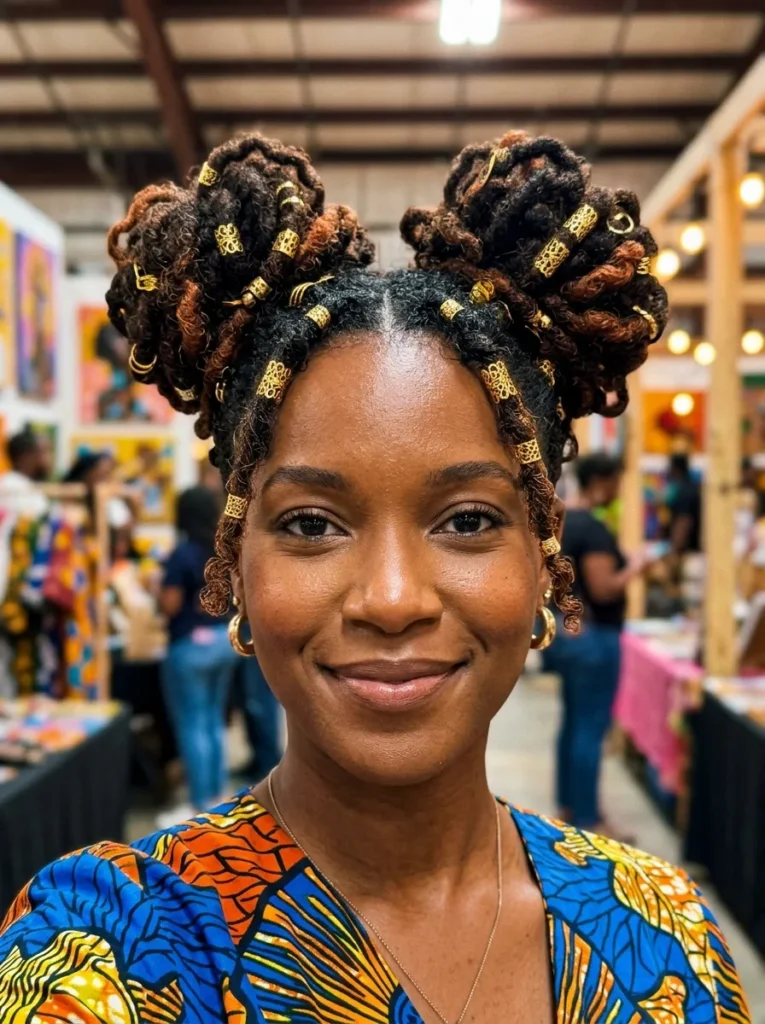
Putting small gold cuffs into your hair adds a beautiful touch of jewelry to your everyday look. I always love how gold contrasts nicely against rich, dark natural hair. It makes a basic protective style look expensive and totally ready for photos.
You can clip these little metal rings right onto the front sections of your hair. In my experience, sliding a few cuffs into the actual buns also catches the light beautifully. It is a quick detail that gets so many compliments.
- Best For: Type 3 and 4 hair, medium length, heart-shaped faces.
- Maintenance Level: Medium. The cuffs can sometimes slide down if not pinched tight.
- Time Needed: 15 minutes.
- Pro Tip: Buy adjustable metal cuffs so you can squeeze them gently onto your thickest curls without snagging.
14. Fluffy Blowout Double Knots
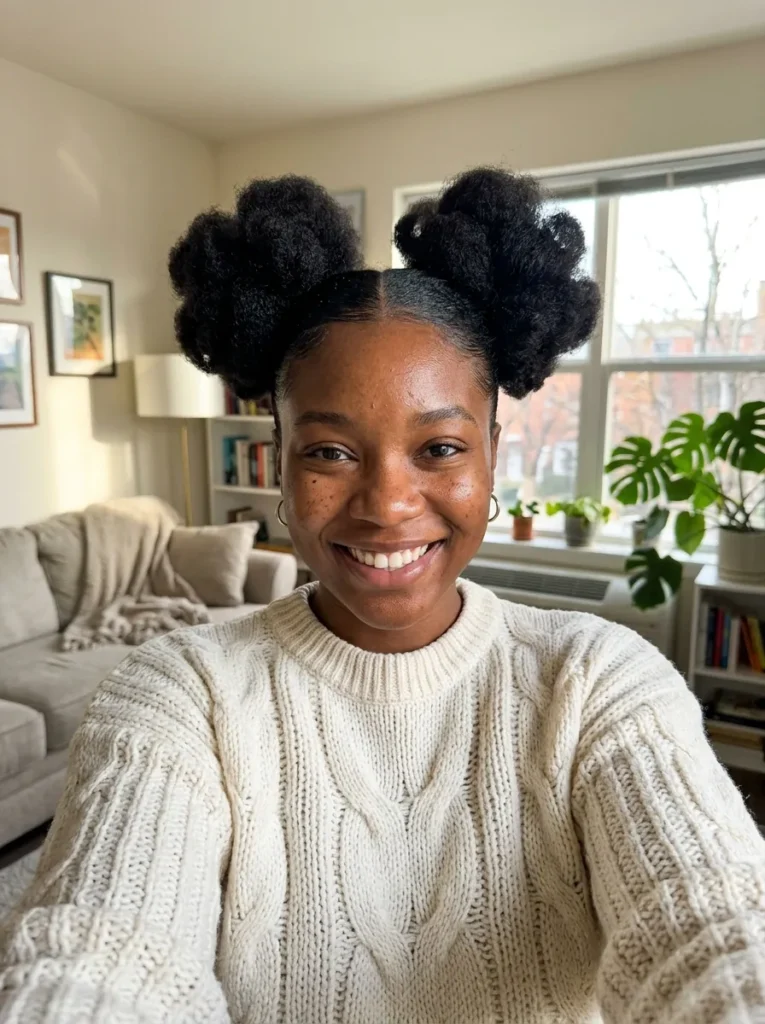
If you just blew out your natural hair, this fluffy style is a fantastic way to wear it. The stretched texture makes the buns look incredibly smooth and soft. I think it gives off a very relaxed, breezy vibe for the weekend.
Because your hair is stretched, the buns will have a totally different shape than curly knots. I have found that loosely rolling the blown-out hair keeps the volume looking huge. It is a great way to enjoy your blowout before wash day.
- Best For: Blown-out natural hair, medium to long length, square face shapes.
- Maintenance Level: Medium. Humidity will make the blown-out roots revert quickly.
- Time Needed: 20 minutes (not including blowout time).
- Pro Tip: Use a light holding spray instead of heavy gels so your stretched hair stays soft and fluffy.
15. Braided Back Double Buns
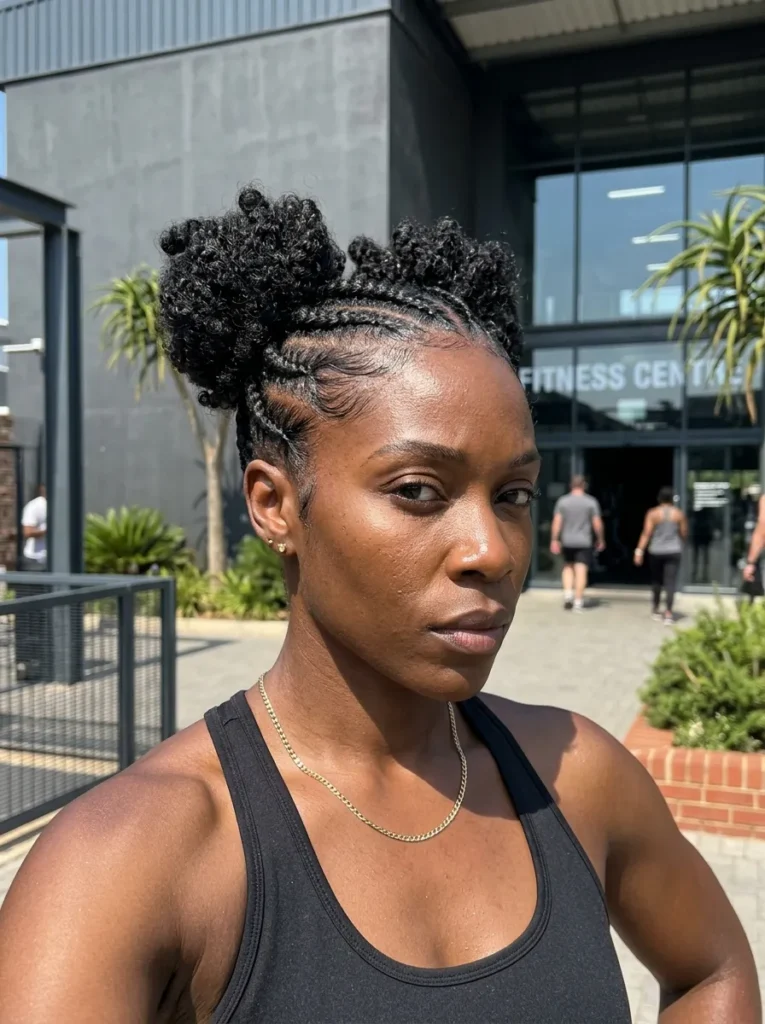
This look is a cool surprise when you turn around. Instead of braiding the front, you braid the back of your head going upwards. I love how this neat detail keeps the hair off your neck while creating cute buns on top.
You will have to flip your head upside down to do this right. In my experience, feeding the back braids directly into the top knots makes the style really secure. It is awesome for gym days when you need everything locked in place.
- Best For: Thick type 4 curls, medium length, diamond face shapes.
- Maintenance Level: Low. The upside-down braids hold the back hairs super tight.
- Time Needed: 30 minutes.
- Pro Tip: Use a three-way mirror to check your parts in the back before you start braiding upwards.
16. Twisted Front Double Buns
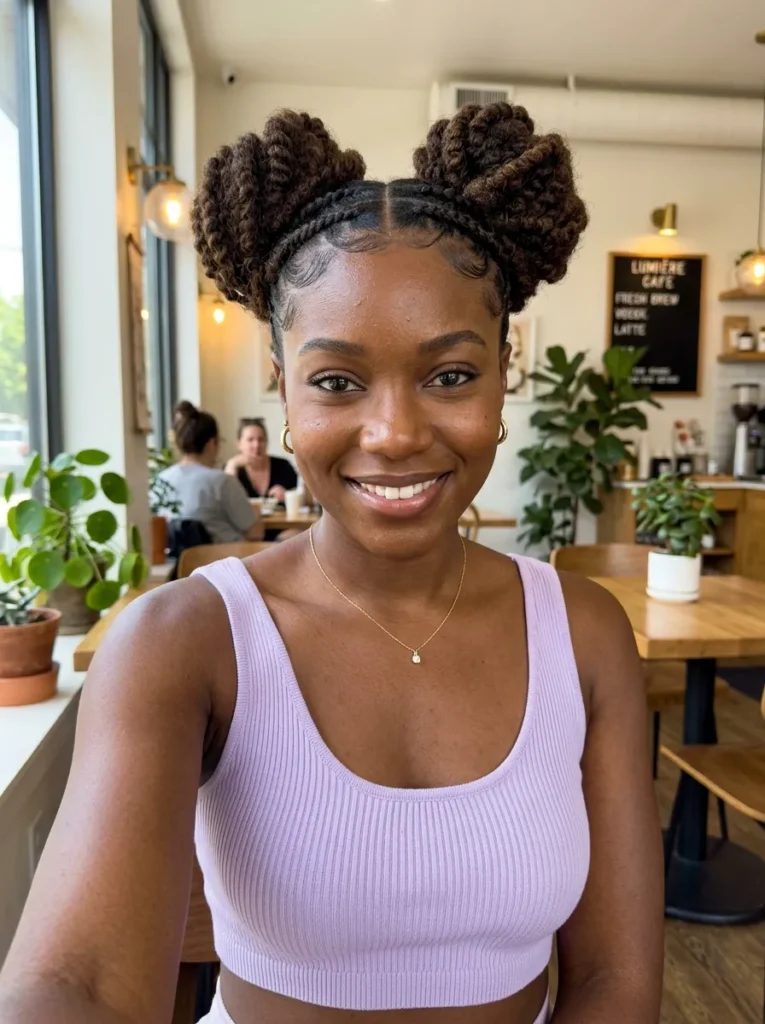
Flat twists are a great alternative if you do not know how to cornrow. I always use them to pull the front sections back smoothly. It gives the double buns a really nice texture and keeps your edges looking very neat all day long.
This is one of my favorite quick fixes for an old wash-and-go. You just twist the front pieces and wrap the rest of your curls into two knots. In my experience, it hides frizzy roots perfectly and makes you look put together instantly.
- Best For: Thick natural curls, medium length, round face shapes.
- Maintenance Level: Low. Flat twists hold better than loose hair.
- Time Needed: 20 minutes.
- Pro Tip: Use a rich twisting cream on the front sections so the flat twists stay juicy and smooth.
17. Color Block High Knots
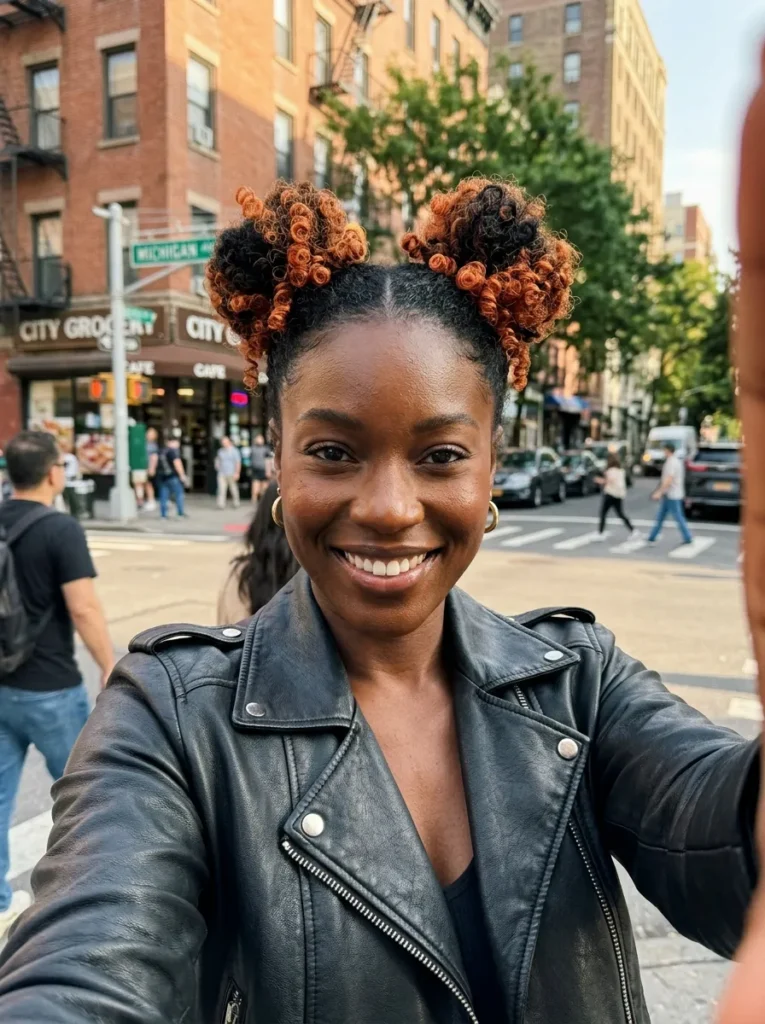
Playing with color makes double buns look so cool. If you have dyed tips or a skunk stripe, this style shows off those different shades perfectly. I love how the colored pieces swirl around the dark roots to create a beautiful, eye-catching pattern.
You do not need permanent dye to get this fun look. I have noticed that temporary hair wax works amazing on dark curls. You can paint a bright color on the ends of your hair before wrapping the buns for a totally temporary change.
- Best For: Colored natural hair, medium length, oval face shapes.
- Maintenance Level: Medium. Temporary color wax might transfer if touched.
- Time Needed: 15 minutes.
- Pro Tip: Apply color wax to slightly damp hair so it spreads evenly before you form the buns.
18. Face Framing Curly Bangs
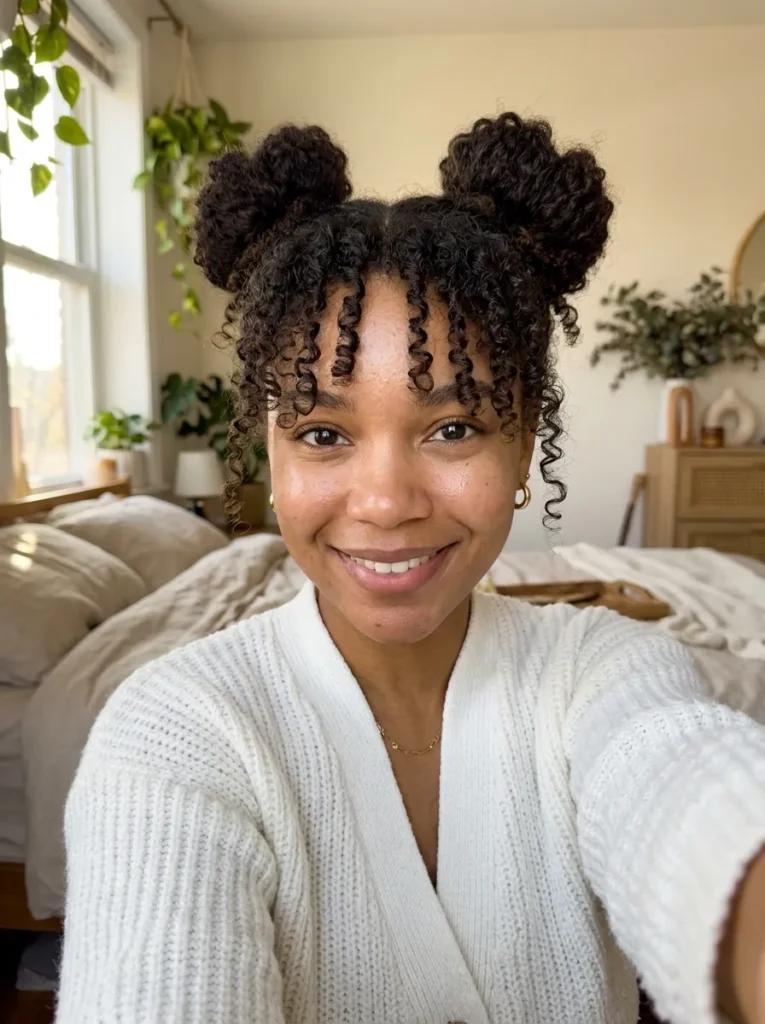
Leaving a few curly pieces right in the front softens your entire face. I think curly bangs pair so beautifully with double knots on top. It gives the style a very sweet, romantic feel that is perfect for a weekend brunch date.
Make sure you do not pull the front too tight when creating your parts. In my experience, loosely defining a few curls over your forehead completely changes the shape. It is a great trick if you want to balance out a larger forehead.
- Best For: Type 3 curls, medium to long length, heart-shaped faces.
- Maintenance Level: Medium. The front bangs need refreshing each morning.
- Time Needed: 15 minutes.
- Pro Tip: Twirl the front bang pieces around your finger with a little gel to define the ringlets.
19. Criss Cross Rubber Band Buns
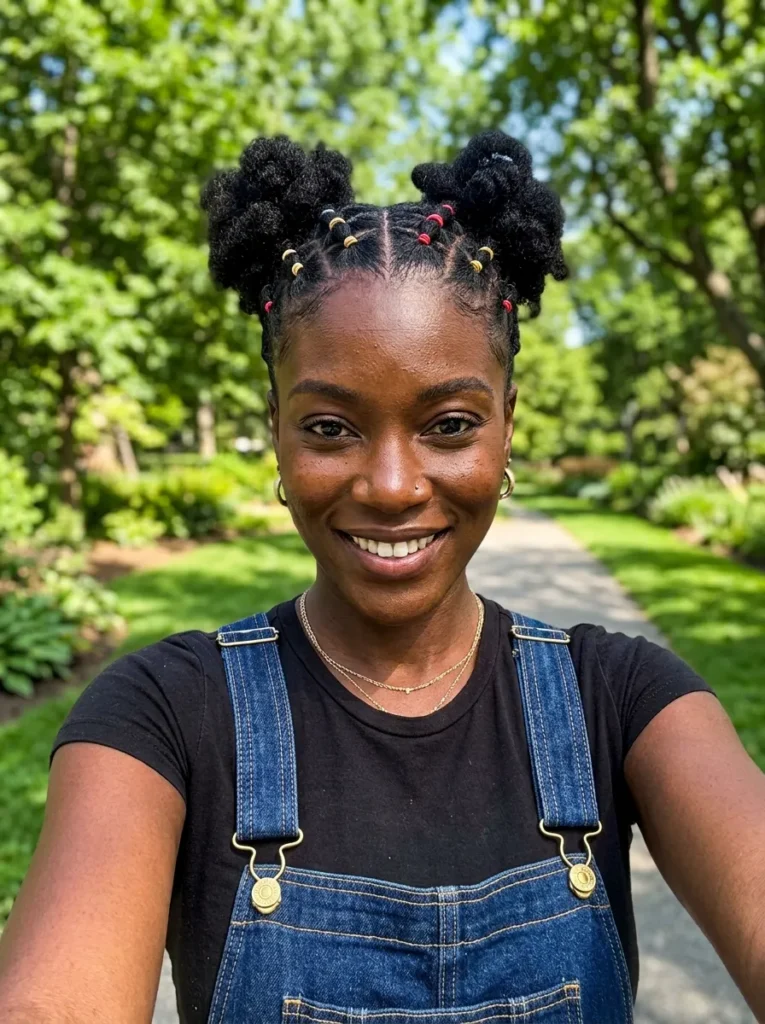
Rubber band hairstyles are super popular, and adding a criss-cross pattern to the front looks amazing. I love how the tiny sections make a really cool geometric design. It takes a normal protective style and makes it look like a piece of art.
You will need some tiny elastics and patience to get the boxes even. I have found that putting a little oil on the bands stops them from snapping your hair. Once the front design is done, just tie the back into two high knots.
- Best For: Thick type 4 curls, any length, square face shapes.
- Maintenance Level: Low. The rubber bands keep the roots flat for days.
- Time Needed: 35 minutes.
- Pro Tip: Always soak the tiny rubber bands in olive oil for five minutes before putting them in your hair.
20. Braided Pigtail Double Buns
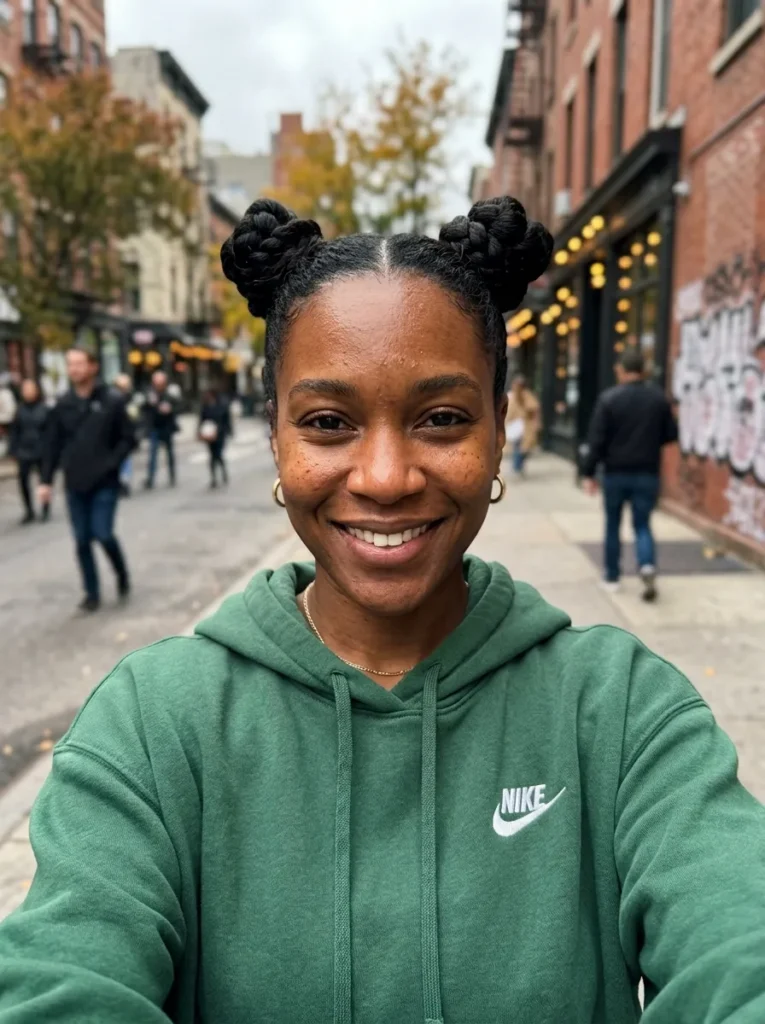
Instead of wrapping loose curls, you braid the ponytails first before making the buns. I always use this trick when I want my ends completely protected from the cold air. The braided texture gives the knots a very cool, chunky look.
This is easily one of the best ways to retain length over the winter. In my experience, braiding the hair tight stops it from tangling up during the day. You just roll the thick braids into circles and pin them down flat.
- Best For: Very thick natural hair, long length, diamond face shapes.
- Maintenance Level: Low. The braids keep everything neat and untangled safely.
- Time Needed: 20 minutes.
- Pro Tip: Tuck the very ends of your braids under the bun and secure them with a hidden bobby pin.
Conclusion
Switching up your look does not mean you have to spend hours styling your curls or risk damaging your hair. These versatile ideas prove that you can easily keep your curls safe while looking completely put together.
Finding your favorite space buns for natural hair is all about embracing your unique texture and having fun with it. Go ahead and pin your favorite styles to your hair boards so you can try them out this week. I have seen how a simple, confident new style can completely brighten up your whole day!