22 Stunning Hoco Hairstyles for a Picture-Perfect Night
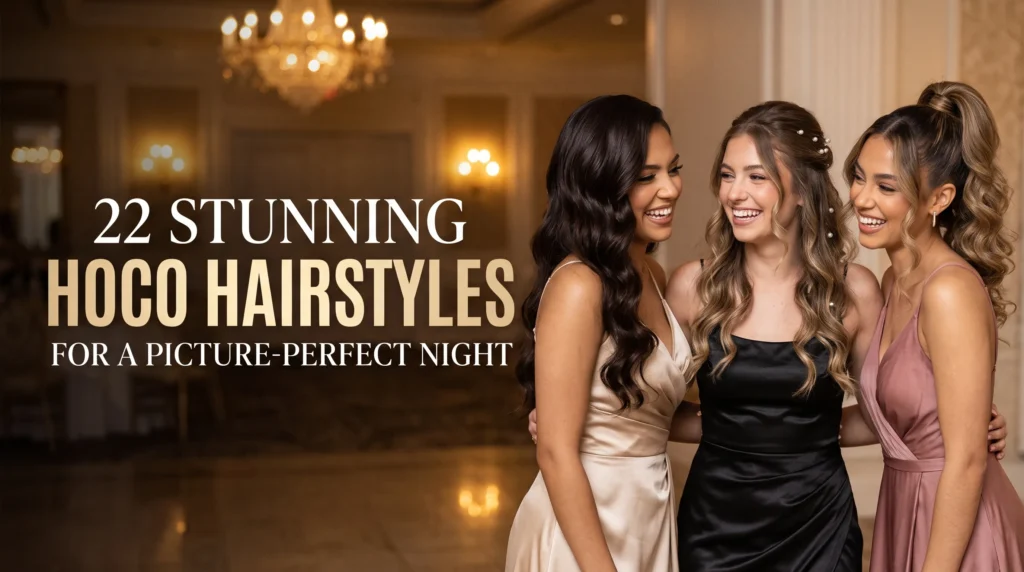
Your homecoming look deserves a hairstyle that feels just as special as your outfit. The right hair can make you feel confident, comfortable, and ready for every photo.
These 22 hoco hairstyles offer inspiration for different hair lengths, textures, and personal styles, with practical ideas you can recreate at home or share with your hairstylist. You’ll find glossy waves, braided looks, sleek ponytails, romantic buns, and delicate accessories that add sparkle without competing with your dress.
Not sure which style suits you best? Start by considering your dress neckline, the earrings you plan to wear, and how you want your hair to look after hours of dancing. A quick practice run can also help you check the style’s comfort and staying power before the big night. Save your favorite ideas and choose the look that feels most like you.
1. Soft Hollywood Waves
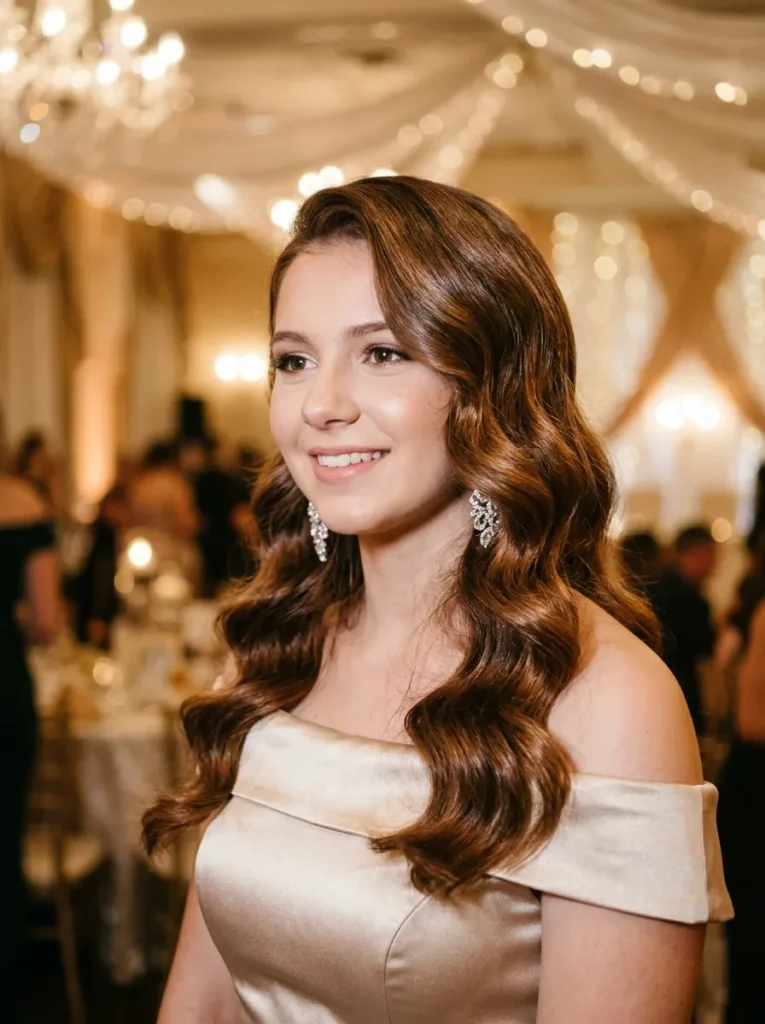
For classic hoco hairstyles, soft Hollywood waves bring movement and a polished finish without feeling overdone. Start with fully dry hair and apply heat protectant, then curl medium sections away from your face. Let each curl cool completely before brushing gently with a wide paddle brush.
Keep the crown smooth and tuck one side behind your ear to show off your earrings. Flexible-hold hairspray controls flyaways while preserving movement. For photos, turn your face slightly toward the light so the waves catch dimension rather than looking like one solid mass of curls.
2. High Sleek Ponytail
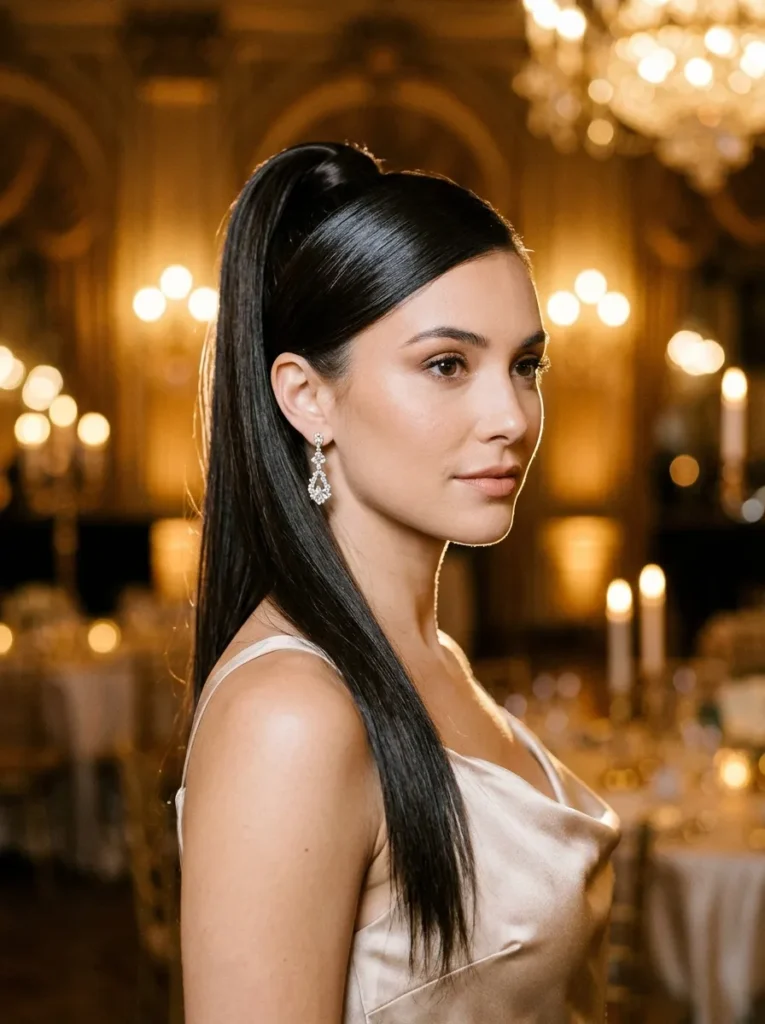
- A high ponytail creates a lifted silhouette and keeps your face visible in photos.
- Brush dry, detangled hair upward toward the crown, smoothing it before securing it with a strong elastic.
- Work a small amount of smoothing cream over the sides to tame flyaways without making the finish stiff.
- Wrap a thin strand around the elastic and pin it underneath for a salon-style base.
- Choose straight lengths for a sleek look or curl the ends for extra bounce.
That wrapped base makes the hairstyle look polished, even when you create it at home. Pair it with a strapless or one-shoulder dress to keep your neckline clear. Keep a few bobby pins and travel-size hairspray nearby for quick touch-ups after dancing or taking group photos.
3. Half-Up Pearl Twist

Quick Tip:
For an elegant half-up style that still lets your hair move, keep the twist loose rather than pulling it tight. Place pearl pins where the two sides meet so they secure the style and show clearly in photos.
Pearl details add a delicate point of light without competing with your dress. Choose pins that complement your jewelry, then check the style from the back before leaving. The twist should feel secure, but you should still be able to slide a fingertip beneath it comfortably.
4. Braided Crown Updo
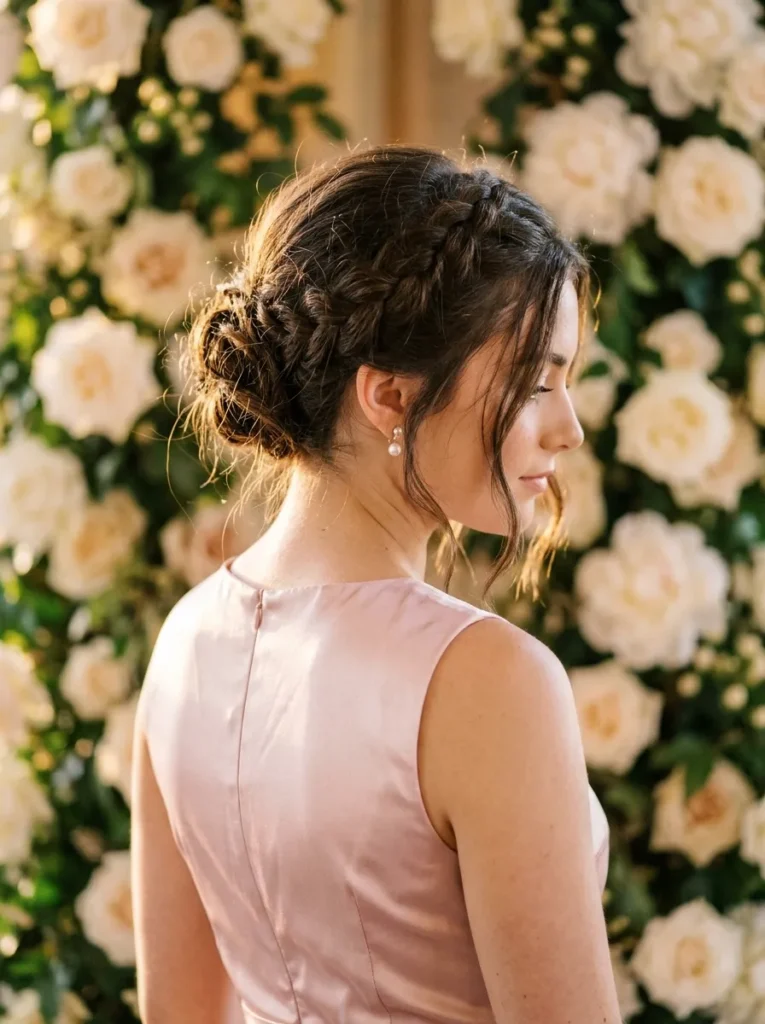
BEFORE
Loose hair keeps falling forward, covering your earrings and making your neckline less noticeable. A simple bun may also feel too plain for an outfit with delicate details.
AFTER
A braided crown creates a graceful frame around your head while keeping most of your hair securely pinned. The woven texture adds detail from every angle, especially in back-view photographs.
Start by creating a center or slightly off-center part, then braid two sections from either side of your head. Bring them around the crown and secure them with discreet bobby pins. Gently loosen a few braid sections for softness, and finish with light hairspray. This style works especially well with open-back dresses and statement earrings.
5. Voluminous Curly Bun

- Prepare your curls: Apply a lightweight mousse to damp hair and diffuse or air-dry until completely dry.
- Create volume: Gently lift the roots with your fingers, using a wide-tooth comb only where needed.
- Gather the bun: Secure your hair into a high ponytail without pulling the curls completely flat.
- Shape and pin: Arrange the curls around the base, securing individual sections with bobby pins.
- Finish the frame: Leave two small tendrils near your temples and mist with flexible-hold hairspray.
The secret to a beautiful curly bun is keeping its natural texture visible instead of forcing every strand into place. Use pins that match your hair color, and test the bun by gently moving your head before adding accessories. A few crystal pins can provide sparkle without hiding those lovely curls.
Also Visit : 21 Stunning Blowout Hairstyles for Bouncy, Silky Hair
6. Side-Swept Curls

| Styling Detail | Option A: Defined Curls | Option B: Loose Waves |
| Overall look | Bouncy, structured curls | Soft, flowing movement |
| Best for | Glamorous dresses and bold earrings | Romantic dresses and delicate jewelry |
| Styling tool | Medium-barrel curling iron | Large-barrel curling iron |
| Hold | Medium to strong hairspray | Flexible-hold hairspray |
| Final effect | Polished and dramatic | Relaxed and romantic |
The side-swept shape adds instant visual interest while letting one shoulder and your earrings stand out. Curl small sections away from your face, allow them to cool, then sweep the hair across one shoulder. Secure the opposite side with crossed bobby pins hidden underneath. Finish with hairspray, especially if your hair tends to slip during dancing.
7. Messy Low Bun

DO:
- Gather your hair loosely at the nape and secure it with a strong elastic.
- Twist the ponytail into a relaxed bun and pin sections into place.
- Pull out two fine strands around your face for a softer finish.
- Add gold pins or tiny rhinestones for a subtle touch of sparkle.
DON’T:
- Pull every strand tightly against your scalp.
- Make the bun too loose to survive dancing.
- Use heavy oils that can make the style look flat.
- Add oversized accessories that compete with your earrings.
The beauty of this updo lies in its soft texture rather than perfect symmetry. I’ve noticed that leaving a little natural movement around the face helps a bun look less rigid in close-up photos. Secure the base well, then loosen only a few strands once the shape feels stable.
8. Ribbon-Tied Ponytail
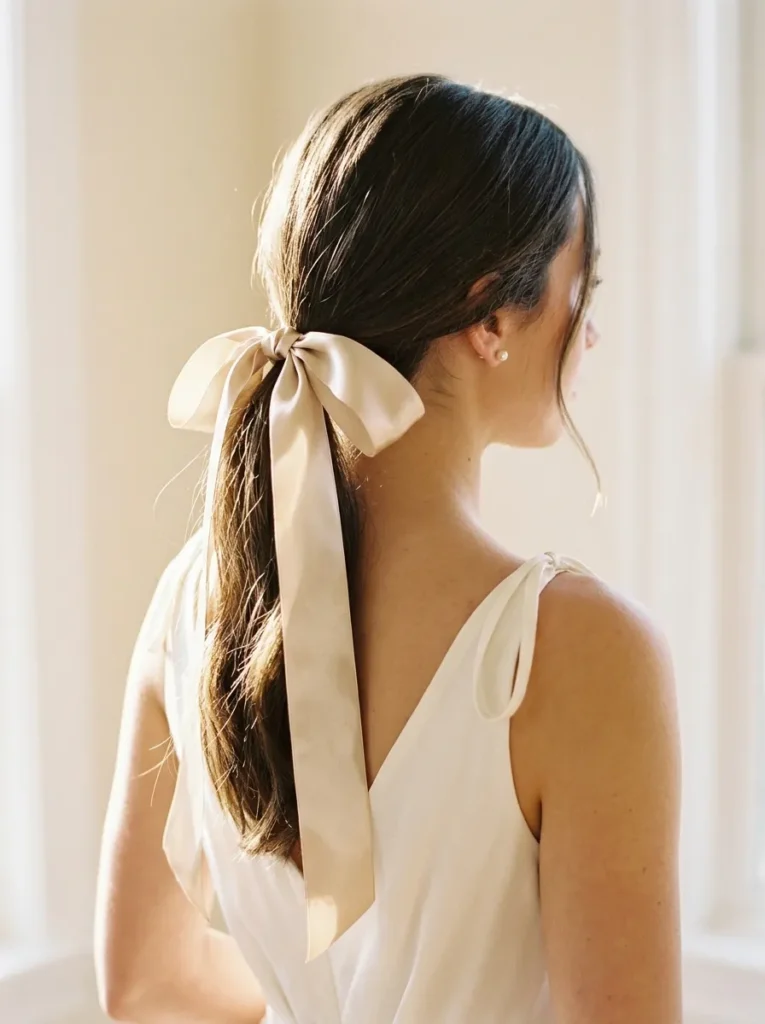
Cost: Low if you already own a ribbon
Time: 10 to 20 minutes
Skill Level: Beginner
Best For: Straight hair, soft waves, and simple formal dresses
A ribbon brings a playful, polished detail to a familiar ponytail without requiring complicated styling. Choose a ribbon that complements your dress, such as black satin with a silver outfit or burgundy velvet with a neutral dress. Tie it securely around the elastic, and trim the ends so they fall neatly without brushing against your face.
For a fuller effect, curl the ponytail ends before tying the bow. Keep the ribbon proportional to your hair length: a large bow suits thick, long hair, while a smaller bow usually looks balanced on shorter ponytails. Test the knot before leaving so it stays in place throughout the evening.
9. French Braid Ponytail

A French braid flowing into a ponytail gives your hairstyle beautiful detail at the crown while keeping the lengths away from your face. Start near the hairline, cross three sections over one another, and gradually add small sections as you braid toward the back of your head.
Once you reach the crown, gather the remaining hair into a ponytail and secure it with an elastic. Curl the ends for extra movement, or leave them straight for a sporty, sleek finish. Keep the braid comfortably firm rather than pulling hard at the roots, especially if you plan to wear the style for several hours.
10. Crystal Clip Waves
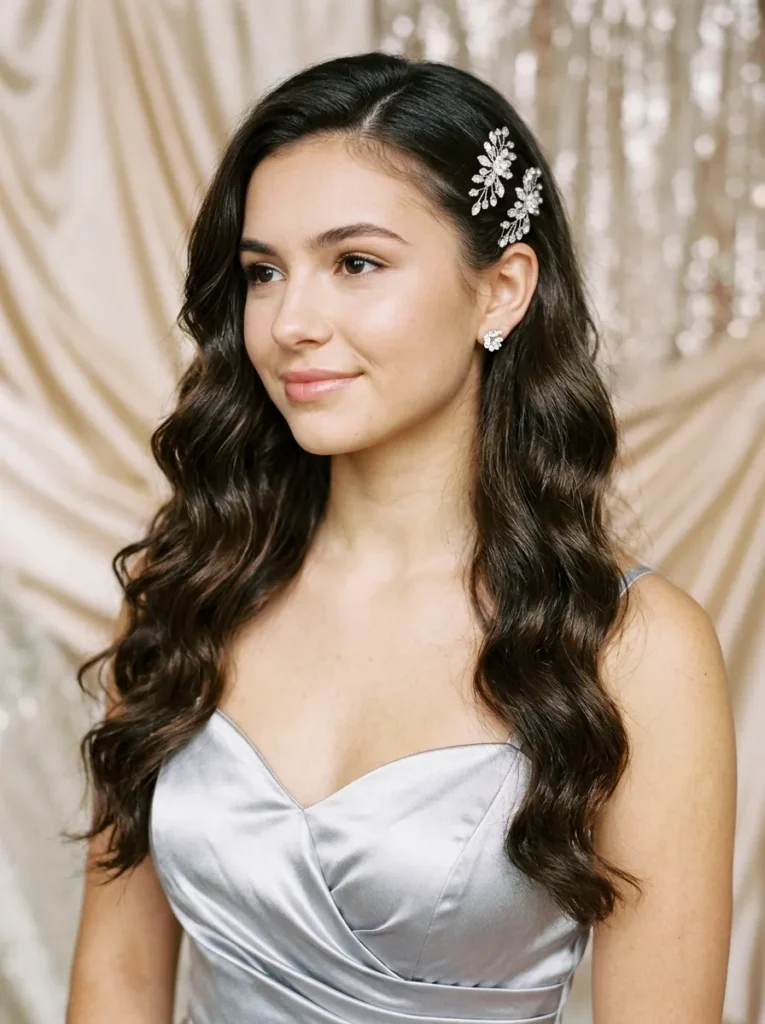
- Create soft waves: Curl medium sections away from your face, leaving the ends slightly relaxed for a modern finish.
- Choose your clips: Select crystal barrettes or rhinestone pins that complement your dress and jewelry.
- Place them strategically: Position the clips above one ear or at the point where your hair is tucked back.
- Secure the style: Let your curls cool before brushing them gently, then use flexible-hold hairspray to preserve their movement.
- Check the sparkle: Take a quick photo under soft lighting to see whether the clips catch the light without overpowering your look.
Among hoco hairstyles, crystal-adorned waves are a lovely choice when you want glamour without an elaborate updo. They work especially well with simple dresses because the accessories provide the detail. Keep the clips firmly attached and avoid placing them where they might snag delicate fabric or irritate your scalp.
Also Visit : 22 Elegant Hairstyles for a Stunning, Polished Look
11. Bubble Ponytail
Quick Tip:
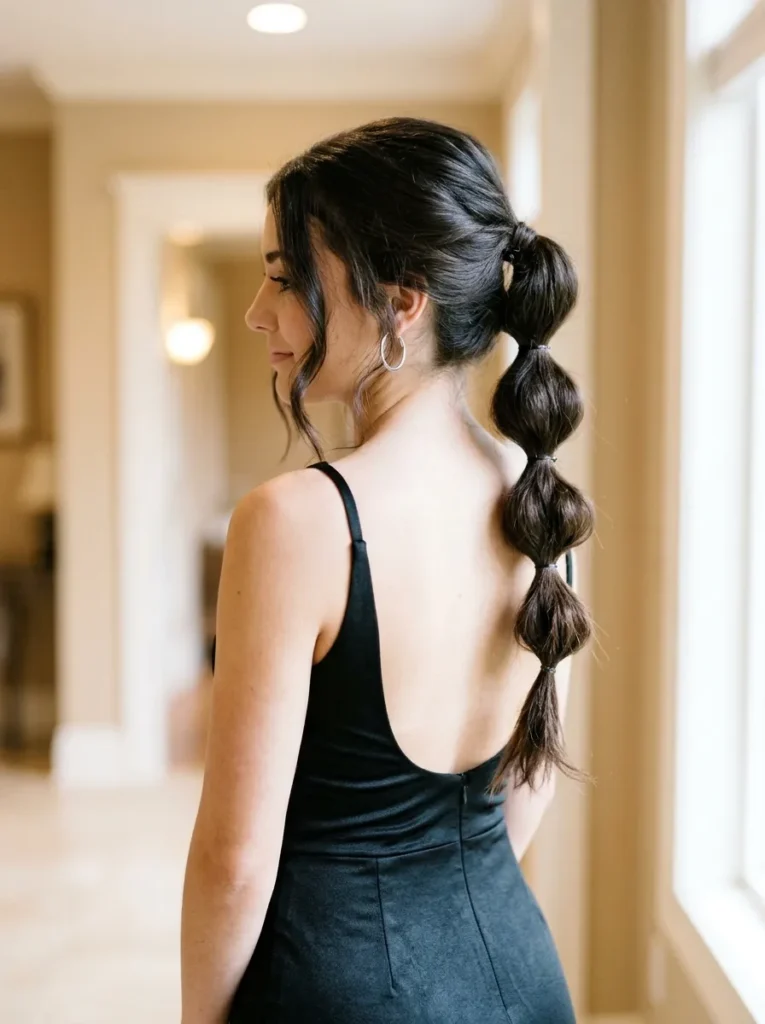
Use small elastics that closely match your hair color so the rounded sections remain the focus. After securing each elastic, gently pull the sides of that section outward with your fingertips to create fuller, balanced bubbles.
Start with a smooth ponytail at your preferred height, then add elastics every few inches down its length. Keep the spacing consistent, adjusting it to suit your hair length. A little texturizing spray can help fine hair hold its shape, while thick hair may need stronger elastics. Finish by checking each bubble from the back.
12. Twisted Side Bun

BEFORE
Hair hanging loosely over both shoulders can hide an asymmetrical neckline or compete with statement earrings. A plain low bun may also feel too simple for a formal homecoming outfit.
AFTER
A twisted side bun gathers the hair into an intentional shape while leaving the neckline visible. The overlapping sections create texture that looks detailed from the side and back.
Create a deep side part, gather your hair behind one ear, and divide it into two sections. Twist them together, coil the length into a low bun, and secure it with bobby pins. Leave a few soft strands around your face if you prefer a relaxed finish. A strong-hold hairspray helps the bun stay secure through photos and dancing.
13. Textured Fishtail Braid
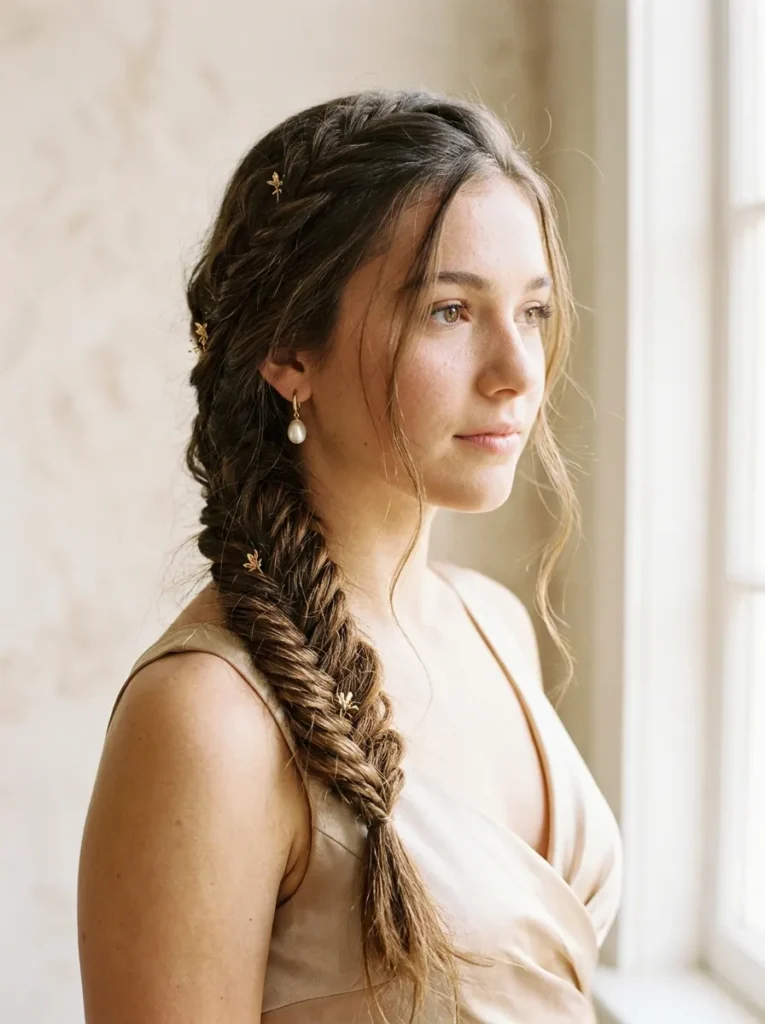
- Prepare your hair: Brush out tangles and apply a small amount of texturizing spray to help the braid hold its shape.
- Divide the hair: Gather your hair over one shoulder and split it into two equal sections.
- Create the fishtail: Take a thin strand from the outside of the left section and cross it into the right section. Repeat on the opposite side, alternating until you reach the ends.
- Secure the braid: Tie the end with a small elastic that matches your hair color.
- Add texture: Gently tug the braid edges outward for a fuller appearance, then set everything with flexible-hold hairspray.
A fishtail braid looks intricate without requiring complicated tools or lots of accessories. It works especially well with long hair and dresses featuring delicate necklines. Keep the braid slightly loose for a softer finish, but leave the elastic secure so the style stays intact throughout the evening.
14. Bouncy Blowout
| Styling Detail | Option A: Rounded Blowout | Option B: Voluminous Waves |
| Overall finish | Smooth, curved ends | Loose, flowing bends |
| Best tool | Round brush and blow dryer | Large-barrel curling iron |
| Root volume | Created while blow-drying | Boosted with mousse or root spray |
| Time required | Around 25 to 40 minutes | Around 30 to 45 minutes |
| Best feature | Polished, salon-inspired shape | More defined movement and texture |
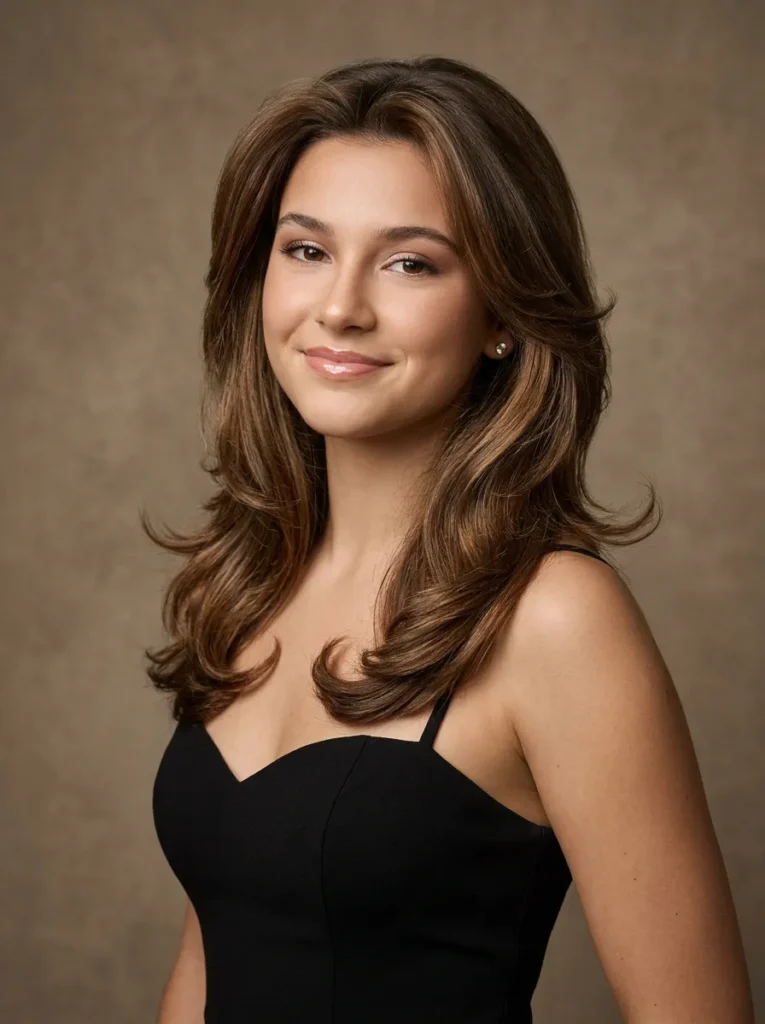
A bouncy blowout gives your hair body while keeping the finish soft and touchable. Apply heat protectant, then dry small sections with a round brush, lifting at the roots and curving the ends away from your face. Let the hair cool before brushing through it. A lightweight volumizing spray helps maintain lift without weighing the layers down.
15. Mini Braided Buns
DO:
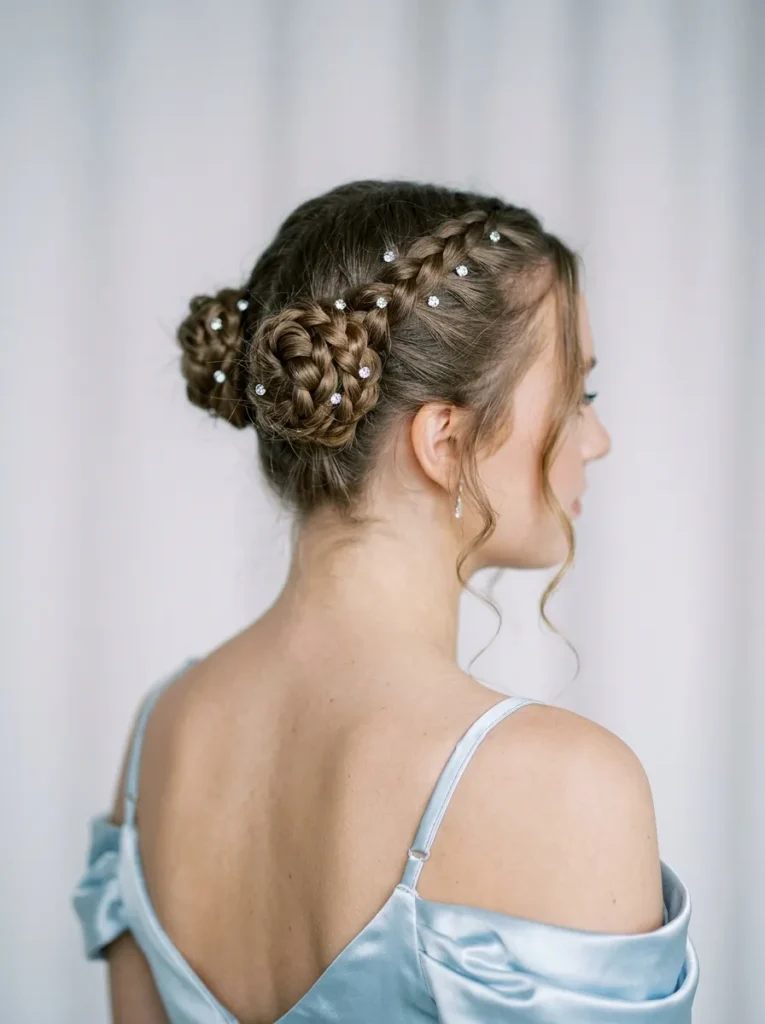
- Part your hair neatly down the center for balanced buns.
- Braid each section before wrapping it into a compact bun.
- Secure both buns with bobby pins that match your hair color.
- Add small crystal pins for a refined, party-ready finish.
DON’T:
- Make the buns so tight that your scalp feels uncomfortable.
- Use oversized elastics that remain visible around the bases.
- Leave loose sections unsecured if you plan to dance.
- Apply too much gel if you want a soft, touchable finish.
Mini braided buns offer a playful alternative to traditional formal updos while keeping your hair away from your face. The braided texture makes each bun look detailed, even without elaborate accessories. Check that both sides feel equally secure before leaving, and keep a few extra pins in your bag for quick repairs.
Also Visit : 24 Gorgeous Shoulder Length Hairstyles for Easy Styling
16. Satin Headband Curls
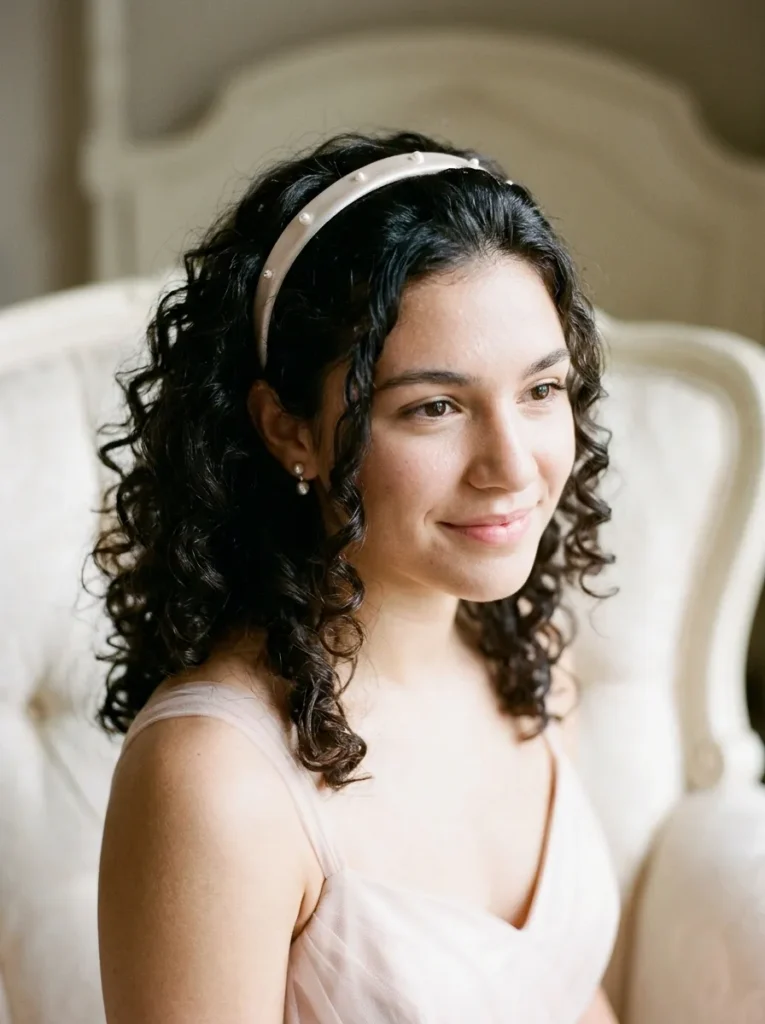
Best For: Medium-length hair and soft curls
Time: 15 to 25 minutes
Skill Level: Beginner
Accessories: Pearl, satin, or crystal headband
A satin headband adds a refined finishing touch while keeping your hair away from your face. Start by creating loose curls with a curling iron and allow them to cool before brushing gently. Slide the headband into place just behind your hairline, then lift a little hair at the crown for extra volume. Choose a slim design for understated elegance or a pearl-covered band for more noticeable sparkle. This style works especially well when you want an easy, comfortable look that still feels dressed up for the evening.
17. Classic Low Chignon
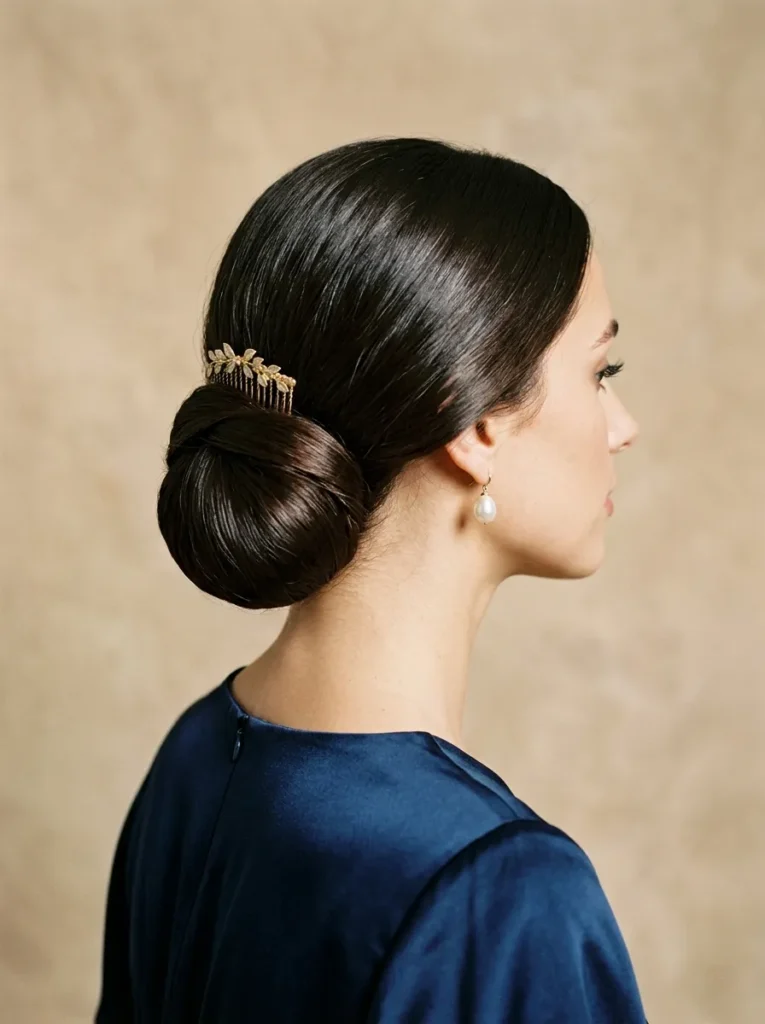
A classic low chignon brings understated elegance to a formal outfit, especially when you want your neckline and earrings to take center stage. Begin with smooth, detangled hair and create a neat center or side part. Gather your hair at the nape, twist it gently, and fold it into a compact knot.
Secure the shape with bobby pins, tucking the ends underneath so they remain hidden. A light mist of hairspray helps control flyaways without making the finish look stiff. Add a small gold comb or a few crystal pins for extra detail. Check the back with a handheld mirror before leaving, since the clean shape looks best when the knot feels secure and balanced.
18. Waterfall Braid Waves
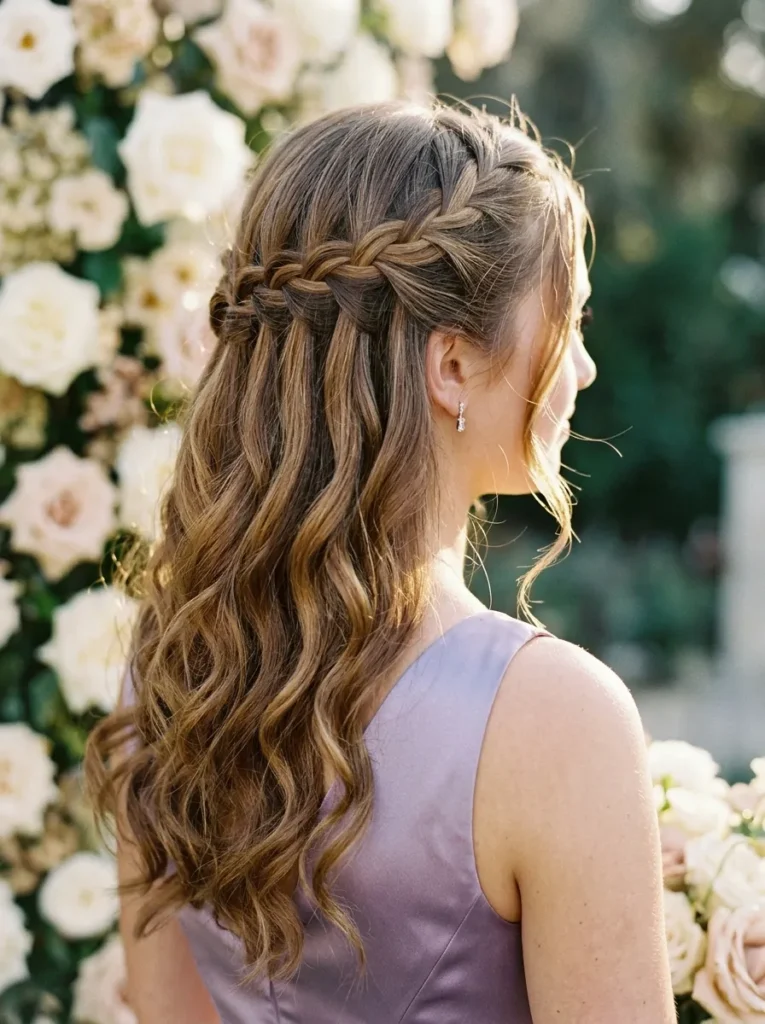
- Part your hair: Create a side part or a soft center part, depending on your preferred look.
- Begin the braid: Take three small sections near one temple and start a regular French braid.
- Create the waterfall effect: Drop the lower strand after each crossover and replace it with a fresh section of hair from above.
- Continue across: Work toward the opposite side, keeping the braid close to your head without pulling too tightly.
- Secure and curl: Pin the braid discreetly behind your ear and add loose curls to the remaining lengths.
The waterfall braid gives loose hair a distinctive detail without hiding its length or movement. It works particularly well with medium to long hair and dresses with delicate straps. Practice the braid once before your event, and use small, discreet pins to keep the finished style comfortable throughout the evening.
19. Sleek Straight Hair

Time: 15 to 30 minutes, depending on hair length
Skill Level: Beginner to intermediate
Best For: Long, medium, or naturally straight hair
Finish: Smooth, glossy, and minimalist
Sleek straight hair creates a clean silhouette that pairs beautifully with statement earrings, bold makeup, or a detailed dress. Apply heat protectant before straightening small sections, and keep the iron moving to avoid excessive heat exposure. Finish with a tiny amount of lightweight serum on the ends, keeping the roots fresh and free from excess product.
20. Boho Loose Braid
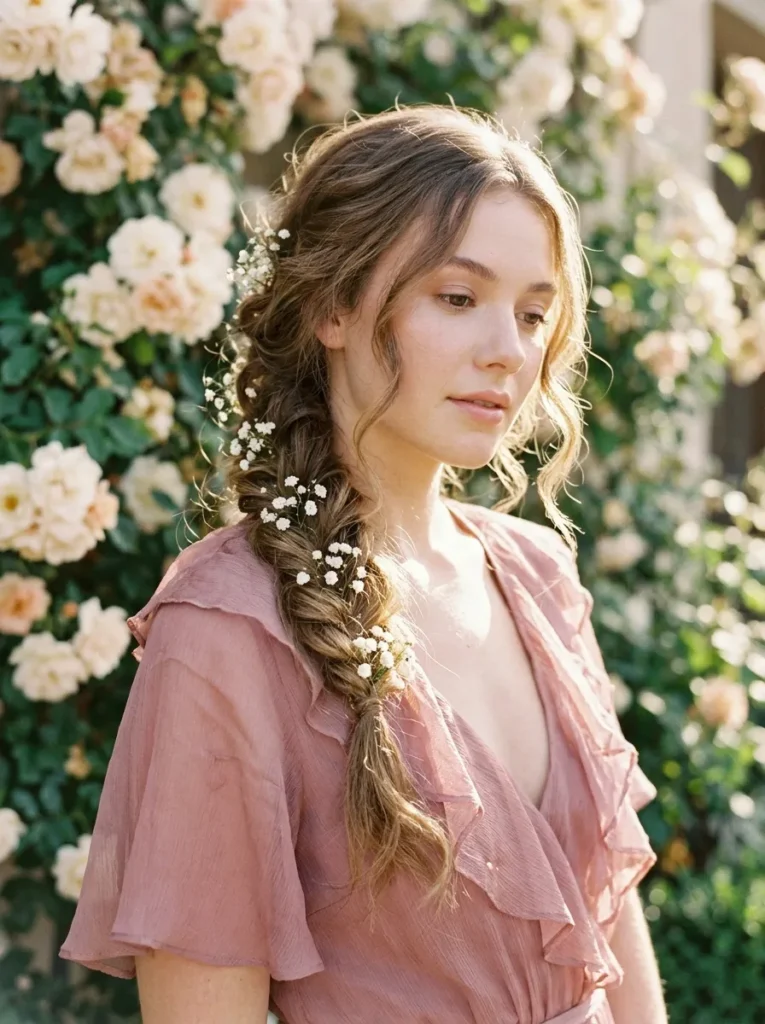
For a relaxed, romantic look, a loose boho braid brings texture and movement without feeling overly formal. Start with soft waves, then gather your hair over one shoulder and create a traditional three-strand braid. Secure the end with a small elastic that blends into your hair color.
Gently pull a few sections outward to create fullness, keeping the braid secure near the top. Add tiny floral pins or delicate gold accessories if they complement your dress. This style works especially well with flowy chiffon outfits, but avoid placing too many decorations in the braid because they can catch on fabric or become uncomfortable during dancing.
Also Visit : 21 Bold Concert Hairstyles That Keep You Party-Ready
21. Flipped Ends Bob
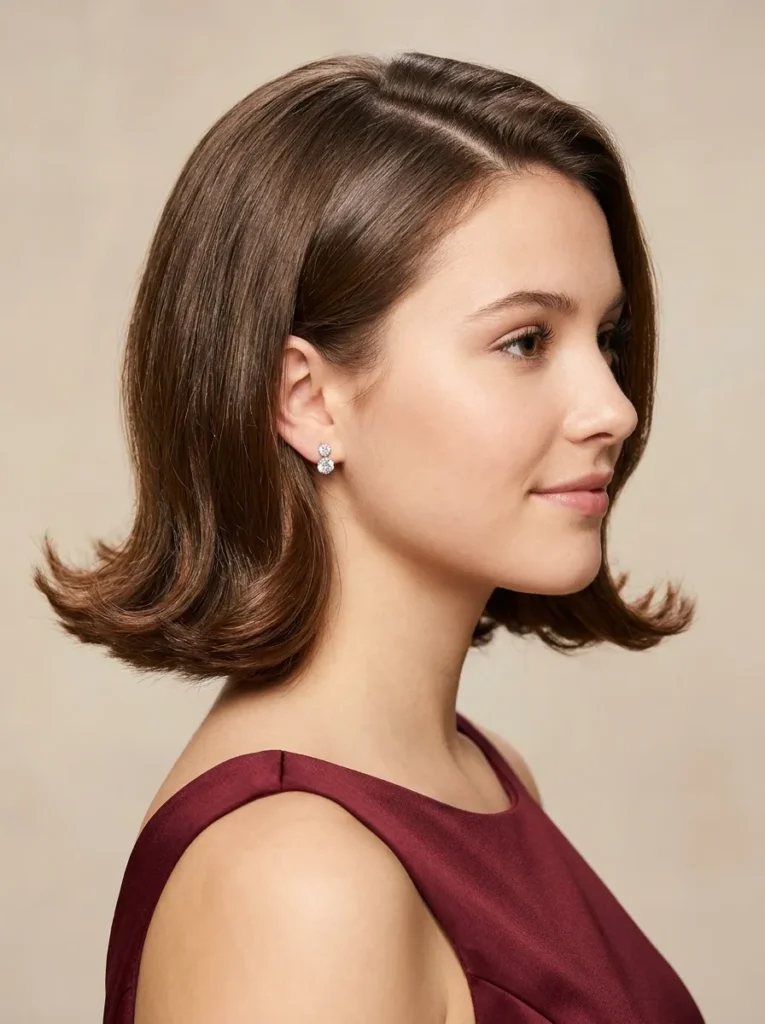
- Start with dry hair: Apply heat protectant before using a flat iron or round brush.
- Create the flip: Turn the tool outward at the ends of each section to form a soft, curved finish.
- Keep the top smooth: Brush the crown neatly while preserving natural volume around the roots.
- Balance both sides: Check the flipped ends in a mirror so they frame your jawline evenly.
- Set the shape: Finish with flexible-hold hairspray to keep the ends defined without making them stiff.
Flipped ends give a short bob a playful, retro-inspired finish that stands out from more traditional curls. The shape looks especially striking with a strapless dress or bold earrings. Keep the outward curve soft rather than sharply bent, and carry a small comb for touch-ups if your hair loses its shape during the evening.
22. Romantic Low Ponytail

Time: 15 to 20 minutes
Skill Level: Beginner
Best For: Medium to long hair
Accessories: Satin ribbon, pearl pins, or a delicate hair clip
A romantic low ponytail proves that a simple hairstyle can still make a lasting impression. Create a center or soft side part, curl a few sections for movement, and gather your hair loosely at the nape. Wrap a small strand around the elastic, then pull out two fine tendrils near your face. Finish with flexible-hold hairspray and a delicate accessory that complements your dress. The result is comfortable, photogenic, and easy to refresh between pictures and dancing.
CONCLUSION
The right homecoming hairstyle should complement your outfit, feel comfortable, and reflect your personal style. From Hollywood waves and sleek ponytails to braided details and romantic buns, these hoco hairstyles offer inspiration for different hair lengths, textures, and styling preferences.
Before the big night, practice your favorite look and gather essentials such as bobby pins, heat protectant, and flexible-hold hairspray. Small preparations can help you feel more relaxed and enjoy every moment, from taking photos to dancing with friends.
Save this article on Pinterest, try a style that catches your eye, and share it with a friend who is planning her homecoming look. Your perfect hairstyle is the one that makes you feel confident, beautiful, and ready to enjoy the night!