20 Pineapple Updo Hairstyles Perfect For Any Occasion
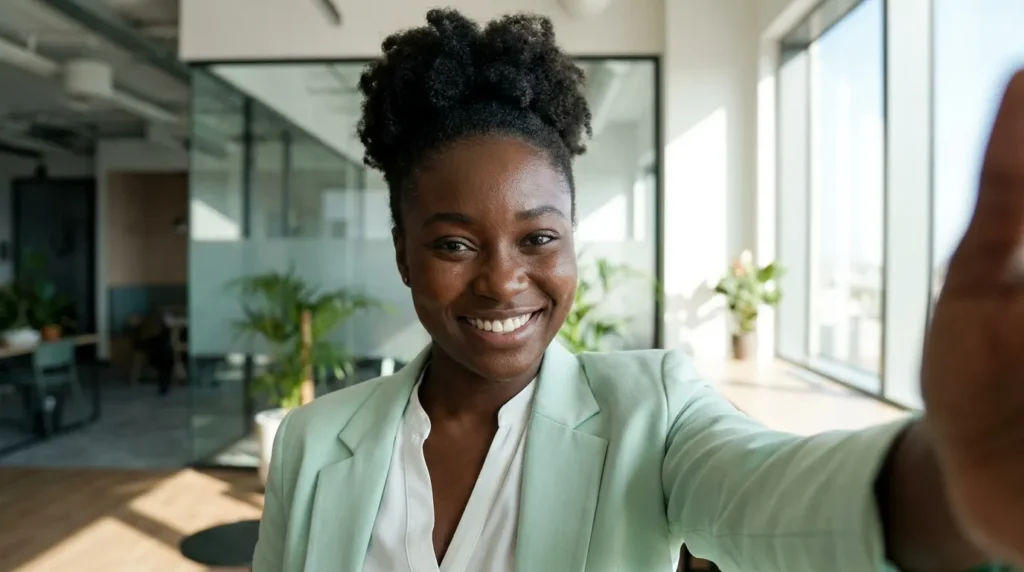
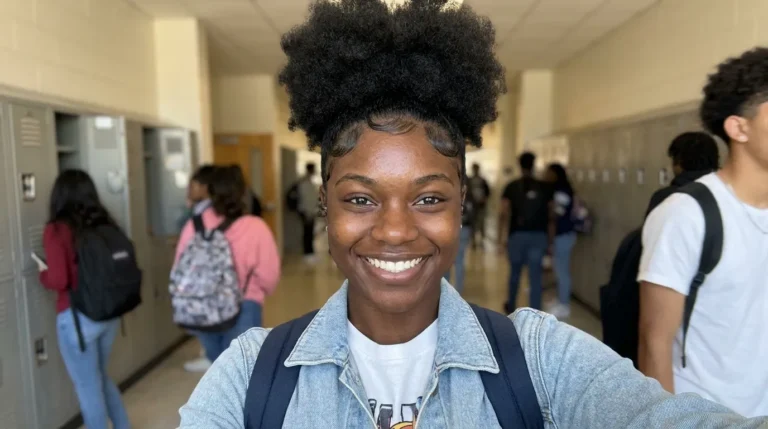
Are you tired of waking up to flat, tangled hair? Learning how to do different pineapple updo hairstyles is the easiest way to save your morning routine. It protects your curls while making you look instantly put together.
In my experience as a stylist, natural hair thrives when we keep the ends tucked away and friction low. This classic method prevents nasty split ends and stops your curls from drying out during the day.
Whether you are heading to the gym or out for a fancy dinner, this list has a perfect option for you. Get ready to find your new favorite quick go-to look.
1. Classic Pineapple Updo Hairstyles
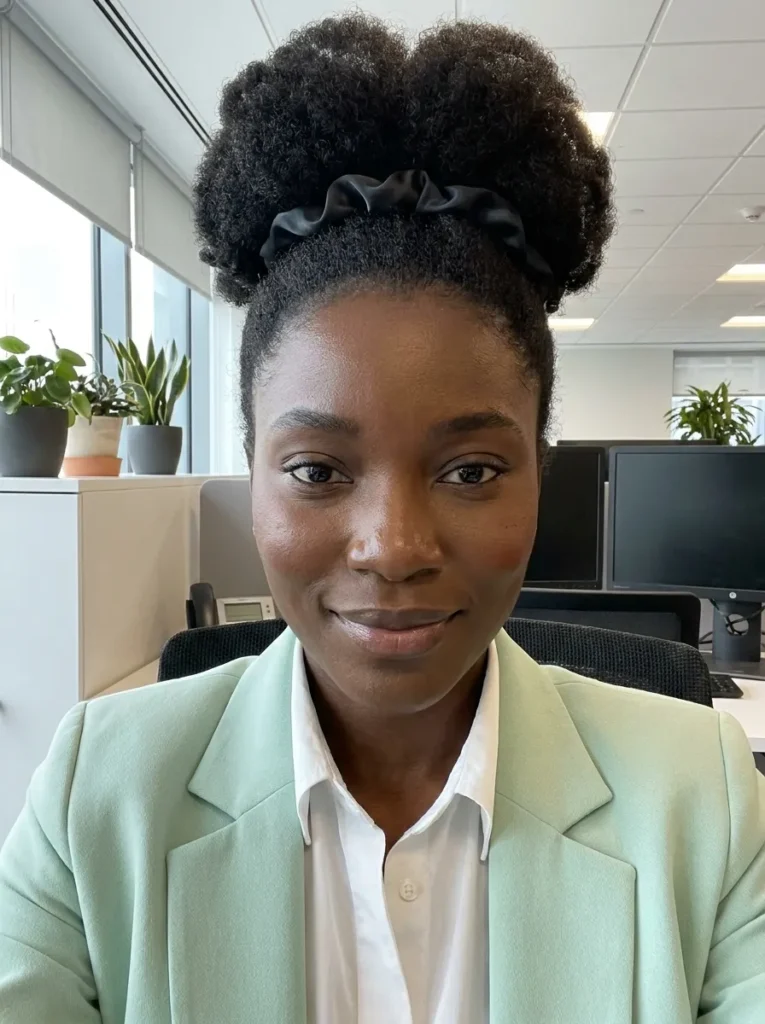
This is the absolute go-to look when you want to protect your natural curls and look put together in minutes. Gathering your hair at the very top of your head keeps your ringlets bouncy and out of your face all day long. I wear this almost every single morning.
You will love how easy it is to dress up or down. Whether you are running errands or going out for dinner, this simple style just works. It shows off your cheekbones perfectly and stops your ends from rubbing against your clothes, which really helps prevent split ends.
- Best For: Type 3 and 4 curly hair / Medium length / Oval and round faces
- Maintenance Level: Low. Just sleep with a satin scarf to keep it fresh.
- Time Needed: 5 minutes
- Pro Tip: Use a silk scrunchie instead of a regular hair tie to prevent breaking your curls.
2. Messy Curl Top Knot
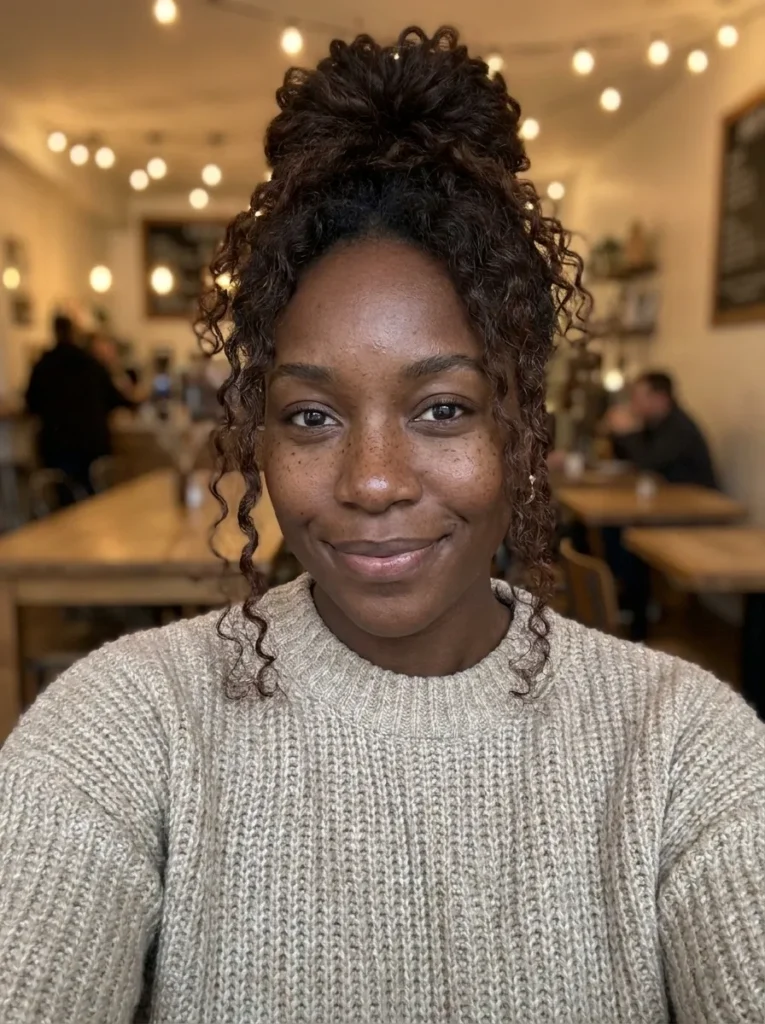
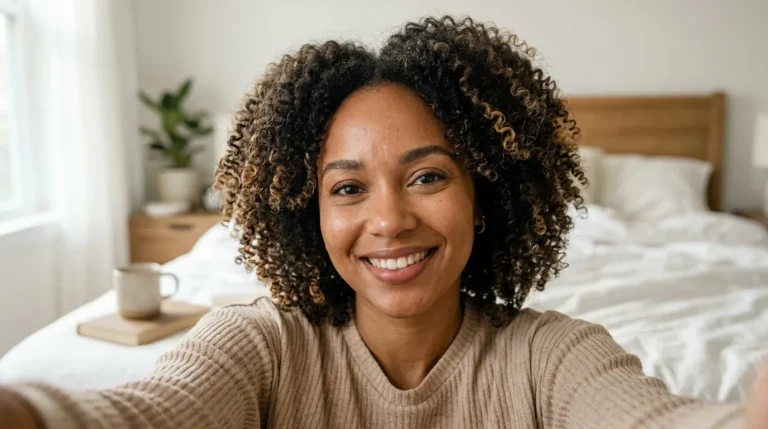
Sometimes you want a look that feels completely effortless and relaxed. Leaving a few curly pieces out around your face gives this style a very soft, romantic vibe. It is a fantastic option for second or third-day hair when your curls are big and full of natural volume.
You do not have to worry about making everything super smooth or perfect. The magic of this look is actually in the little flyaways and loose strands. I find it pairs perfectly with simple hoop earrings and a cozy sweater for a coffee date or a casual weekend.
- Best For: Loose wavy or curly hair / Medium to long length / Square or heart faces
- Maintenance Level: Low. The messier it gets, the better it actually looks.
- Time Needed: 10 minutes
- Pro Tip: Pull down two tiny curls right in front of your ears to frame your face.
3. Braided Front Crown
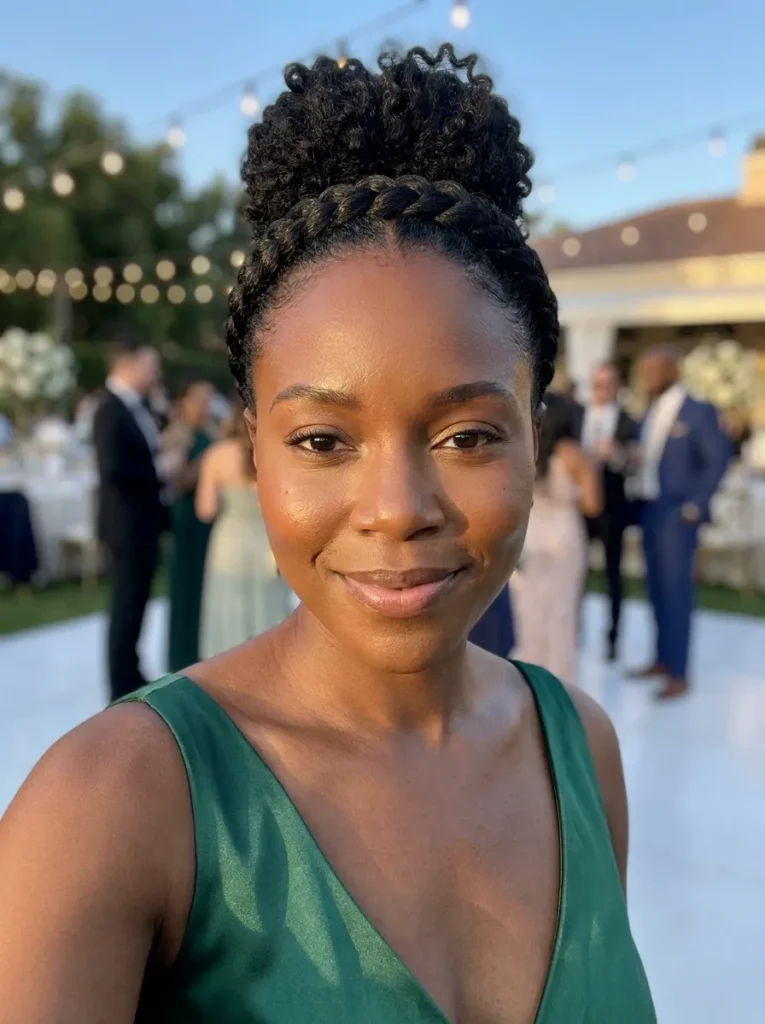
Adding a small braid right at the front takes a standard top knot and makes it look super fancy. It gives the front of your hair a really nice texture and keeps shorter bangs tucked away. I always get compliments when I take the time to add this detail.
This setup is really great if you have an event like a wedding or a nice family party. The braided section acts like a natural headband that draws attention to your eyes. Plus, it holds your hairline neatly in place if you are going to be dancing around.
- Best For: Thick curly hair / Long length / Diamond and oval faces
- Maintenance Level: Medium. The braid needs to be fairly tight so it doesn’t frizz up.
- Time Needed: 15 minutes
- Pro Tip: Use a little bit of edge control gel on your fingertips while braiding for grip.
4. Silk Scarf Wrap Style
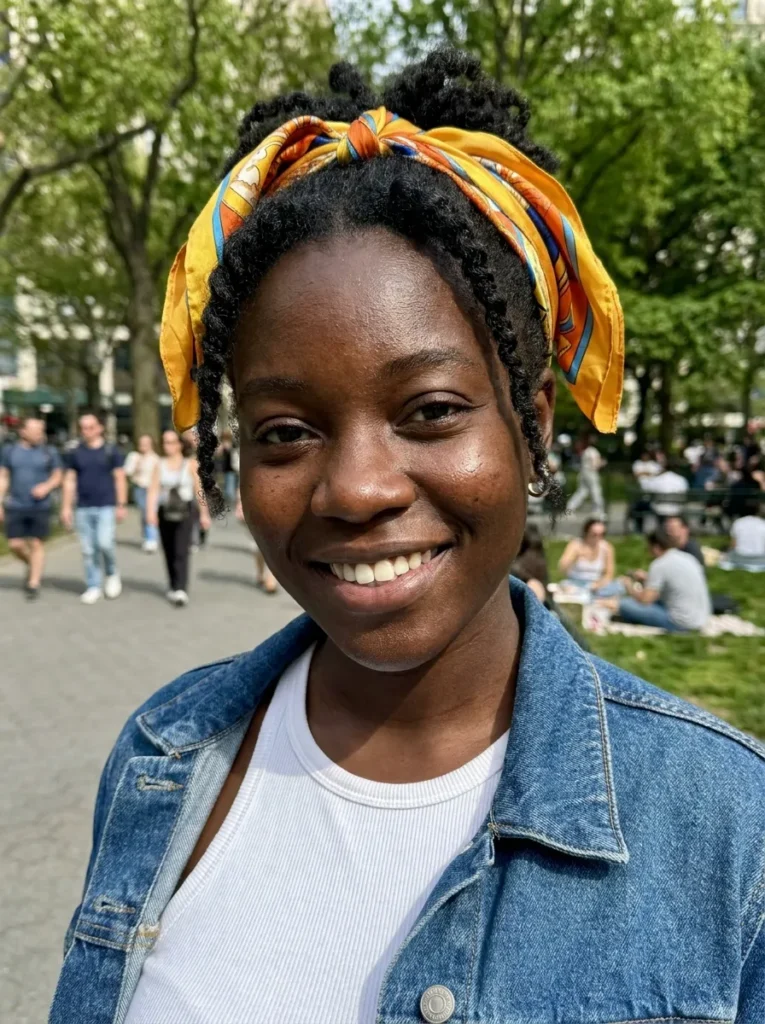
Wrapping a bright, colorful scarf around the base of your bun completely changes the whole outfit. It hides your hair tie and gives you a really cool, retro look that pops in photos. This is my favorite trick when my roots are looking a little bit flat or dry.
You can match the fabric pattern to your clothes or just pick something bold to stand out. It also works as an extra layer of protection for your edges during the day. It is a super quick fix that makes you look like you spent hours getting completely ready.
- Best For: All natural hair types / Any length that fits in a pony / All face shapes
- Maintenance Level: Low. Just tie the fabric tightly so it does not slip off.
- Time Needed: 5 minutes
- Pro Tip: Fold your scarf into a triangle first, then roll it up so it lays flat.
5. High Puff With Bangs
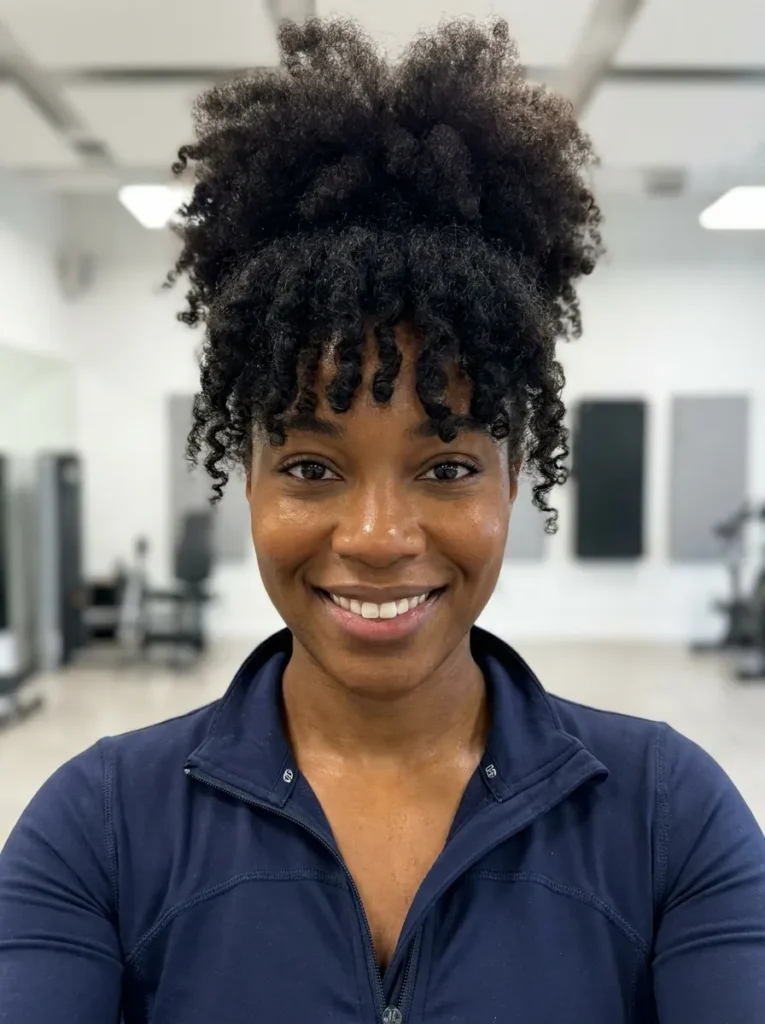
Letting your front curls fall forward like bangs gives this updo a super cute and playful attitude. It frames your forehead beautifully and brings all the volume right up to the top. I love how this style gives off a fun, youthful energy that works for almost anyone.
If you do not actually have cut bangs, you can easily fake it by pinning the front section forward. It is a great way to change up your shape without grabbing the scissors. This look is perfect for snapping pictures because it creates such a nice, round, fluffy shape.
- Best For: Coily hair / Short to medium length / Long or large foreheads
- Maintenance Level: Medium. You might need to refresh the front pieces with water.
- Time Needed: 10 minutes
- Pro Tip: Fluff your bangs with a hair pick right at the roots for extra height.
Also Visit : 20 Formal Natural Hair Updos That Wow Every Time
6. Half Up Pineapple
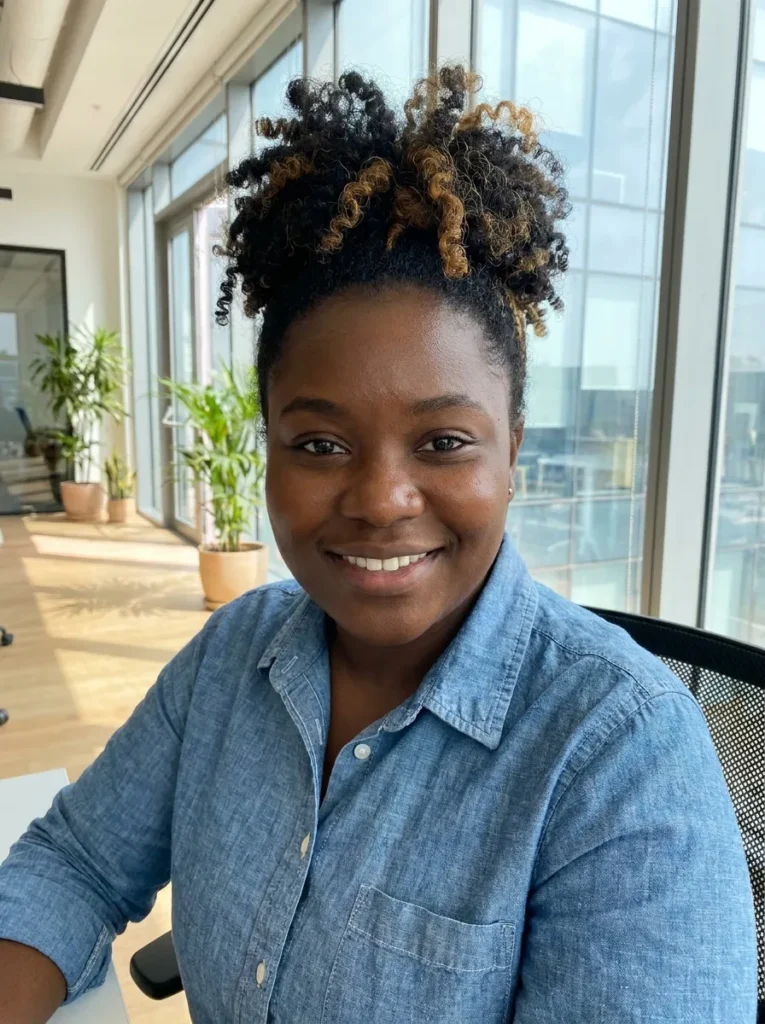
Splitting your curls gives you the best of both worlds. You get the height and volume on top, but you still get to show off your length in the back. I love this style when I want my hair to look really full and thick.
It is a great choice if you have a lot of hair and a full updo feels too heavy on your neck. The top section stays out of your eyes, while the bottom section bounces freely. This works wonderfully for casual Fridays at the office.
- Best For: Thick curly hair / Medium to long length / All face shapes
- Maintenance Level: Medium. The bottom section might need some moisture to prevent frizz.
- Time Needed: 10 minutes
- Pro Tip: Use a leave-in conditioner spray on the bottom half to keep those curls bouncy all day.
7. Two Front Twists
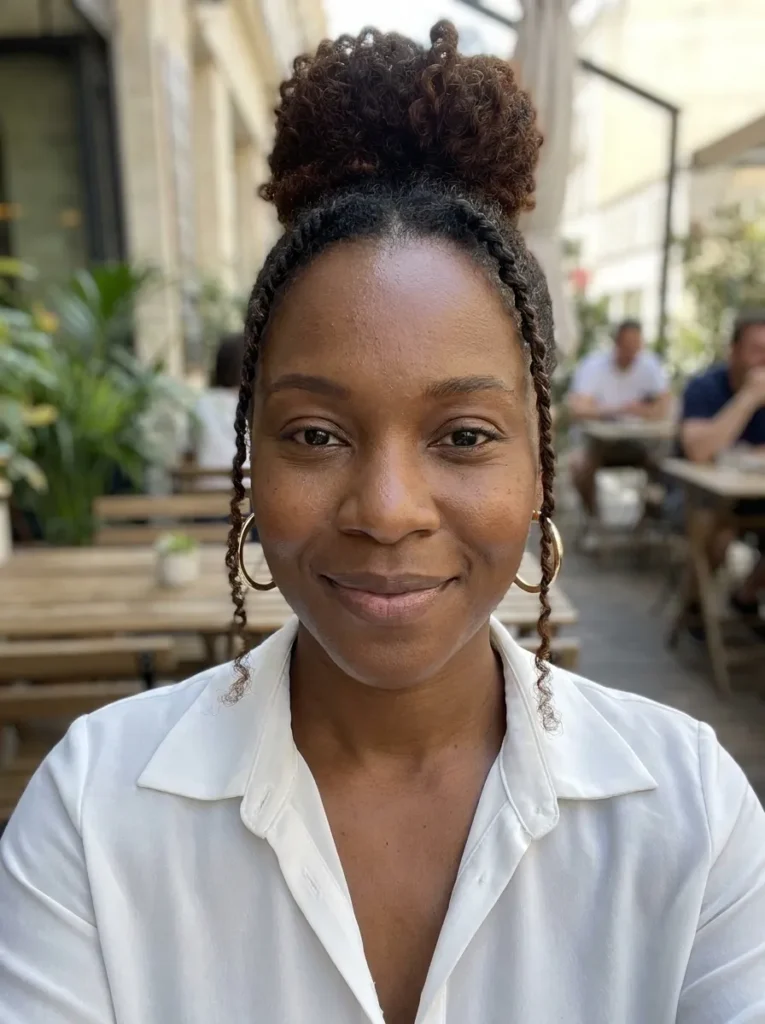
Leaving two simple twists hanging right by your face adds a really beautiful framing effect. It is a tiny detail that makes the whole hairstyle look much more planned out and stylish. I always do this when I am wearing my favorite chunky hoop earrings.
You can make the twists as thick or as thin as you want. They instantly soften your features and draw eyes right to your cheekbones. If you are going out for a quick lunch or running to a meeting, this adds a really nice touch.
- Best For: Type 4 coily hair / Any length / Square and heart faces
- Maintenance Level: Low. Twists hold their shape much better than loose loose curls.
- Time Needed: 10 minutes
- Pro Tip: Twirl the very ends of your twists with a tiny drop of oil so they don’t unravel.
8. Sleek Edges High Bun
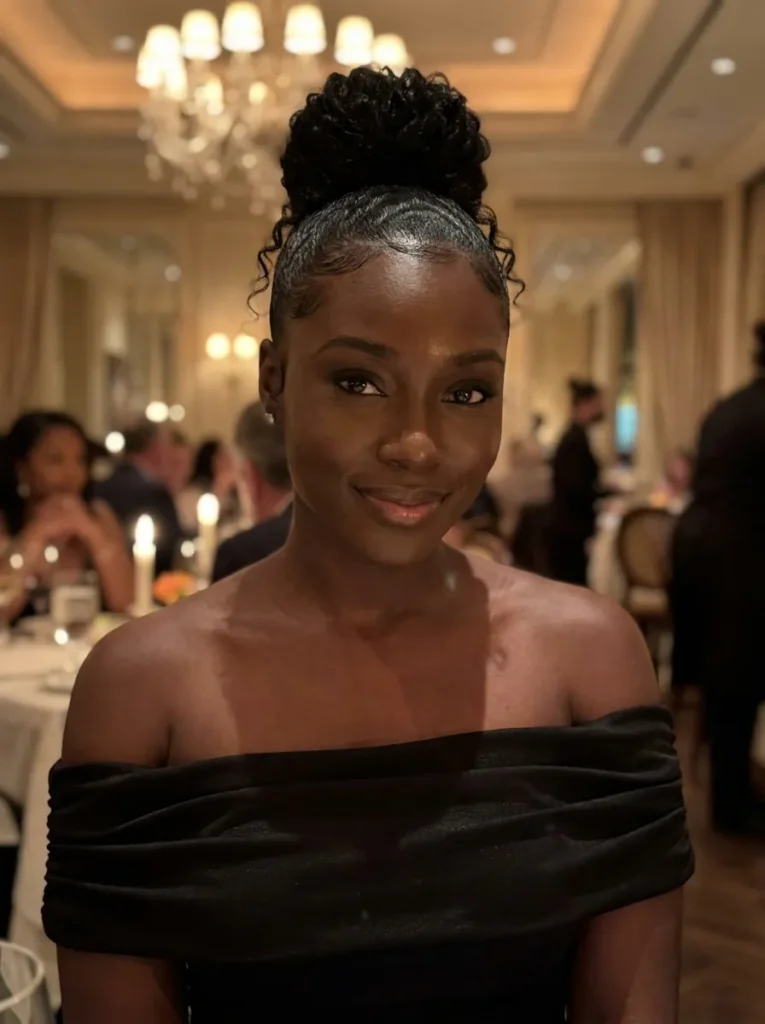
Brushing your hairline down completely smooth creates a striking contrast with the big fluffy curls on top. This is my secret weapon for making a bad hair day look incredibly intentional and chic. The sleek base automatically makes you look very polished and put together.
You will want a good quality edge control brush to lay everything down perfectly flat. It takes a little extra patience, but the final result is beautiful for formal events or fancy dinners. It really holds your hair securely in place through humid weather too.
- Best For: All curl types / Any length / Oval and round faces
- Maintenance Level: Medium. You will need to tie a scarf around the base to set the gel.
- Time Needed: 15 minutes
- Pro Tip: Tie a satin wrap around your edges for ten minutes before leaving the house to lock them down.
9. Twisted Crown Updo
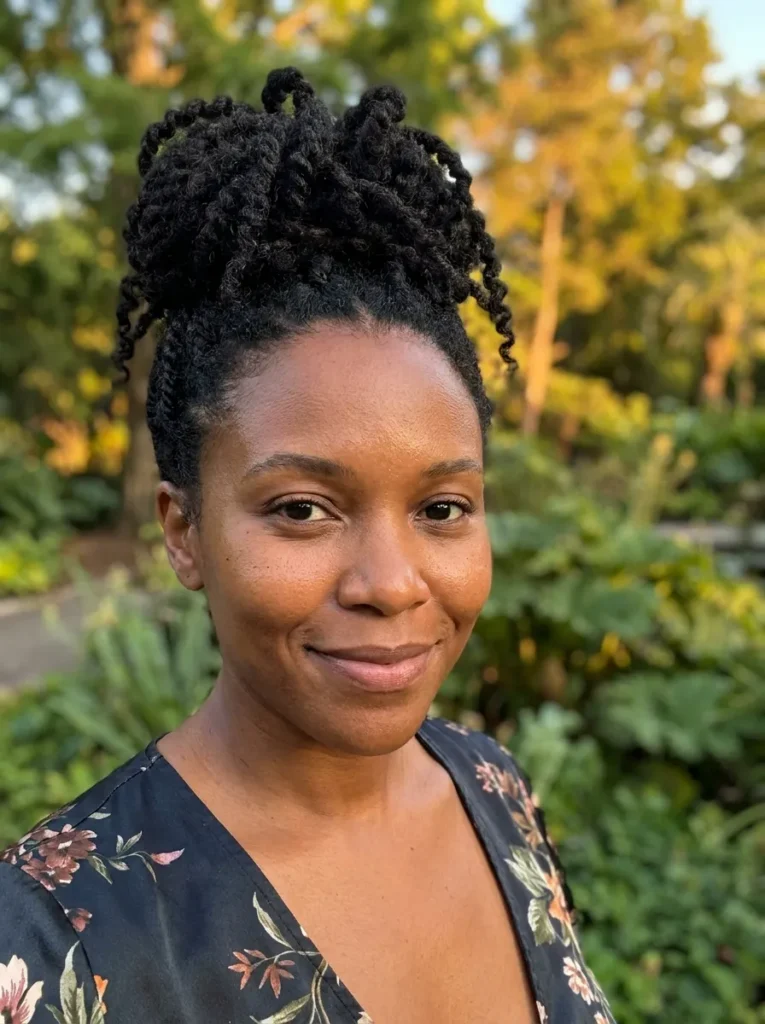
Instead of just pulling your hair straight up, twisting the back and sides upward creates a gorgeous shape. It gives the illusion of a complicated salon style without needing any special skills. I think it looks absolutely beautiful from every single angle when people see it.
This technique is especially helpful if the hair at the back of your neck tends to shrink or tangle. The twists gently pull the hair upward securely without causing tight tension. It is definitely a favorite look for weddings, graduations, or any big celebration day.
- Best For: Coily hair / Medium length / Diamond and oval faces
- Maintenance Level: High. You need several bobby pins to keep all the twists secured nicely.
- Time Needed: 20 minutes
- Pro Tip: Roll the hair upward and inward, tucking the ends away before pinning for a smooth look.
10. Side Swept Curls
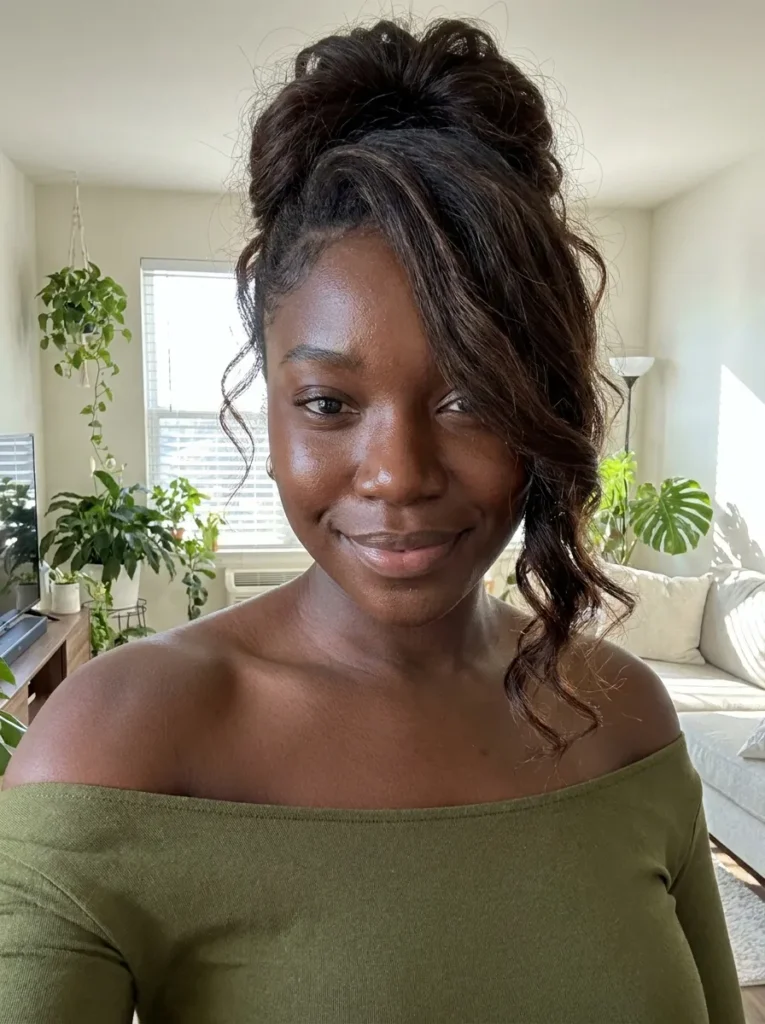
Pushing all your gathered curls to one side of your face gives off a very glamorous and romantic feel. It breaks up the symmetry of a standard bun and adds a lot of personality. I love doing this when I have a deep side part already.
This is a fantastic way to show off your curl definition if you just did a fresh wash and go. Letting the hair tumble gently over one eye looks amazing in selfies. It pairs beautifully with an off the shoulder top or a pretty summer dress.
- Best For: Loose curls and waves / Medium to long length / Long and oval faces
- Maintenance Level: Low. Letting the curls fall naturally means you don’t have to fuss with perfect placement.
- Time Needed: 5 minutes
- Pro Tip: Position your hair tie slightly off-center to naturally guide the hair to fall where you want it.
11. Golden Cuff Accessorized Puff
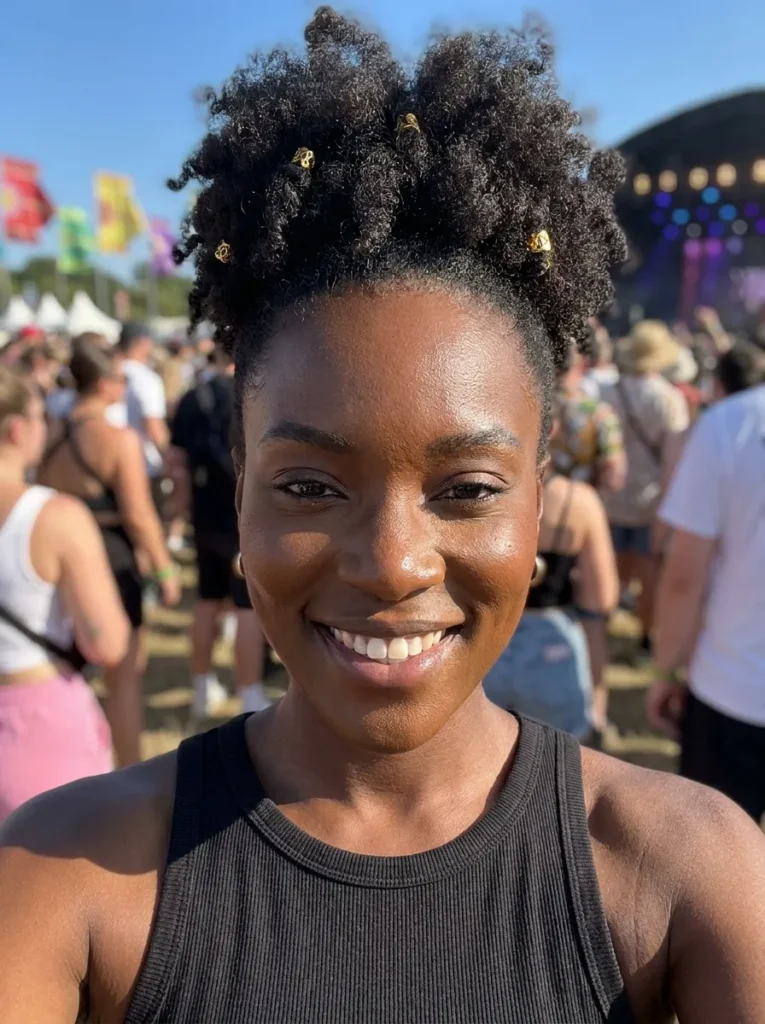
Snapping a few metal cuffs onto your curls instantly makes your hair look like literal jewelry. These tiny golden rings catch the light and add so much character to your look. I always keep a pack in my purse for emergency style upgrades.
You can place them randomly throughout the top section or line them up along a twist. It takes just seconds to do, but people will think you spent serious time getting ready. This small detail looks incredibly cool for music festivals or parties.
- Best For: Braided roots or thick coily hair / Medium length / All face shapes
- Maintenance Level: Low. They clasp tightly and stay put all day long.
- Time Needed: 5 minutes
- Pro Tip: Gently open the cuff wide before sliding it on so it does not snag your hair.
12. Oversized Satin Scrunchie Style
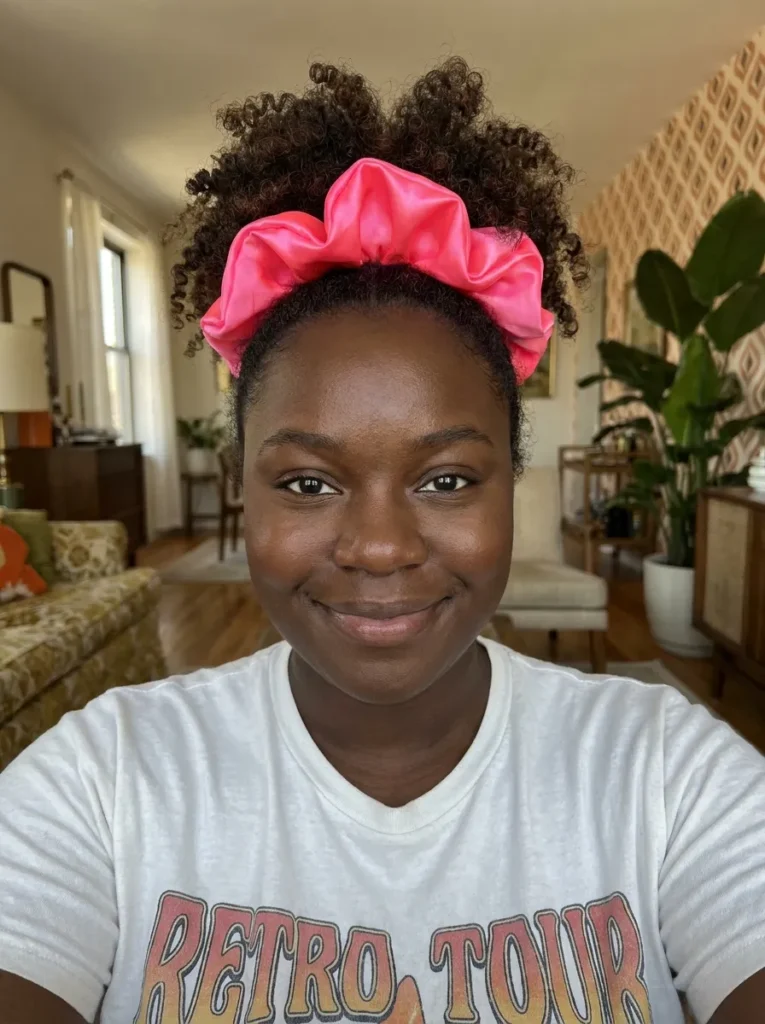
Swapping your normal hair tie for a giant satin scrunchie creates a really fun, dramatic shape. The large fabric base pushes your curls even higher while protecting your delicate strands from breaking. I love how soft and comfortable it feels on my head.
You can match the scrunchie color to your shirt or pick a really bright neon color for a fun contrast. It makes thin hair look a lot thicker and gives the whole outfit a cute nineties throwback feel. It is honestly so stylish.
- Best For: Thin or fine curly hair / Any length / Round and oval faces
- Maintenance Level: Low. The satin prevents tangles and keeps everything very smooth.
- Time Needed: 2 minutes
- Pro Tip: Wrap it only two times so you do not squish the base of your curls too tightly.
13. Thick Fabric Headband Wrap
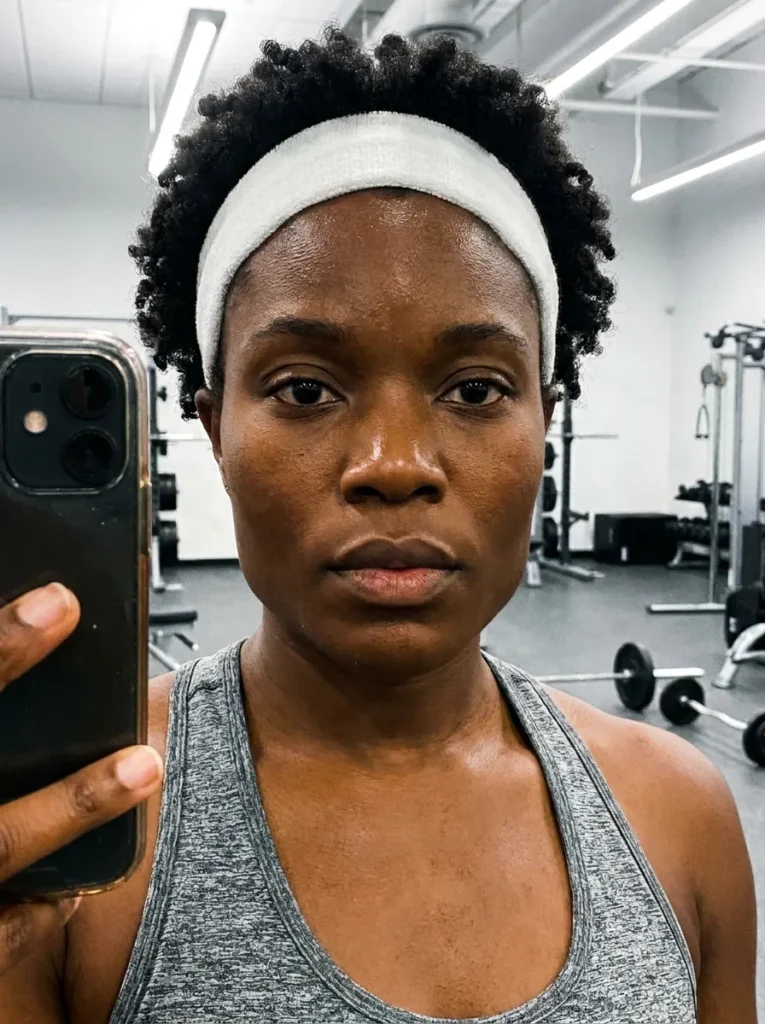
Sliding a thick cotton headband right behind your ears gives your updo a very sporty, clean finish. It pushes all those tiny baby hairs back and creates a smooth runway leading up to your curls. I rely on this trick during hot summer days.
This is also the absolute best way to hide greasy roots if you missed wash day. The headband absorbs sweat while you are working out or running around the city. It keeps you looking totally fresh and put together with zero real effort.
- Best For: All natural hair types / Any length / Square and heart faces
- Maintenance Level: Low. Just slide it on and you are entirely good to go.
- Time Needed: 2 minutes
- Pro Tip: Stretch the band slightly before putting it on so it does not give you a headache later.
14. Layered Faux Hawk Curls
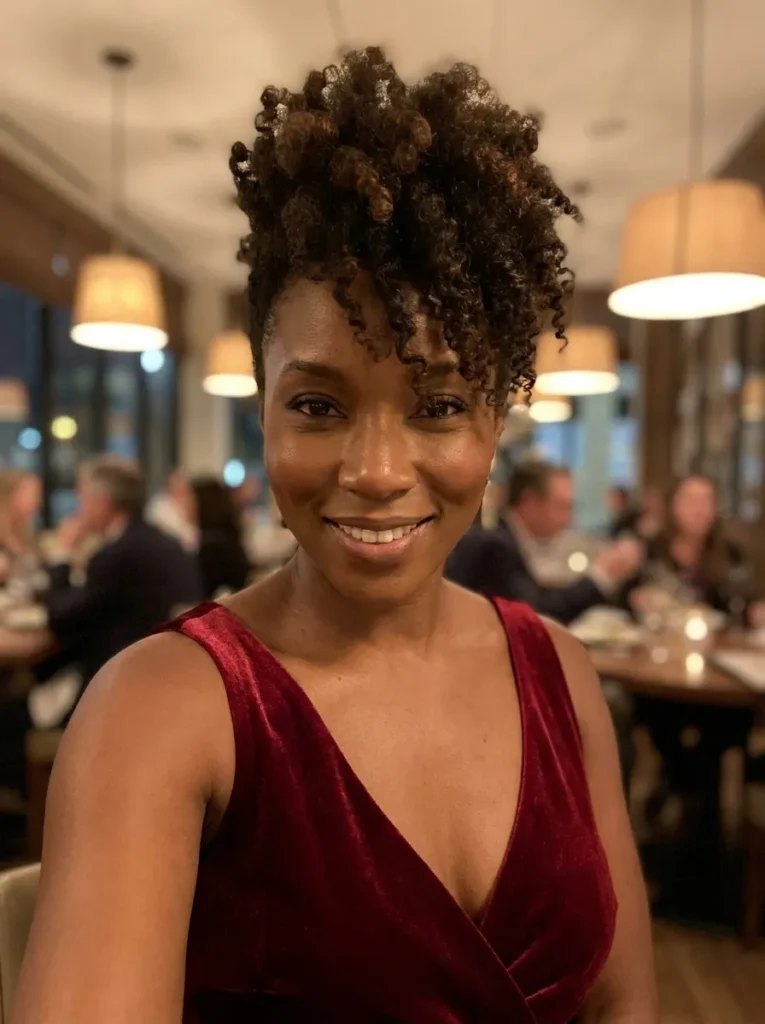
Instead of using just one hair tie, you can use three to create a tall strip of curls down the middle of your head. Pinning the sections together makes it look like one giant, continuous wave. I feel so incredibly fierce wearing this look.
It gives you that cool shaved-side look without actually having to cut a single inch of your hair. This shape naturally makes your face look longer and draws attention right to your eyes. You will definitely stand out at any nice dinner event.
- Best For: Coily hair / Short to medium length / Round faces
- Maintenance Level: High. You need lots of pins to blend the sections together smoothly.
- Time Needed: 15 minutes
- Pro Tip: Use small black rubber bands for each section so they hide easily beneath your thick curls.
15. Upward Braided Back Detail
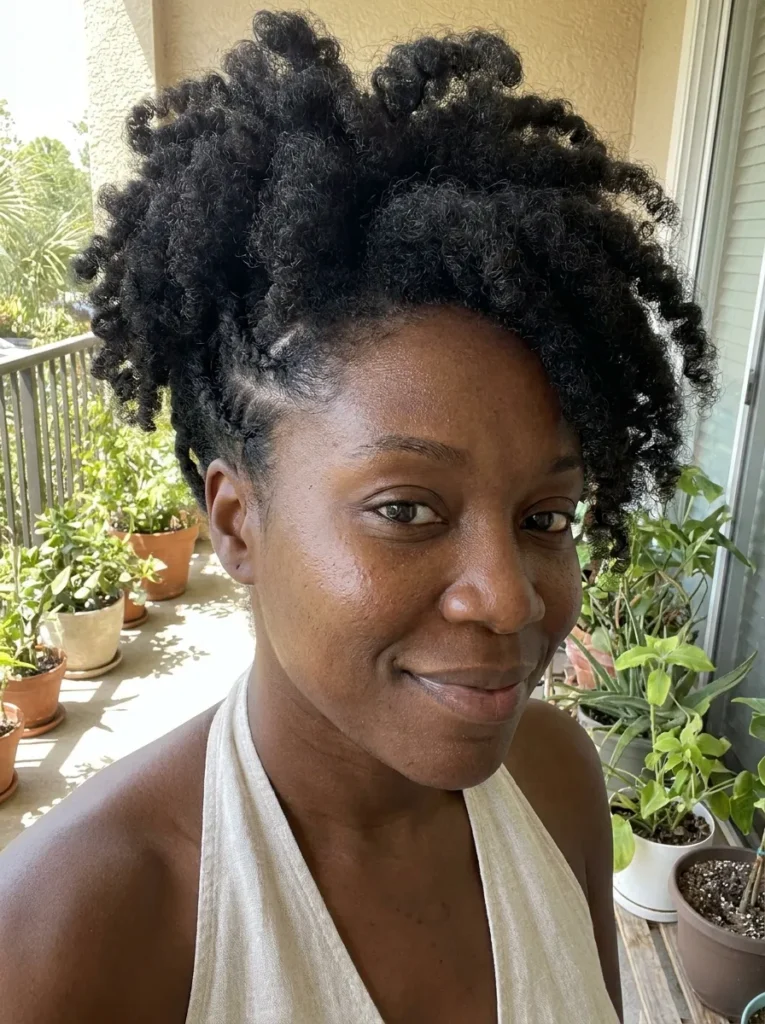
Adding a single flat braid going up the back of your head is an amazing surprise detail. When you turn around, everyone sees this beautiful pattern leading right into your high curls. I always ask my sister to help me braid the back perfectly.
It really keeps those short kitchen hairs off your neck during hot weather. The front looks completely normal, but the back brings so much extra style to the table. This is my top pick for wearing backless dresses or cute tank tops.
- Best For: Thick curly hair / Medium length / All face shapes
- Maintenance Level: Medium. The braid needs to be tight enough to not unravel easily.
- Time Needed: 15 minutes
- Pro Tip: Flip your head completely upside down while doing the back braid so gravity actually helps you.
16. Half Cornrow Crown
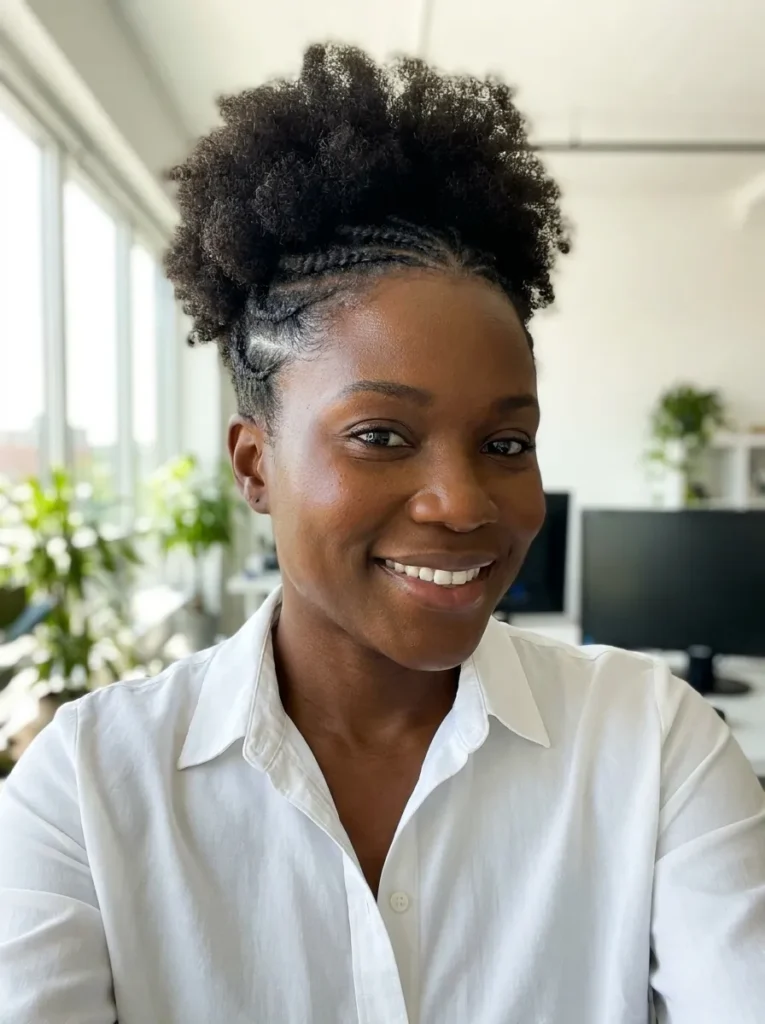
Combining straight rows with a big curly top gives you a really sharp, clean finish. The tight lines on the side pull your face up beautifully and make your cheekbones pop. I love how this mixes a protected style with big natural volume.
You can leave the rows in for days, which makes your morning routine so much faster. This layout is perfect for trips or busy weeks when you cannot wash your hair constantly. It easily shifts from a morning workout to a late night out.
- Best For: Type 4 hair / Medium length / Round and oval faces
- Maintenance Level: High. You need precise parting and tight gripping for the rows.
- Time Needed: 45 minutes
- Pro Tip: Use a rat tail comb to make your parts extremely straight before you start braiding.
17. Floral Clipped Puff
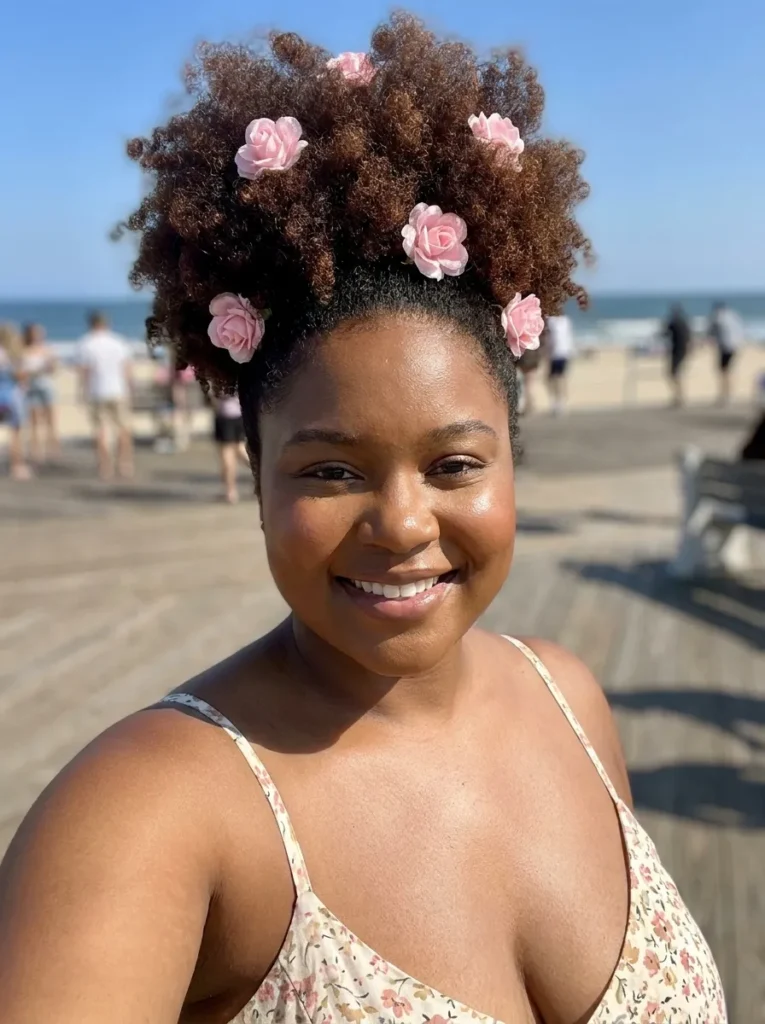
Sliding a few fake flowers into your curls makes the whole style feel incredibly soft and pretty. It is the easiest way to look dressed up for a spring party or a beach trip. I always do this when the weather finally gets warm.
You do not need any special skills to make this look amazing right at home. Just push the clips directly into the thickest part of your hair so they hide the metal completely. People always stop me to ask about this cute accessory.
- Best For: Thick wavy or curly hair / Any length / All face shapes
- Maintenance Level: Low. The clips stay right where you push them all day long.
- Time Needed: 3 minutes
- Pro Tip: Pick smaller flowers so they do not overwhelm your face or hide your beautiful curls.
18. Highlighted Curly Top
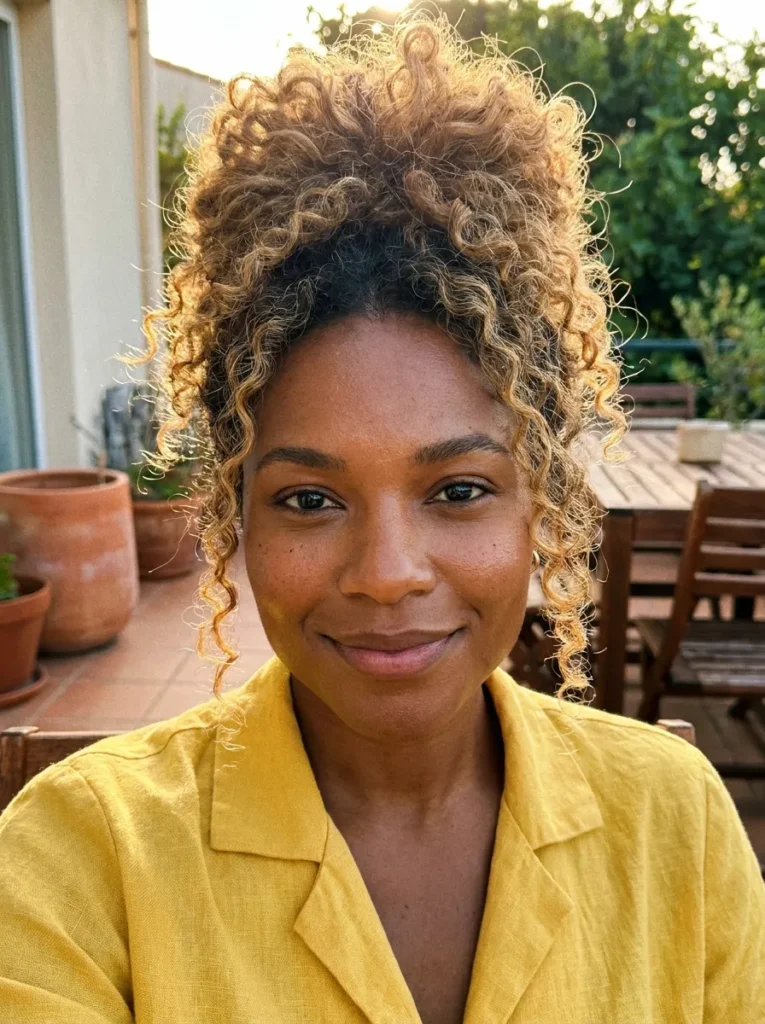
Pulling your hair all the way up is the best way to show off fresh color or highlights. When the lighter ends pile up on top of your dark roots, it creates a really cool contrast. I noticed my blonde tips look so much brighter this way.
This shape catches the sunlight beautifully and makes your curls look deep and fully layered. If your ends are feeling a little dry from bleaching, tucking them together hides any frizz. It is a smart trick to keep colored hair looking completely healthy.
- Best For: Dyed or highlighted curls / Medium to long length / Square faces
- Maintenance Level: Low. Let the different colors do all the hard work for you.
- Time Needed: 5 minutes
- Pro Tip: Apply a tiny drop of shine serum to your colored ends before gathering them up.
19. Double Puff Pigtails
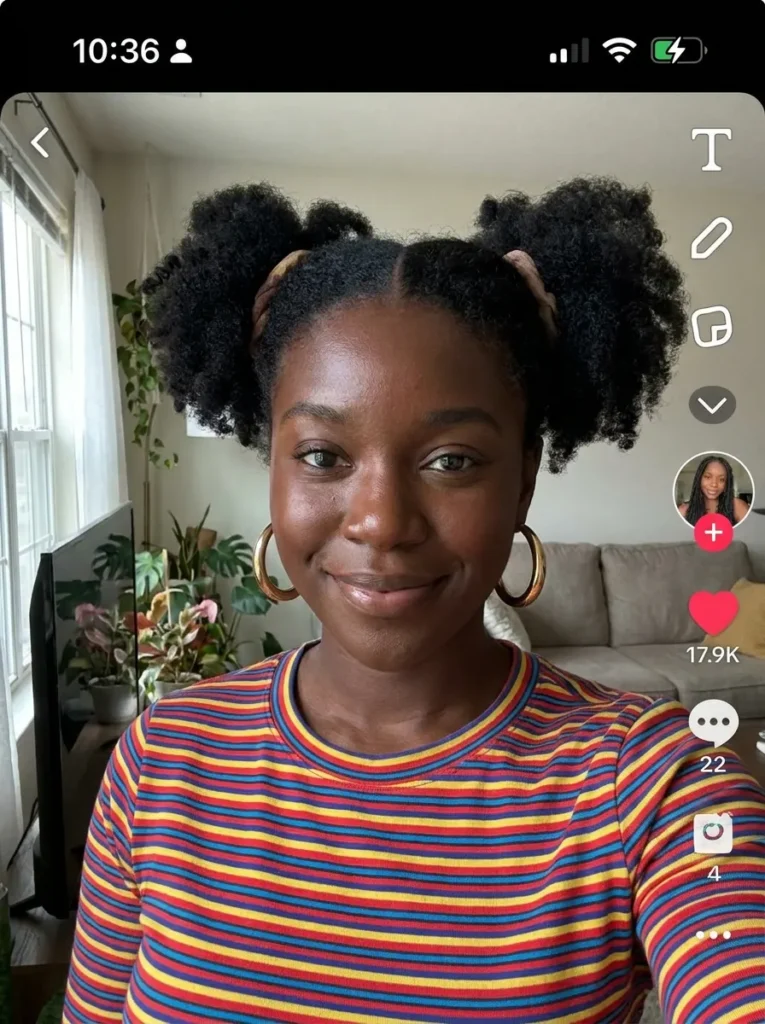
Splitting your hair into two high sections is a really fun twist on the normal shape. It gives off a very youthful, happy energy that totally brightens up your face. I try this on weekends when I am feeling a little extra playful.
This double setup is actually a great trick if your hair is on the shorter side. Gathering two smaller sections is way easier than forcing everything into one giant band. It balances out your head shape and looks amazing with large hoop earrings.
- Best For: Short to medium coily hair / Thick density / Heart and long faces
- Maintenance Level: Medium. You have to make sure both sides are perfectly even.
- Time Needed: 10 minutes
- Pro Tip: Use a mirror to check the back so your center part goes straight down.
20. Pearl Embellished Updo
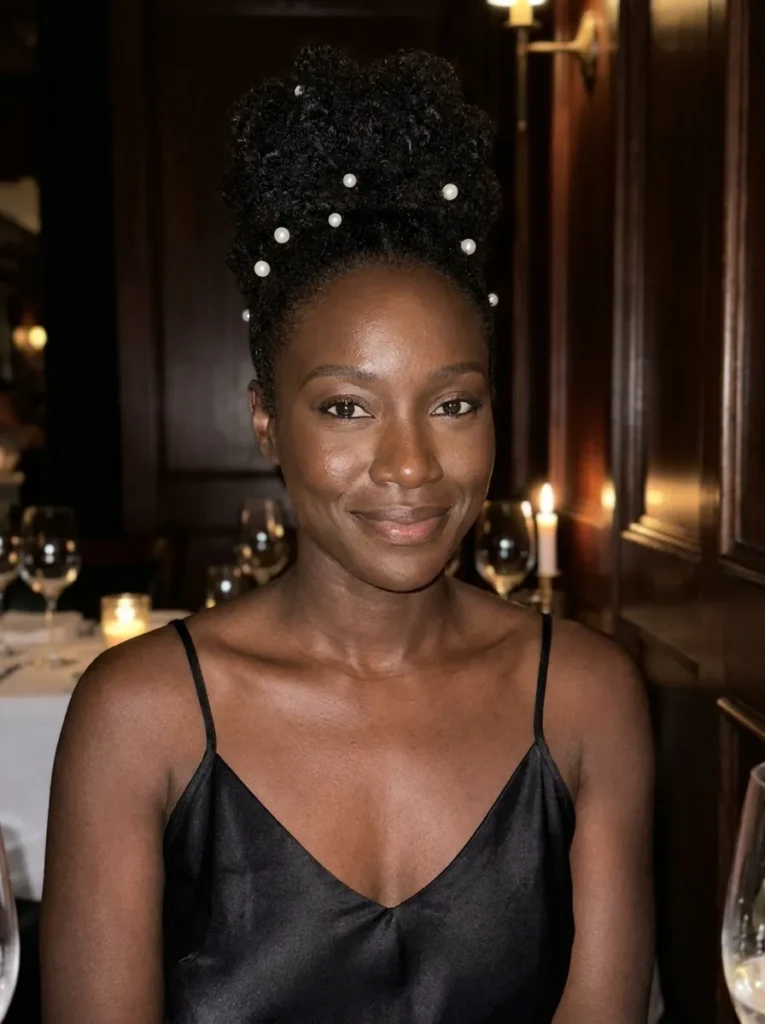
Sticking small pearl pins throughout your top curls turns a basic look into pure elegance. The little white dots stand out against dark hair and look incredibly expensive. I wore this to a fancy dinner and felt like an absolute princess all night.
It is honestly shockingly easy to put together right before you walk out the door. You just scatter the pins around without overthinking the exact placement at all. This simple touch completely upgrades your outfit without needing a trip to the salon.
- Best For: Dense coily or curly hair / Medium length / Diamond and oval faces
- Maintenance Level: Low. The spiraled pins twist right in and never slide out.
- Time Needed: 5 minutes
- Pro Tip: Buy the pearls that have spiral bases instead of straight pins so they grip your curls.
Conclusion
Changing up your daily morning routine does not have to be hard or exhausting work. Trying out these different pineapple updo hairstyles proves that you can protect your beautiful natural hair while looking incredibly stylish everywhere you go.
Make sure to Save your favorite looks to your Pinterest boards right now so you can easily find them on your next busy wash day. I’ve seen how the right style can boost confidence, and you deserve to feel completely beautiful and ready for anything.