
21 Beautiful Natural Hairstyles That Celebrate Your Texture
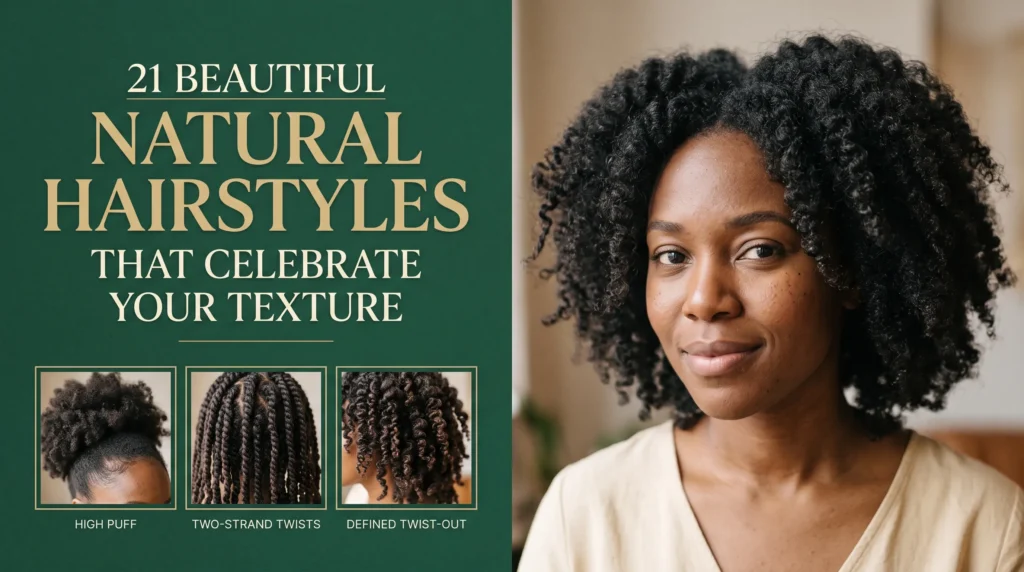
Your natural hair has its own beauty, texture, and personality. The right hairstyle can bring all three to life.
Finding a style that looks beautiful, feels comfortable, and works with your natural curl pattern can sometimes be challenging. That is why these 21 natural hairstyles offer inspiration for different lengths, curl types, and everyday routines, from soft twist-outs and voluminous afro puffs to elegant updos and bold frohawks.
Whether you prefer a simple look for busy mornings or something more polished for a special occasion, there is plenty to explore. I’ve noticed that small changes, such as switching your part, adding a few twists, or adjusting the shape of your curls, can give a familiar style a completely different feel.
You’ll also find practical styling tips to help you work with your texture, reduce unnecessary manipulation, and choose looks that suit your routine. Save your favorites, experiment at your own pace, and enjoy discovering new ways to wear your natural hair with confidence.
1. Defined Wash and Go
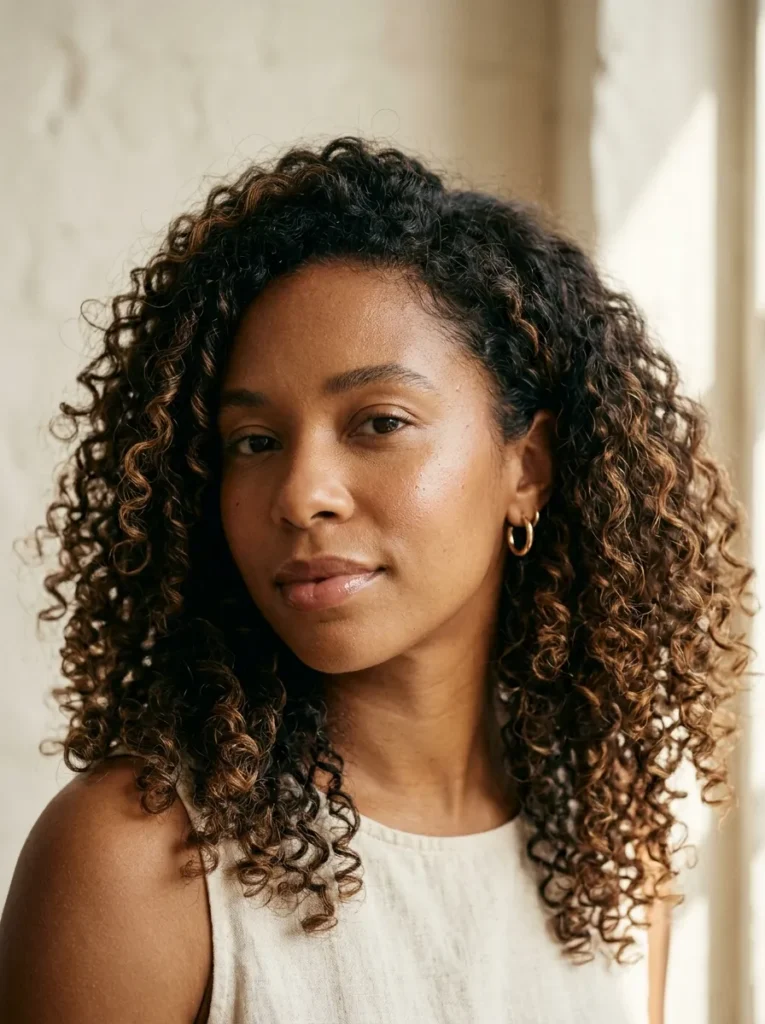
Natural curls deserve to take center stage, and a defined wash and go does exactly that. This style highlights your hair’s original curl pattern, from tight coils to loose spirals, without hiding its natural shape. The result is a fresh, well-defined look that works beautifully for everyday wear.
Start with freshly washed, soaking-wet hair. Apply a leave-in conditioner, followed by a curl-defining gel or cream suited to your hair’s texture. Work in small sections, smoothing the product from roots to ends. Let your curls air-dry or use a diffuser on low heat to reduce frizz while preserving definition.
The secret is using enough water and avoiding excessive touching while your hair dries. Once completely dry, gently separate any stiff curls with a few drops of lightweight oil. This simple routine helps your natural pattern stand out while keeping your hair soft, defined, and full of movement.
2. High Puff Hairstyle
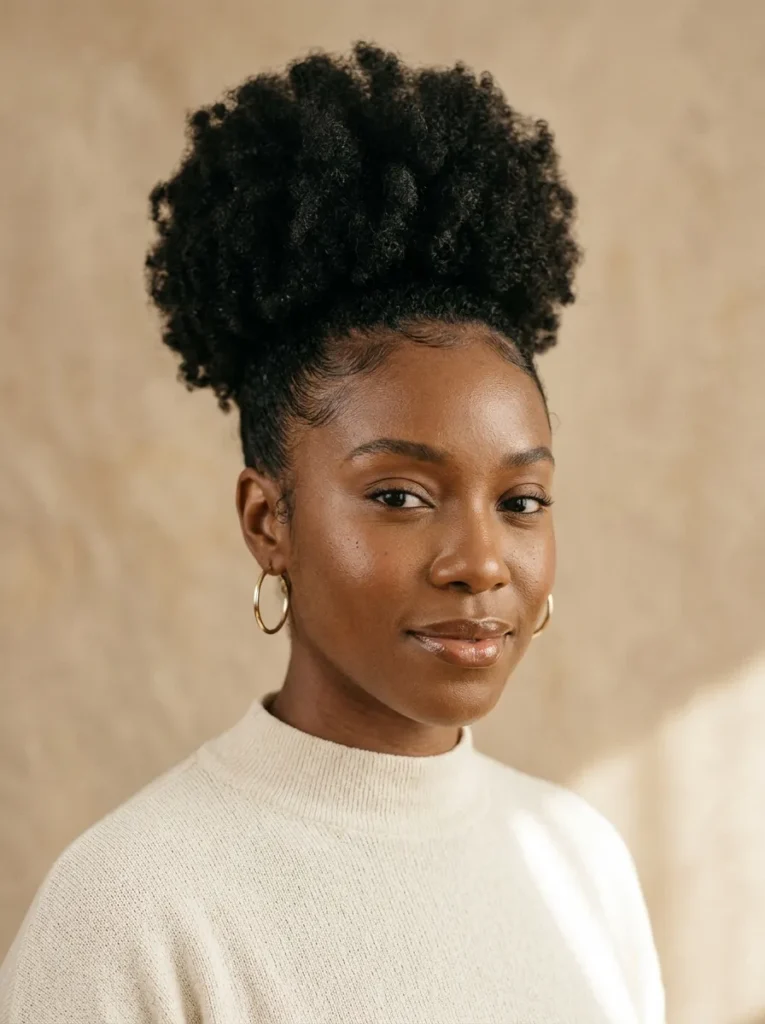
A high puff brings instant volume without requiring complicated styling. It gathers your curls into one striking shape while allowing their natural texture to remain visible. Whether your coils are short and springy or long and fluffy, this hairstyle creates a lifted silhouette that pairs easily with casual outfits and dressier looks.
- Start with moisture: Apply a leave-in conditioner to soften your hair before styling.
- Choose a gentle holder: Use a satin-covered elastic or a soft, snag-free band.
- Shape the puff: Gather your hair toward the crown without pulling tightly at the edges.
- Add definition: Apply a little curl cream to the ends if you prefer separated curls.
- Finish the edges: Smooth them lightly with a soft brush and a suitable styling product.
For a fuller appearance, gently lift the roots with your fingers or a wide-tooth comb rather than brushing through the entire puff. Keep the band comfortably loose, especially around your temples. A satin scarf worn for a few minutes can help set the hairline without unnecessary tension.
3. Flat Twist Updo
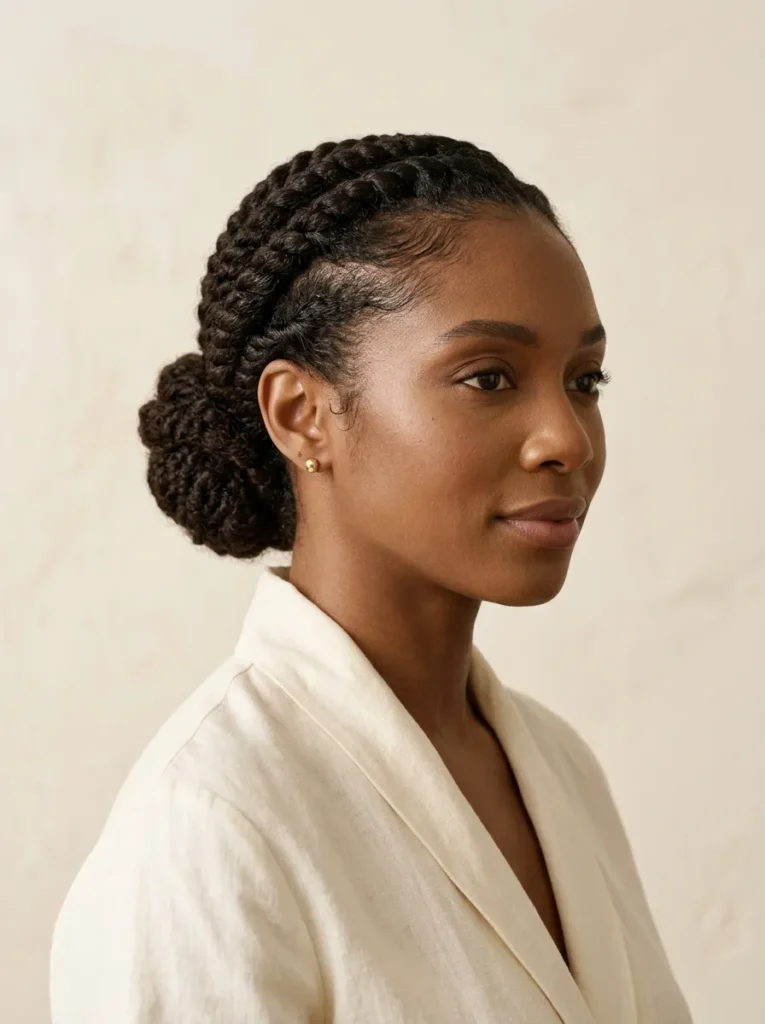
Flat twists create an elegant updo while keeping your hair organized and your natural texture visible. The twists lie close to the scalp, directing the hair backward into a bun or tucked finish. This style suits workdays, family gatherings, and special occasions when you want a polished appearance without heat styling.
Begin with moisturized, detangled hair divided into clean sections. Take two small strands near the front, cross them over each other, and gradually add hair as you move along the scalp. Secure each twist with a small, snag-free pin or elastic, then gather the remaining hair into a low bun.
For a softer finish, leave a few curls near the temples rather than pulling every strand away from your face. A small amount of styling cream can help control flyaways, while a satin scarf helps the twists settle neatly. Avoid twisting too tightly, since tension around the hairline can cause breakage.
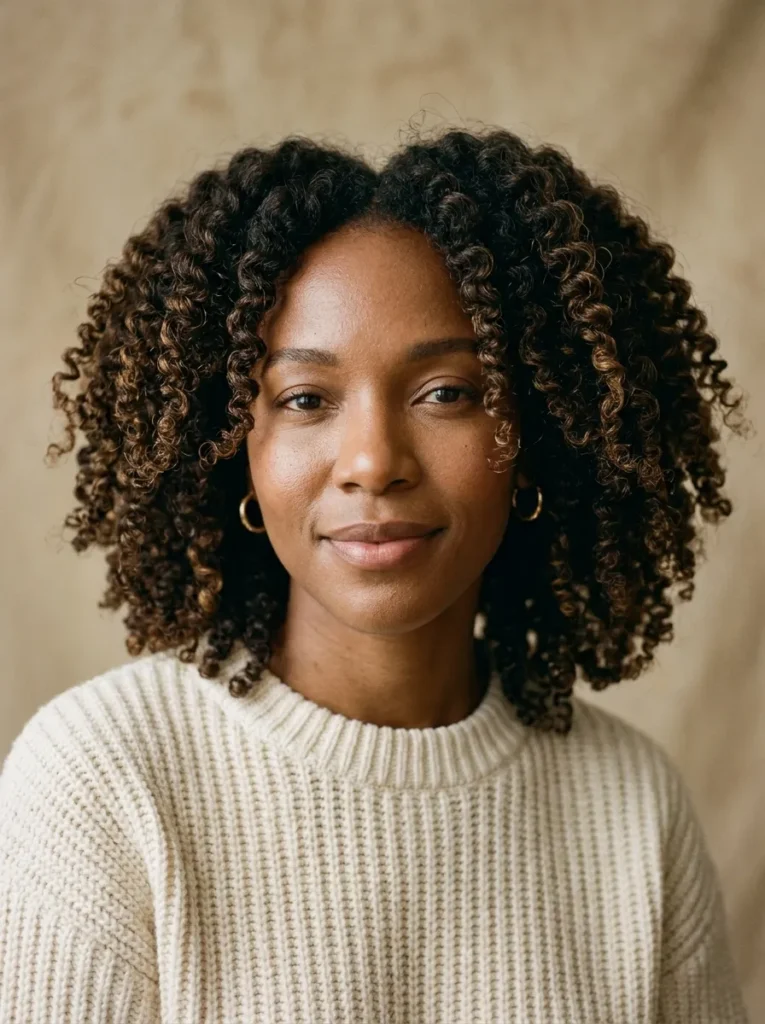
4. Shoulder-Length Twist Out
BEFORE
Your natural hair may look stretched, flat, or less defined after removing braids or twists. Uneven sections can also leave some areas fuller than others, making the overall shape difficult to manage.
AFTER
A carefully separated twist-out creates fuller curls, visible definition, and a balanced shape around the face. The result is a soft, textured style with plenty of movement.
For the best results, start with moisturized hair and divide it into small sections. Apply a leave-in conditioner and a light styling cream before twisting each section. Allow your hair to dry completely before unraveling the twists. Separate each twist gently with oiled fingertips to minimize frizz.
The size of your twists determines the finish. Smaller twists usually create tighter definition, while larger twists produce broader waves and more volume. Pick the size that suits your preferred look, and protect your finished style with a satin bonnet at night.
5. Natural Bantu Knots
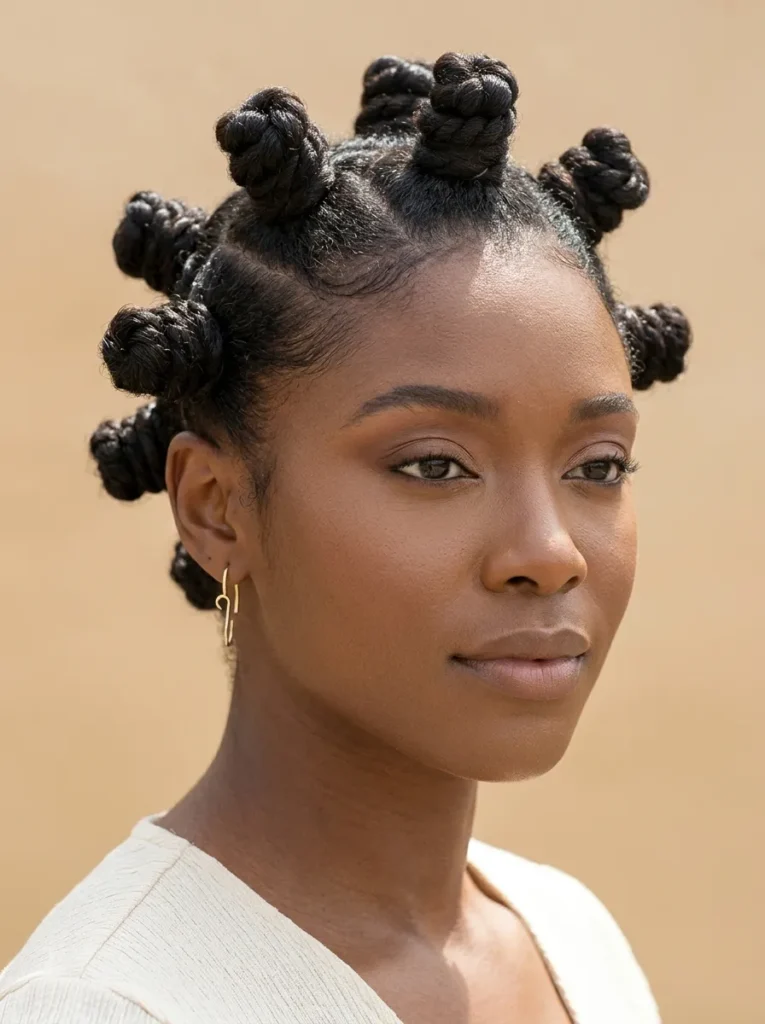
Bantu knots turn natural coils into a striking hairstyle with sculptural detail. Each knot creates a small, rounded shape across the scalp, giving the finished look a distinctive pattern. Wear them as a complete style or unravel them later for a defined Bantu knot-out with springy curls and extra volume.
- Prepare your hair: Detangle gently and apply a lightweight leave-in conditioner.
- Create sections: Use a rat-tail comb to divide your hair into even squares or triangles.
- Twist each section: Rotate the hair until it begins to coil around itself.
- Form the knots: Wrap each twist around its base and tuck the ends securely without pulling tightly.
- Set the style: Allow your hair to dry fully and use a satin bonnet while sleeping.
For a neat finish, keep the sections consistent in size and use a small amount of styling cream to smooth the strands. Bantu knots work on different hair lengths, although shorter hair may require smaller sections. Keep the knots comfortable rather than tight, especially around the edges.
6. Wash and Go vs Twist Out
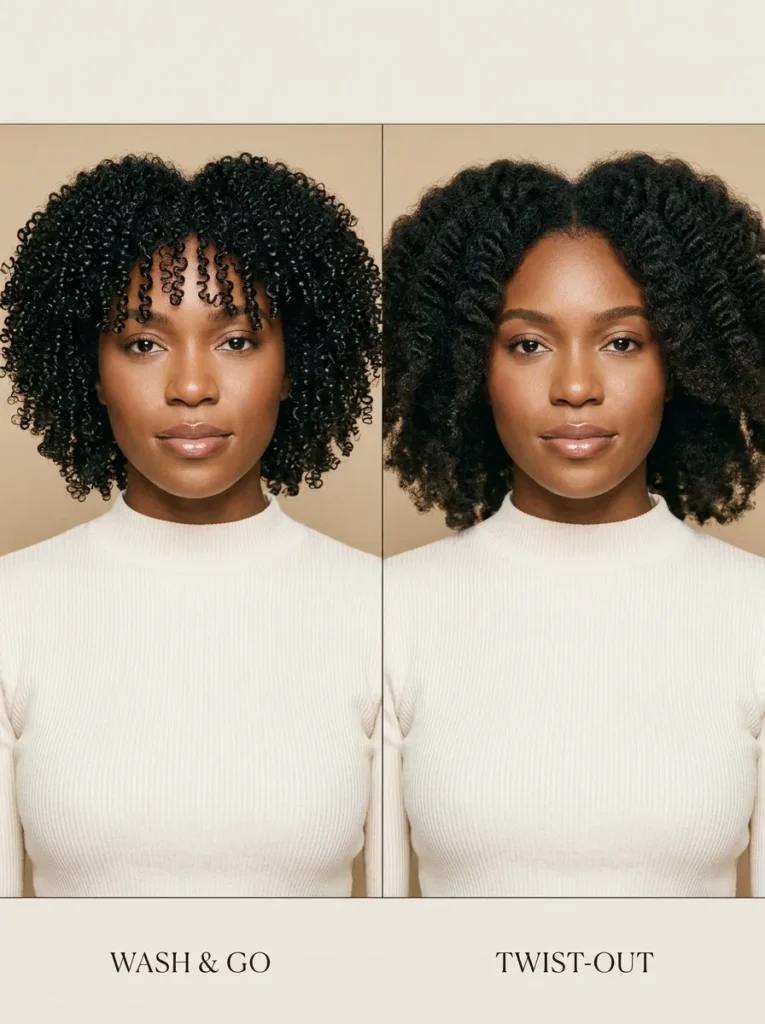
Choosing between defined curls and a fuller twist-out comes down to the finish you prefer and the time you have available. Both styles celebrate natural texture, but they create different shapes and require slightly different routines.
| Feature | Wash and Go | Twist Out |
| Final look | Defined natural curl pattern | Fuller, stretched curls |
| Styling method | Apply products to wet hair | Twist sections and unravel when dry |
| Drying time | Varies with hair density and length | Requires twists to dry completely |
| Volume | Depends on curl pattern and technique | Often offers more visible fullness |
| Maintenance | Refresh curls with water-based products | Preserve definition with gentle nighttime care |
For a quick morning routine, a wash and go may suit you if your curls respond well to defining products. Choose a twist-out when you prefer extra fullness or want to stretch your natural texture without heat. Either way, moisture and gentle handling help maintain the finished style.
Also Visit : 24 Stunning Blonde Hair Color Ideas for a Fresh New Look
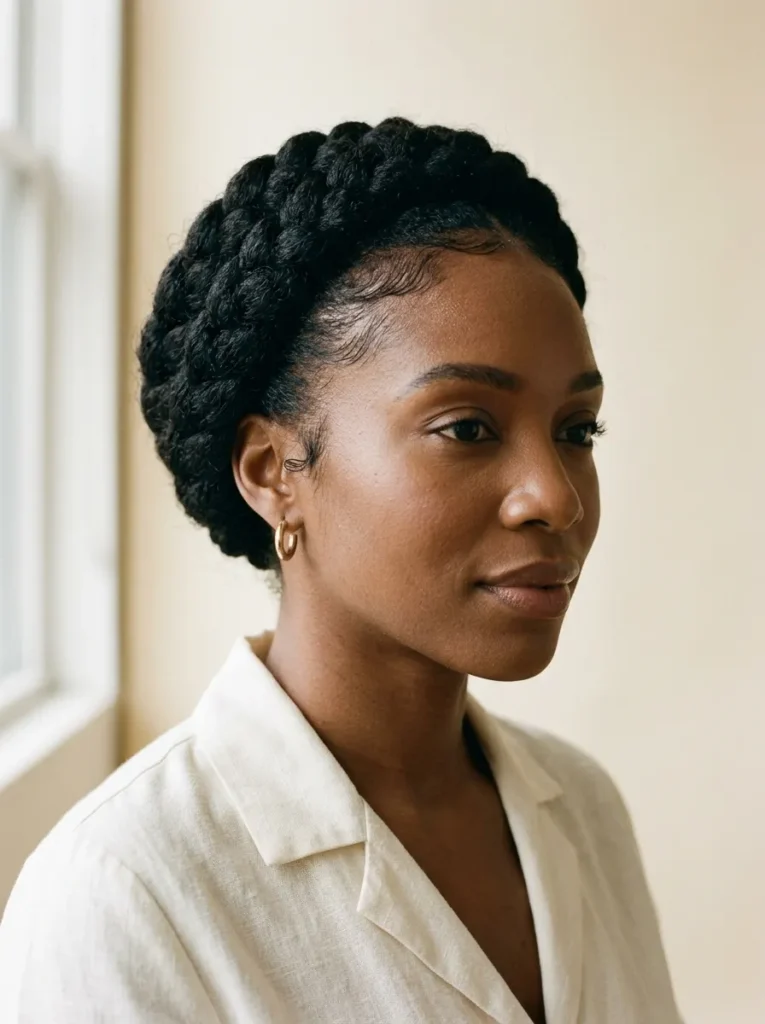
7. Crown Braid Updo
DO
- Moisturize your hair with a leave-in conditioner before braiding.
- Divide your hair into manageable sections for better control.
- Braid around the head, adding small sections as you move along the hairline.
- Secure the ends with discreet pins and check that the braid feels comfortable.
DON’T
- Pull tightly around your temples or nape.
- Braid hair that is heavily tangled or excessively dry.
- Use too many pins that poke the scalp.
- Leave the style in if you notice soreness or persistent tension.
A crown braid creates a graceful, wrapped silhouette that keeps your hair away from your face. It works especially well for medium to long natural hair, although shorter lengths may need extensions or a modified braided design. Add small gold accessories for a special occasion, or keep the braid simple for everyday wear.
8. Shoulder-Length Afro
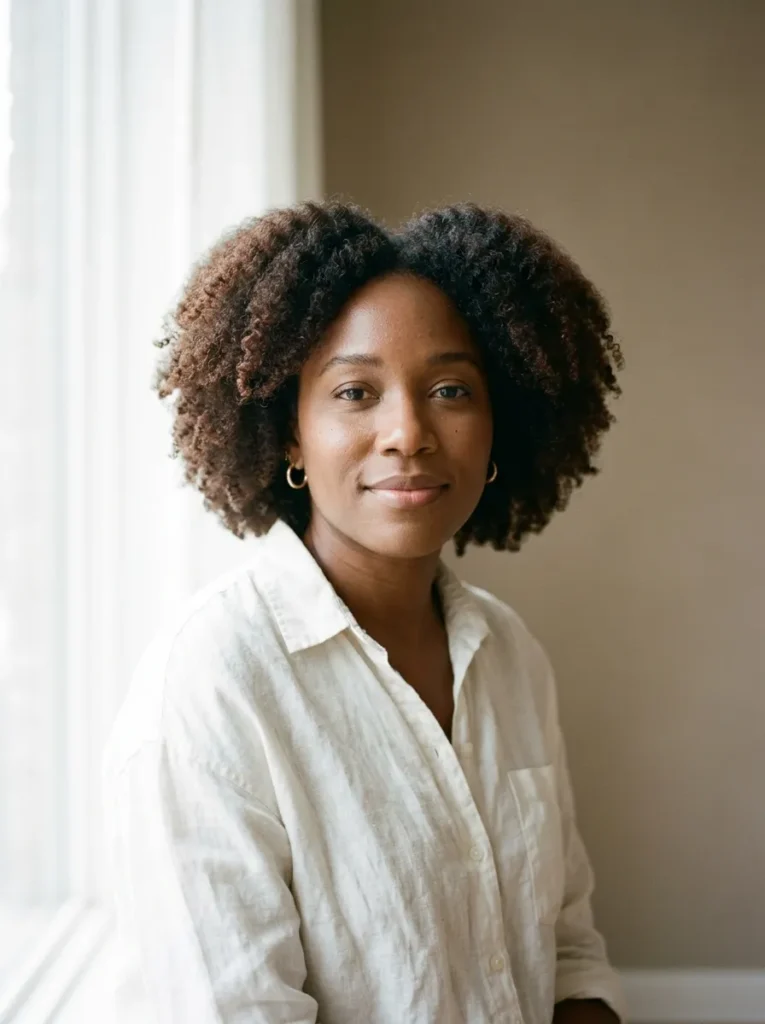
Best For: Medium to long natural hair with enough length to create a rounded silhouette.
Skill Level: Beginner friendly, with gentle shaping.
Styling Time: Approximately 10 to 20 minutes, depending on detangling and styling needs.
Tools: Wide-tooth comb, leave-in conditioner, lightweight oil, and a satin pick.
A shoulder-length afro celebrates fullness without requiring intricate braiding or twisting. Its rounded shape frames the face and gives your coils room to stand out. Start with moisturized hair, then lift the roots gently with an afro pick, working from the ends toward the scalp rather than dragging the comb through the entire length.
For a balanced finish, lift the sides and crown gradually until the shape looks even from the front and side. Avoid excessive picking if you want to preserve curl definition. A little leave-in conditioner can help with softness, while a satin bonnet protects the shape overnight.
9. Half-Up Curly Bun
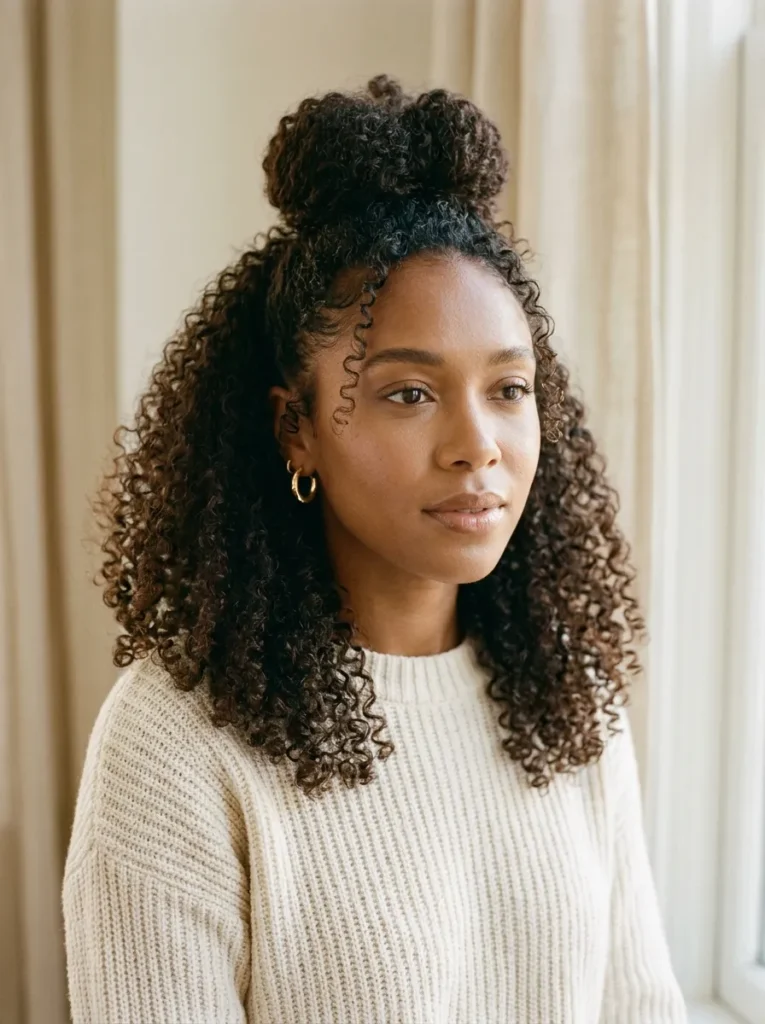
Some days call for a little structure without hiding your curls. A half-up curly bun gathers the upper section of your hair while leaving the rest loose, creating an easy balance between volume and definition.
Start by separating the top section of your hair from ear to ear. Gather it gently at the crown, twist it into a loose bun, and secure it with a soft elastic or bobby pins. Leave the remaining curls down, refreshing them with a small amount of water and leave-in conditioner if needed.
For a softer finish, pull out two small curls near the front and loosen the bun slightly with your fingertips. This style works particularly well on medium to long hair, especially when you want your face to remain visible while keeping your natural texture as the main feature. Avoid securing the bun too tightly, since repeated tension can stress the hairline.
10. Chunky Two-Strand Twists
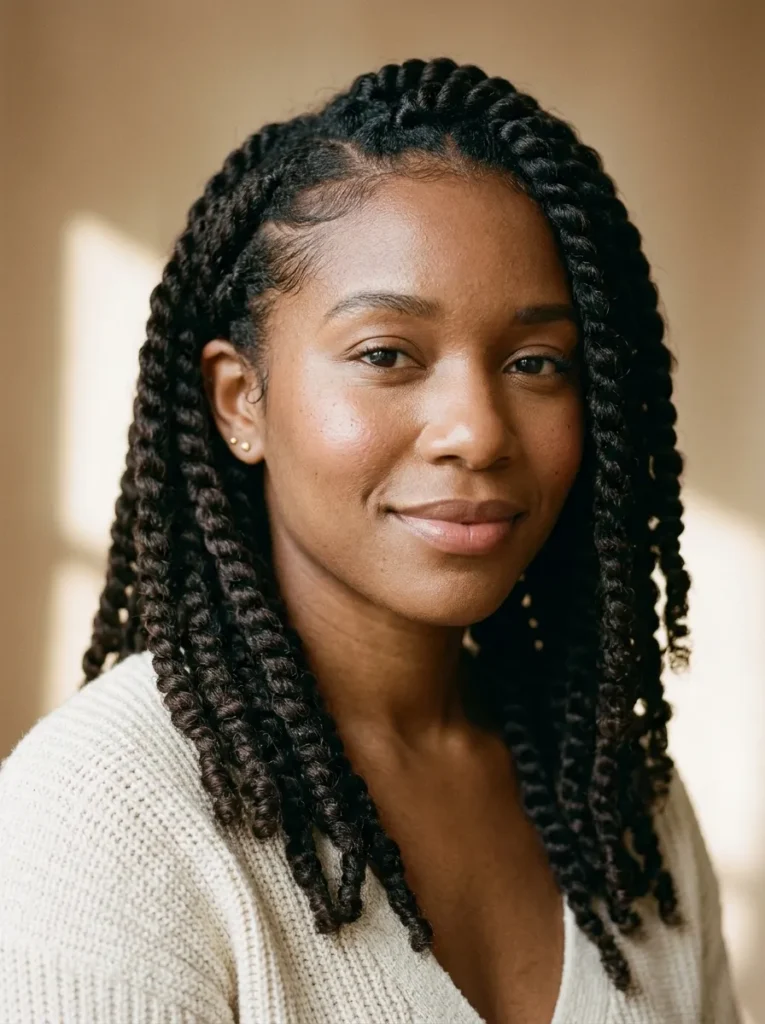
- Prepare: Detangle freshly washed hair and apply a moisturizing leave-in conditioner.
- Section: Divide your hair into medium or large sections using a wide-tooth comb.
- Twist: Split each section into two strands and wrap them around each other consistently.
- Seal: Smooth a little styling cream over the ends and coil them gently to help secure the twists.
- Protect: Cover your hair with a satin bonnet at night to reduce friction and frizz.
Chunky twists offer a defined, low-manipulation style that keeps your hair organized while showing off its natural texture. Larger sections create a bold, full appearance, while smaller sections produce a more detailed finish. Keep your twists loose enough to avoid scalp discomfort, and refresh them with a light mist of water when they begin to look dry.
11. Sleek Low Puff
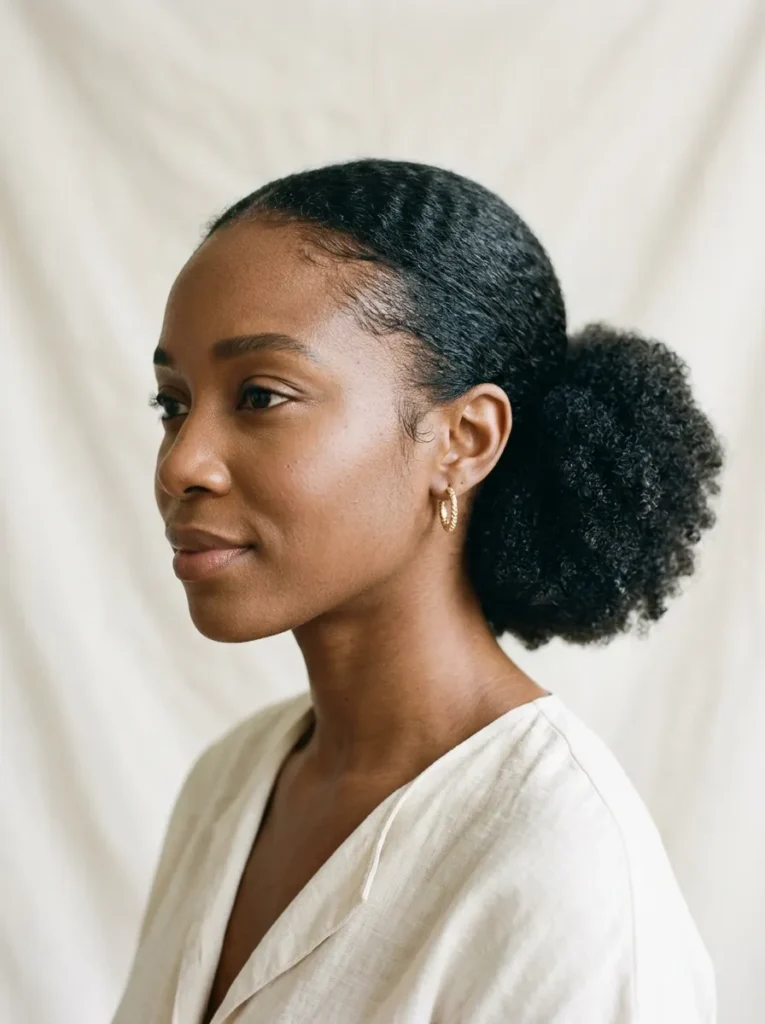
Quick Tip:
Use a soft brush and a small amount of styling gel to smooth your hair toward the nape. Secure it with a satin-covered band rather than pulling tightly. A satin scarf worn for five to ten minutes can help set the crown and create a neat finish.
The sleek low puff is a practical choice for busy mornings, office outfits, or occasions that call for understated elegance. Its smooth crown contrasts beautifully with the volume at the back, allowing your natural coils to remain the focus. Apply styling products sparingly to avoid buildup, and keep the puff loose enough to protect your edges.
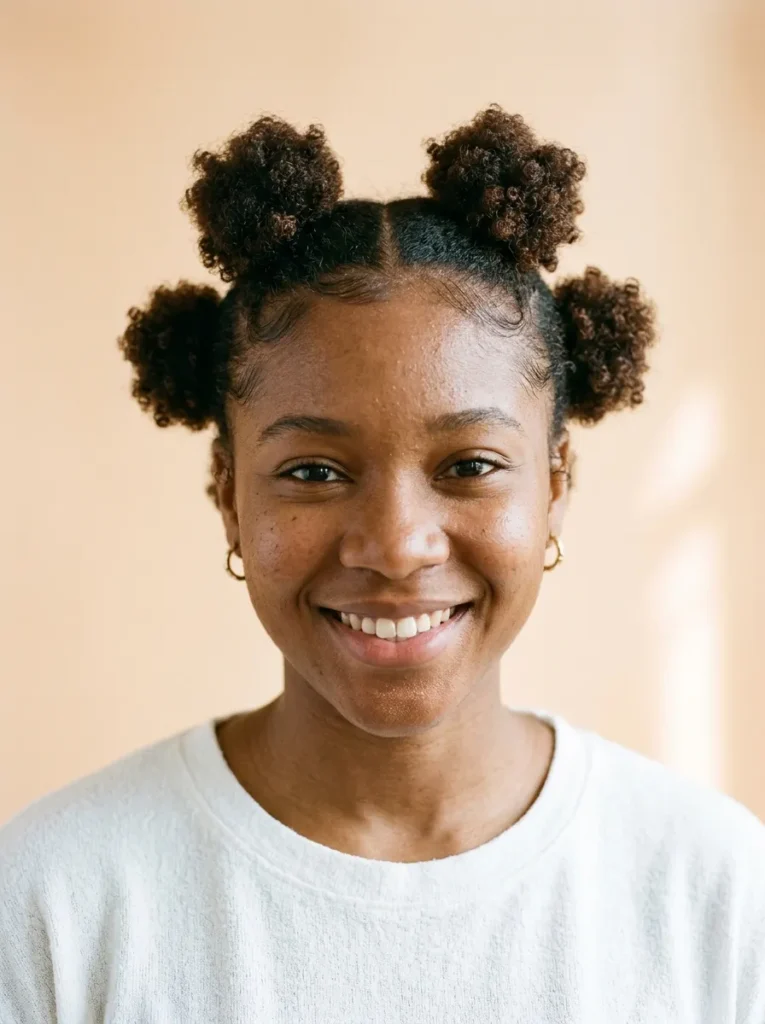
12. Mini Afro Puffs
BEFORE
Short natural hair can be difficult to gather into one full puff, and uneven sections may make the style look less balanced. Pulling too hard to create matching shapes can also place unnecessary tension on delicate edges.
AFTER
Four mini afro puffs create a playful, structured look that distributes volume across the head. The separate sections make shorter curls easier to manage while giving the hairstyle a distinctive silhouette.
Start by parting your hair into four sections with a rat-tail comb. Apply a little leave-in conditioner, gather each section gently, and secure it with a soft elastic. Use your fingers to fluff each puff until the shapes look balanced. You can adjust the partings for a symmetrical finish or a more relaxed appearance.
Mini puffs work particularly well for short to medium natural hair and can be styled for casual outings, school, or weekends. Keep the elastics comfortable and avoid repeating the same tight partings every day. A satin bonnet helps protect the puffs and reduce friction while you sleep.
13. Flat Twist Ponytail
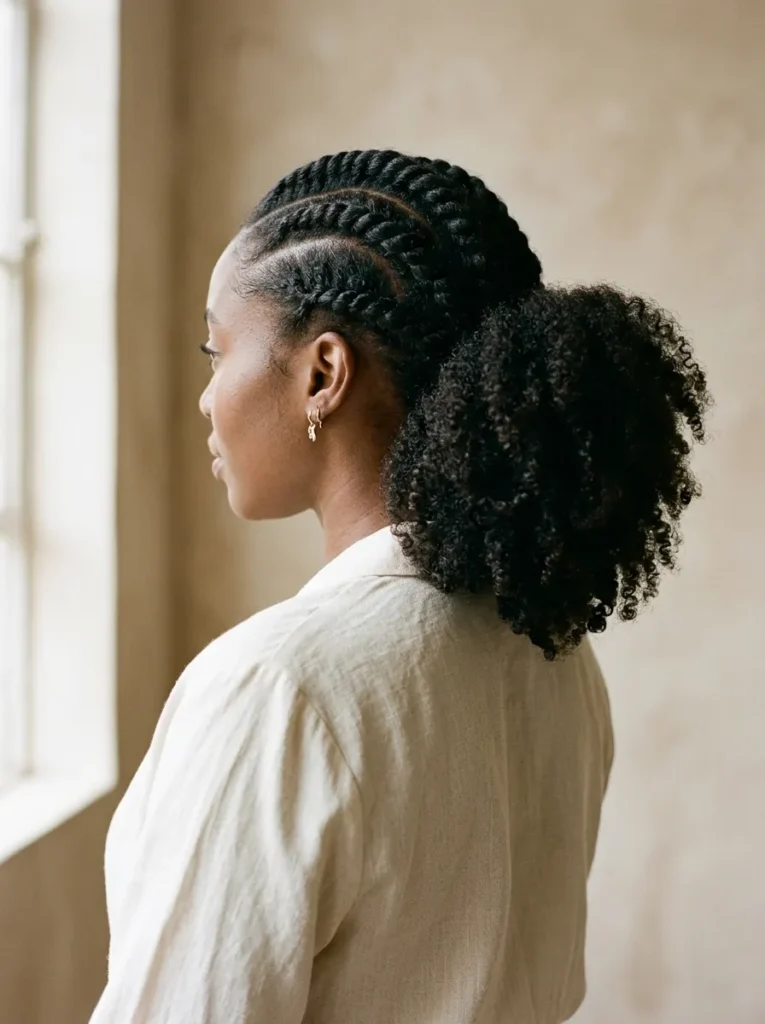
- Section the hair: Create clean partings from the front toward the back using a rat-tail comb.
- Moisturize: Apply leave-in conditioner and a small amount of twisting cream to each section.
- Create the twists: Cross two strands over each other, gradually adding hair as you work along the scalp.
- Gather the ends: Secure the remaining hair into a ponytail with a soft band.
- Finish the shape: Fluff the ponytail gently and tuck away any loose ends with discreet pins.
Flat twists add detail to a simple ponytail while keeping much of the hair secured. You can create two large twists for a minimalist finish or several smaller ones for a more intricate pattern. Keep the twists comfortable around your hairline, and use a satin scarf to help preserve their neat appearance overnight.
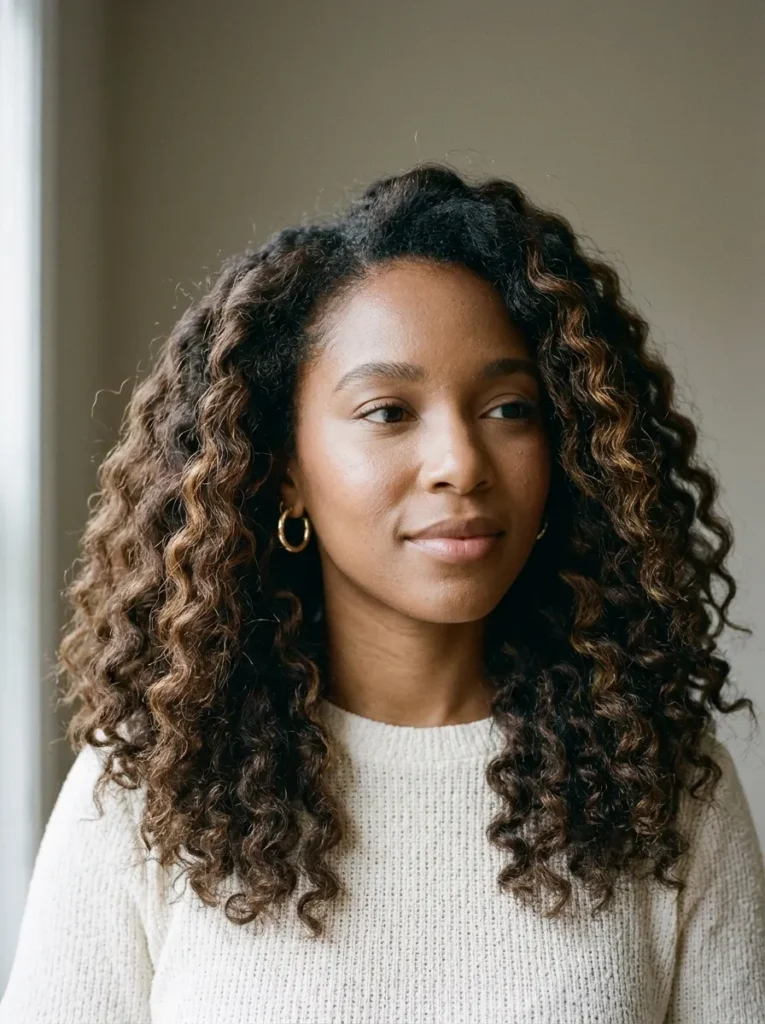
14. Natural Hair Braid-Out
| Feature | Smaller Braids | Larger Braids |
| Curl pattern | Tighter, more detailed waves | Looser, broader waves |
| Final volume | More controlled definition | Often fuller and softer |
| Styling time | Longer braiding session | Fewer sections to braid |
| Best result | Defined texture with smaller waves | Relaxed texture with larger bends |
A braid-out gives natural hair a stretched appearance while preserving plenty of texture and movement. Start with damp, detangled hair, apply a leave-in conditioner and a light styling cream, then braid each section evenly. Let the braids dry completely before unraveling them gently with your fingertips.
For better definition, use a little oil on your hands before separating the braids. Avoid pulling the sections apart repeatedly, as excessive handling can create frizz. The finished style looks especially full when you lift the roots lightly with your fingers and protect the waves with a satin bonnet at night.
Also Visit : 20 Simple Hairstyles for Short Hair That Save You Time
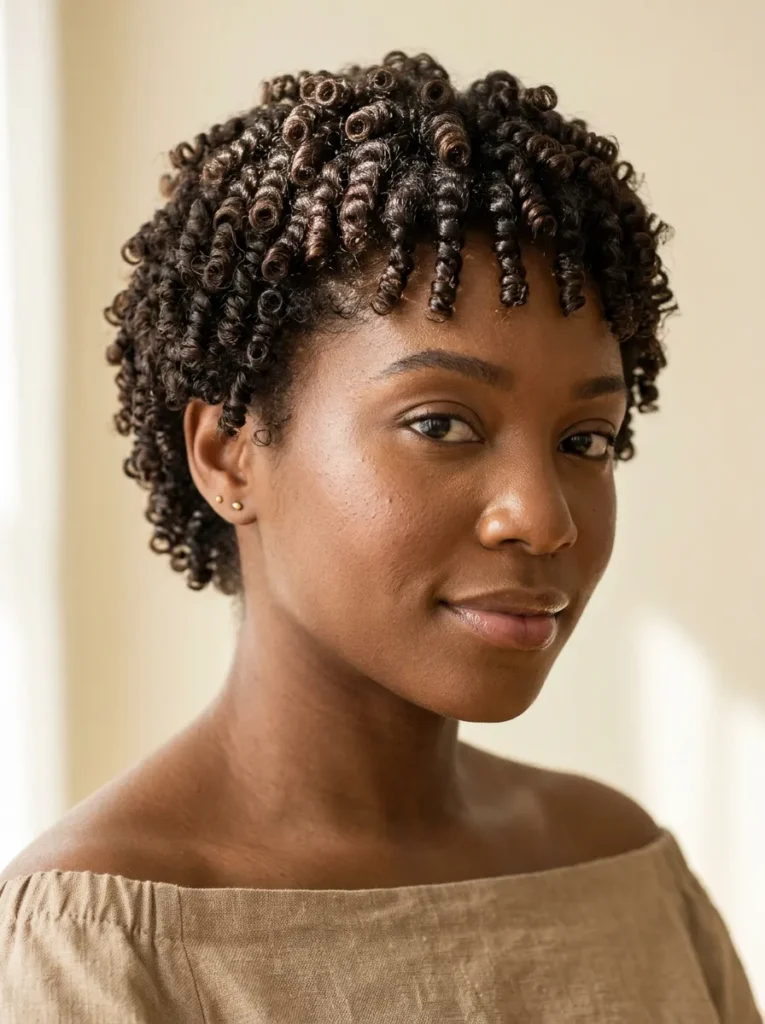
15. Defined Finger Coils
DO
- Work with clean, damp hair for easier shaping.
- Apply a lightweight leave-in conditioner and curl-defining gel.
- Divide your hair into small, even sections.
- Wrap each strand around your finger in its natural curl direction.
DON’T
- Use excessive gel that leaves a heavy residue.
- Pull the strands tightly while creating the coils.
- Separate coils before they have dried completely.
- Comb through the finished style if you want to preserve individual spirals.
Finger coils create a defined, polished finish that highlights the shape of each curl. They are especially useful for short natural hair, although longer lengths can also benefit from the technique. Work patiently in small sections, and remember that coil size affects the final appearance. Smaller coils create a more detailed finish, while larger ones produce a softer, chunkier look.
16. Tapered Natural Cut
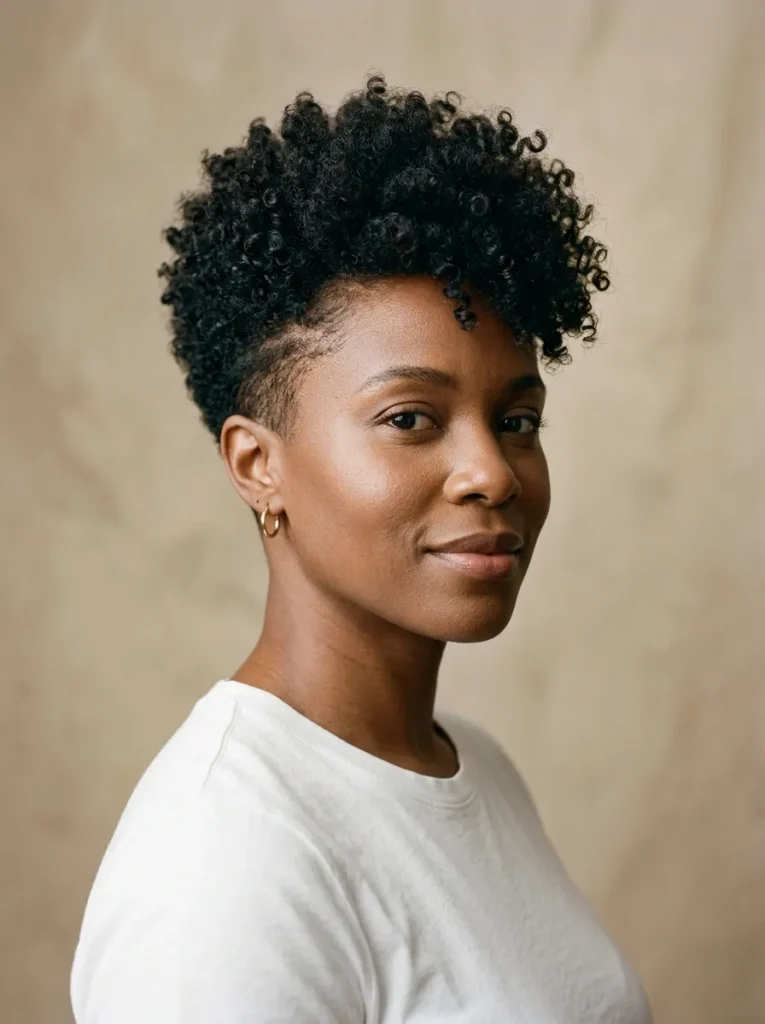
Best For: Short natural hair, especially tightly coiled textures.
Styling Time: Around 5 to 15 minutes for daily shaping.
Maintenance: Regular trims help preserve the tapered silhouette as the sides grow.
Styling Products: Lightweight leave-in conditioner, curl cream, and a soft pick.
A tapered cut brings attention to your curls while creating a clean shape around the sides and nape. The shorter sides contrast with the fuller crown, giving your natural texture a distinctive outline without requiring complicated daily styling.
Ask your barber or stylist to leave enough length on top for the curl pattern you want. You can wear the crown defined with curl cream or gently lift the roots for extra volume. A little moisture each morning helps refresh the curls, while regular trims keep the outline looking intentional. The best part is how easily this cut adapts to casual and dressy outfits.
17. Side-Parted Natural Curls
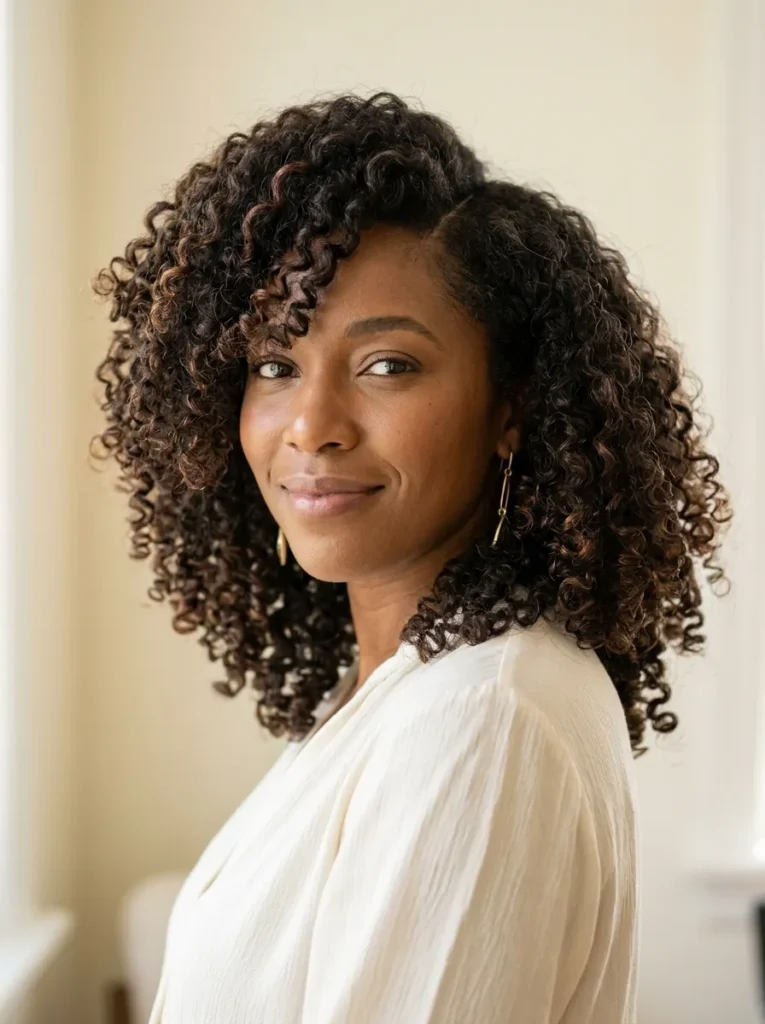
A deep side part can change the entire shape of your natural curls without requiring a new haircut. The angled part adds asymmetry, creates lift at the crown, and lets your curls frame one side of your face more prominently.
Start with damp or freshly refreshed hair. Use the pointed end of a comb to create a part slightly off-center, then apply a small amount of curl cream to encourage definition. Gently arrange the curls on either side with your fingers, lifting the roots where you want more volume.
For a softer finish, avoid making the part too rigid. Let a few curls fall naturally near your forehead, and use a diffuser on low heat if you need faster drying. This look works across many curl patterns and hair lengths, making it an easy way to give familiar natural hairstyles a fresh appearance.
18. Pineapple Curly Updo
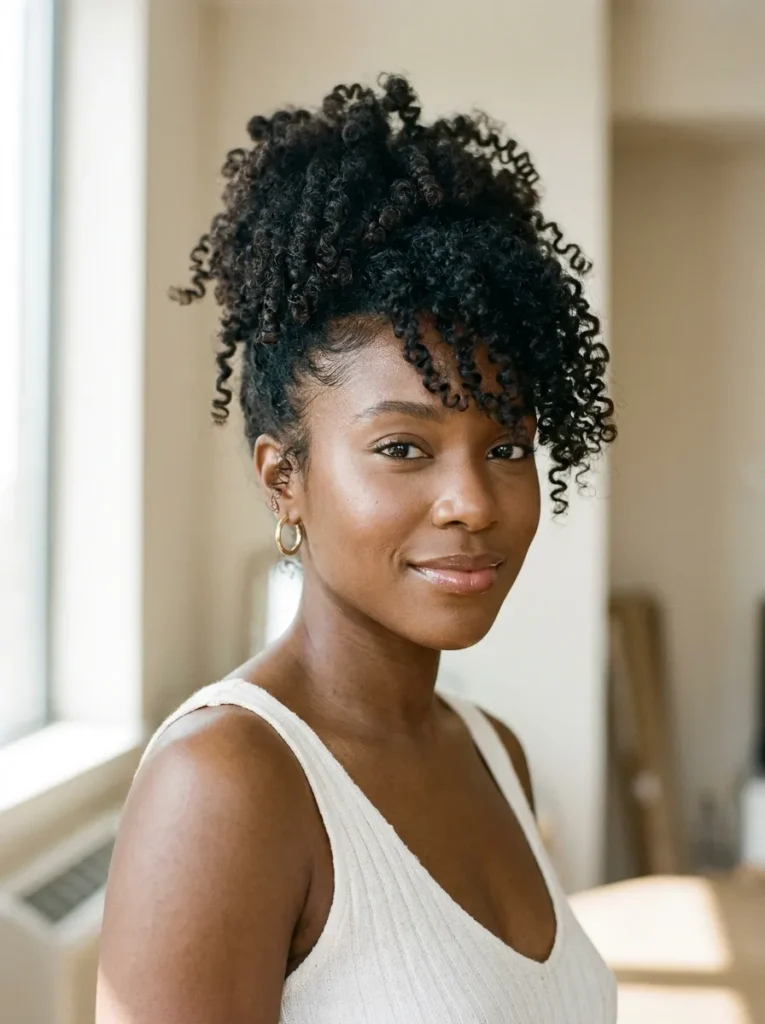
Quick Tip:
Gather your curls loosely at the crown using a soft satin scrunchie, leaving the ends free to fan outward. Avoid pulling the band too tightly, and use your fingers to arrange the curls around your forehead for a relaxed finish.
The pineapple updo is a practical choice for showcasing natural volume while keeping hair away from the neck. It works especially well with medium to long curls that can gather comfortably at the crown. Refresh flattened sections with a light water mist and a little leave-in conditioner, then reshape the curls with your fingertips rather than brushing them out.
For overnight protection, the pineapple technique can also help preserve curl definition while you sleep. Use a loose scrunchie and a satin bonnet or pillowcase to reduce friction. In the morning, release the hair gently and reposition individual curls to restore the shape without unnecessary manipulation.
19. Braided Natural Mohawk
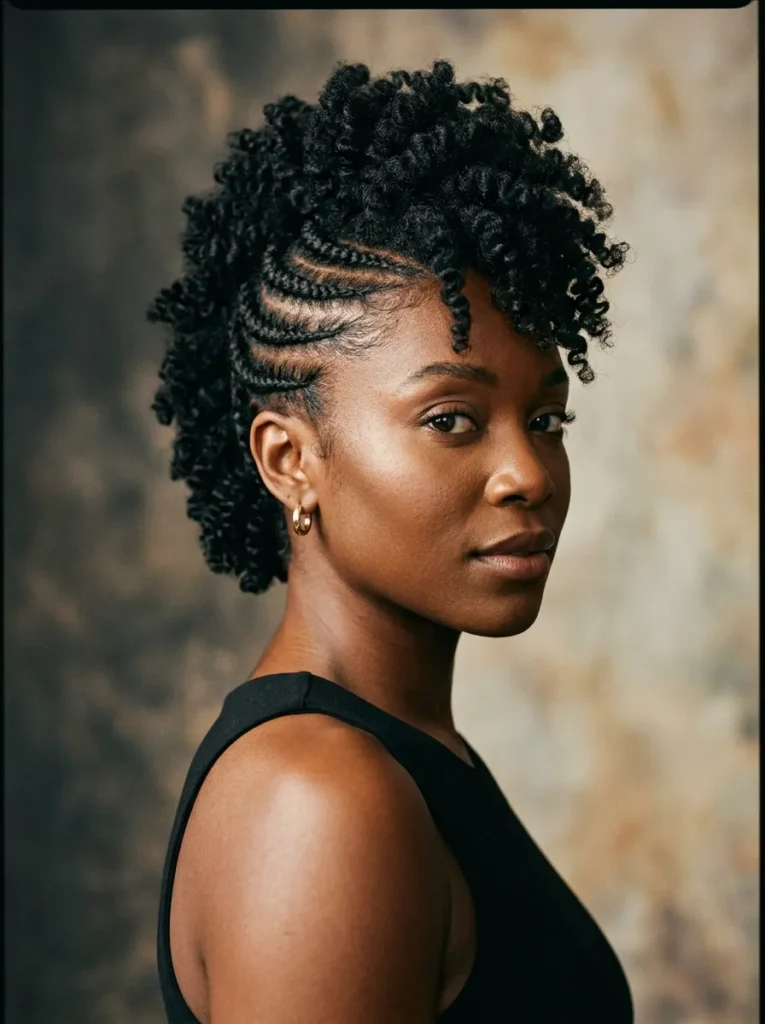
BEFORE
Loose natural hair can lose its shape throughout the day, especially when the sides become puffy or the curls fall away from the crown. Creating a dramatic silhouette may also seem difficult without using heat or extensions.
AFTER
A braided mohawk keeps the sides neatly arranged while leaving the center full of natural curls. The contrast between the cornrows and the textured crown creates a bold style with plenty of visual interest.
Start by dividing your hair into sections running from the sides toward the center. Braid the sides close to the scalp, then leave the middle section loose, twisted, or gathered into defined curls. Secure the braid ends carefully, and shape the crown with your fingers for balanced volume.
This style works well for special occasions, parties, and days when you want a more dramatic look. You can keep the sides simple or ask a skilled braider for decorative patterns. Avoid tight cornrows, particularly around the temples, and loosen the style if you notice discomfort.
20. Low Natural Bun
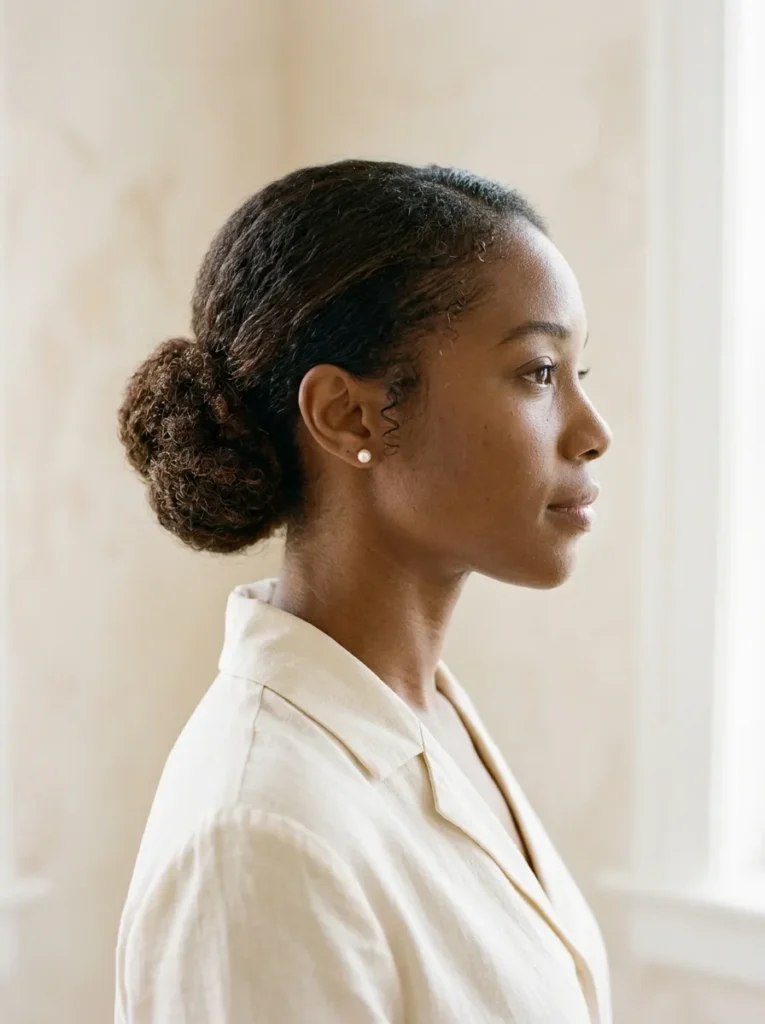
- Detangle gently: Start with moisturized hair and remove knots using your fingers or a wide-tooth comb.
- Gather at the nape: Smooth your hair backward with a soft brush, keeping the tension comfortable.
- Secure the base: Use a soft elastic to create a low ponytail.
- Shape the bun: Twist the ponytail loosely around its base and secure it with hairpins.
- Finish neatly: Tuck in loose ends and apply a small amount of styling cream where needed.
A low bun offers a simple, polished way to wear natural hair for work, formal events, or everyday errands. It keeps the ends gathered together and creates a clean silhouette without requiring heat styling. For a fuller bun, gently stretch the hair beforehand or use a soft bun form that matches your hair color.
Keep the base loose enough to avoid pulling on your edges, and alternate the bun’s position if you wear it frequently. A satin scarf can help smooth the sides while you get ready, leaving the finished style neat without excessive product.
21. Curly Frohawk
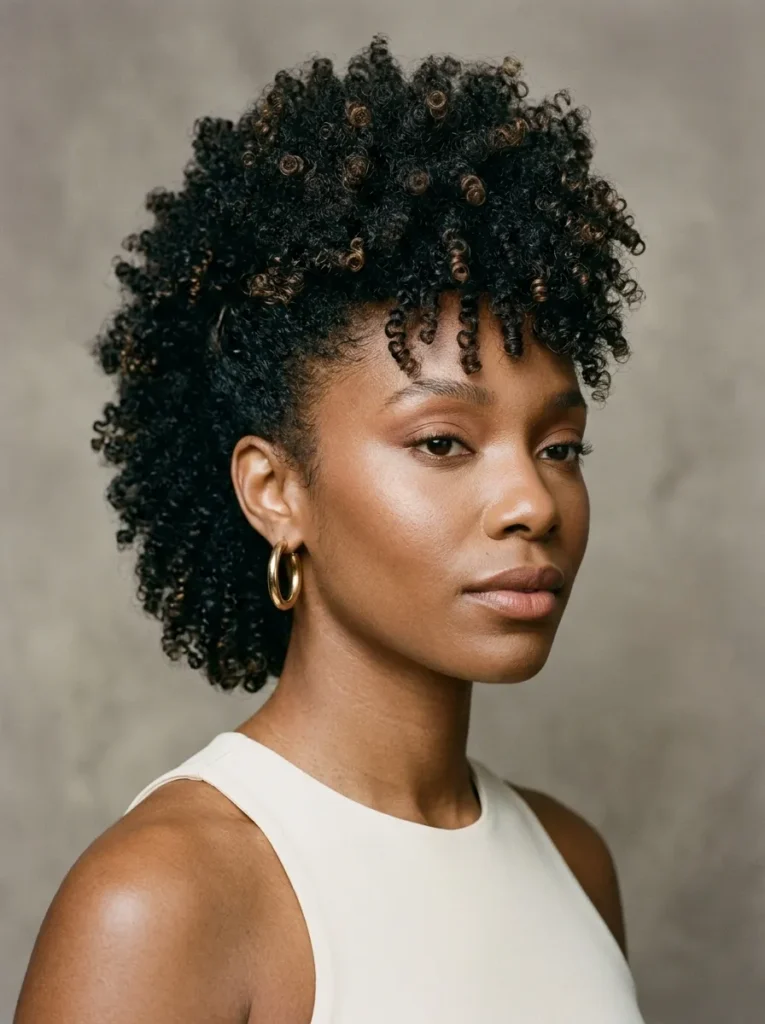
A curly frohawk creates the bold shape of a mohawk while keeping your natural curls at the center of attention. Instead of shaving the sides, you can pin or tuck them inward to form a raised strip of textured hair from the front to the back.
Begin with moisturized, detangled hair. Divide each side into sections, then gently secure the hair inward with bobby pins that match your hair color. Leave the center loose and use your fingers or a wide-tooth pick to lift the curls into a fuller shape. Check the silhouette from the front and both sides before adding the final pins.
For a softer version, leave a few curls around the forehead and keep the sides loosely pinned. For a more dramatic finish, lift the crown and define individual coils with a small amount of curl cream. This style works best when the pins feel secure without scratching the scalp or creating tension.
Also Visit : 20 Protective Hairstyles You Probably Haven’t Tried Yet
CONCLUSION
Your natural texture offers so many ways to express your personal style, whether you love defined coils, fluffy afros, protective twists, or elegant buns. You don’t need an elaborate routine to create a look that feels beautiful and uniquely yours. Start with one of these natural hairstyles, adapt it to your hair length and curl pattern, and remember to prioritize moisture and gentle handling.
Save this article on Pinterest so your favorite ideas are easy to find when you need fresh inspiration. Share it with a friend who loves natural hair, too. Your next favorite hairstyle might be just one simple styling change away.


