Natural Hair Tips for Beginners You Haven’t Tried Yet
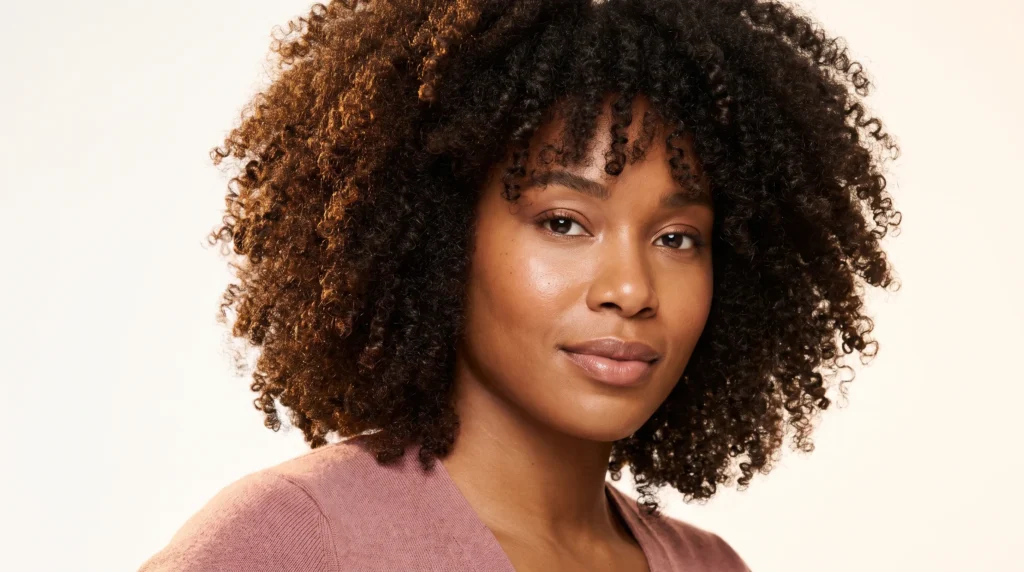
Starting your natural hair journey is one of the most exciting decisions you will ever make for yourself — and also one of the most confusing. Most beginners spend the first few months doing everything they can think of, buying product after product, watching tutorial after tutorial, and still ending up with dry, brittle hair that breaks faster than it grows.
The problem is not that your hair is difficult. The problem is the advice most beginners get. The same ten tips recycled across every blog and YouTube channel — drink water, moisturize your hair, use a satin bonnet. You already know those. These natural hair tips for beginners go deeper. This guide covers the real habits, methods, and decisions that actually change what your hair looks and feels like six months from now.
Whether your hair is 3C or 4C, whether you are one month into your journey or just getting started, you will find clear and practical steps here. Let’s get into it.
What Makes Natural Hair Different From Every Other Hair Type
Natural hair — meaning hair that has not been chemically relaxed or permed — has a coiled or kinked structure that makes it fundamentally different to care for compared to straight hair. The shape of the hair strand itself prevents natural oils from traveling down from the scalp, which means natural hair is almost always more prone to dryness than other hair types.
This is the root cause of most beginner frustration. Routines and products designed for straight or wavy hair do not work the same way on type 3 or type 4 natural hair. Understanding this one fact changes everything about how you approach your routine.
Natural hair also has a lot of shrinkage — meaning your actual hair length is often much longer than it appears when dry. Type 4C hair, for example, can shrink by up to 75% of its actual length. Beginners often think their hair is not growing when in reality it is growing and shrinking at the same time. Knowing this upfront saves a lot of frustration.
Know Your Hair Type and Porosity Before You Buy Anything
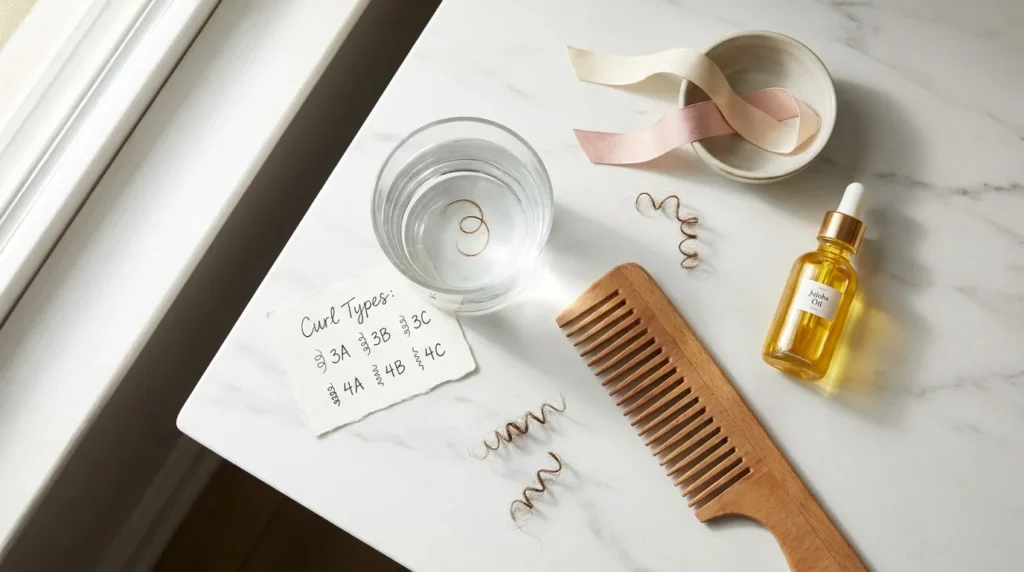
The biggest money-wasting mistake in natural hair care is building a routine without knowing your hair type and porosity. These two factors determine almost every decision — what products you need, how often to wash, how to apply moisture, and which methods will actually work for you.
Hair type refers to your curl pattern. Natural hair ranges from type 3 (looser curls and spirals) to type 4 (tight coils and kinks). Each type has subcategories A, B, and C. Type 4A has defined springy coils, type 4B has angular zigzag coils with less visible curl pattern, and type 4C has very tight coils with significant shrinkage and the least visible curl definition when dry.
Hair porosity is often even more important than curl type. Porosity tells you how well your hair absorbs and holds onto moisture. There are three levels:
- Low porosity: Hair cuticles are tightly closed. Products tend to sit on top of the hair instead of absorbing. Hair takes a long time to get wet and a long time to dry. Needs lightweight products and heat to open the cuticle.
- Normal porosity: Hair absorbs moisture well and holds it at a healthy level. The most balanced and easiest to manage.
- High porosity: Hair cuticles are open or damaged. Absorbs moisture very quickly but loses it just as fast. Tends to feel dry soon after moisturizing and is more prone to frizz and breakage.
How to test your porosity at home: Take a clean strand of hair (with no product on it) and drop it into a glass of room temperature water. Watch what happens over the next two minutes. If it sinks quickly to the bottom, you have high porosity. If it floats on top for a long time, you have low porosity. If it slowly sinks to the middle, your porosity is normal.
Once you know both your hair type and porosity, every other tip in this guide will make much more sense — because you will know exactly how to apply it to your specific hair.
Master the LOC or LCO Method for Moisture That Actually Lasts
Dry hair is the number one complaint from beginners with natural hair — and it almost always comes down to one thing. Not the wrong products. The wrong order of applying those products.
The LOC method and the LCO method are the two most effective systems for locking moisture into natural hair. Both follow a three-step layering process that works with the structure of your hair to hold water in for days at a time.
LOC stands for Liquid, Oil, Cream:
- L (Liquid): Start with water or a water-based leave-in conditioner. Water is the only true source of moisture for hair — not oil, not butter. This is the step that actually hydrates.
- O (Oil): Apply a natural oil immediately after while hair is still damp. Coconut oil, jojoba oil, castor oil, and avocado oil are all excellent choices. The oil creates a barrier that slows down moisture evaporation.
- C (Cream): Seal everything with a thick cream or butter — shea butter, a curl cream, or a heavy leave-in. This final layer locks in both the water and the oil and keeps your hair moisturized for longer.
LCO stands for Liquid, Cream, Oil — same ingredients, different order:
- Apply liquid first, then cream, then seal with oil on top.
Which method is right for you? For low porosity hair, LCO tends to work better. Because low porosity hair resists moisture absorption, applying the lighter cream layer first helps products penetrate more effectively, with the oil sealing on top without adding too much weight. For high porosity hair, LOC works best — the oil layer goes on second to slow down how fast the hair loses moisture, and the cream seals everything in.
Try each method for two full wash cycles before deciding. The one that leaves your hair soft and moisturized the morning after application is your answer.
Deep Condition Every Single Week Without Exception

If you only take one thing from this guide, let it be this: deep conditioning every week is not optional for healthy natural hair. It is the most powerful tool a beginner has, and most people either skip it entirely or do not do it long enough to see results.
A deep conditioner is completely different from a regular rinse-out conditioner. A regular conditioner coats the outer surface of the hair strand. A deep conditioner, with its heavier concentration of moisturizing agents and proteins, is designed to penetrate the hair shaft itself and repair damage from the inside out.
How to deep condition properly:
- Shampoo your hair first to remove any product buildup from the scalp and strands.
- Apply the deep conditioner generously from the roots to the very tips. Every single strand needs to be coated.
- Put a plastic shower cap or plastic grocery bag over your hair. The heat from your body under the cap will open the cuticle and allow the conditioner to penetrate deeper.
- Leave it on for 20 to 30 minutes at minimum. For very dry or high porosity hair, leave it on for 45 minutes.
- Rinse with cool water. Cool water closes the cuticle back up and locks in the conditioning treatment.
For even better results, sit under a hooded dryer or use a heated conditioning cap after applying. Added external heat makes a dramatic difference in how deeply the product absorbs, especially for low porosity hair that naturally resists moisture.
What to look for in a good deep conditioner: Water should be the first ingredient listed. Look for aloe vera, glycerin, shea butter, honey, and hydrolyzed proteins. Avoid products with sulfates, heavy silicones that do not wash out easily, or mineral oil near the top of the ingredient list.
Understand Protein and Moisture Balance — Most Beginners Miss This
One of the natural hair tips for beginners that almost nobody talks about in simple terms is this: your hair needs both protein and moisture to stay healthy, and too much of either one will cause it to break.
Protein is what gives your hair strength and structure. Moisture is what gives it flexibility and elasticity. When these two things are in balance, your hair can stretch without snapping. When they are out of balance in either direction, breakage happens.
Signs your hair has too much protein: It feels stiff, hard, and crunchy even when it should be soft. It breaks off easily when dry with almost no stretch. Strands feel rough to the touch and have a coarse texture.
Signs your hair has too much moisture: Hair feels mushy and overly soft. It stretches a lot when wet but then breaks instead of snapping back. Curl definition is weak and limp.
Most beginners need more moisture than protein in the beginning, especially if they are transitioning from relaxed hair. The general approach is to deep condition with a moisture-focused treatment every week, and only add a protein treatment once a month — or when you start noticing signs of weakness and excess shedding.
When you do add protein, start with a light protein treatment (look for ingredients like hydrolyzed wheat protein, hydrolyzed rice protein, or rice water) before jumping to heavy protein masks. Too much protein too soon causes hard, brittle breakage that takes weeks to recover from.
Always Detangle Wet Hair — Doing It Dry Causes Serious Breakage
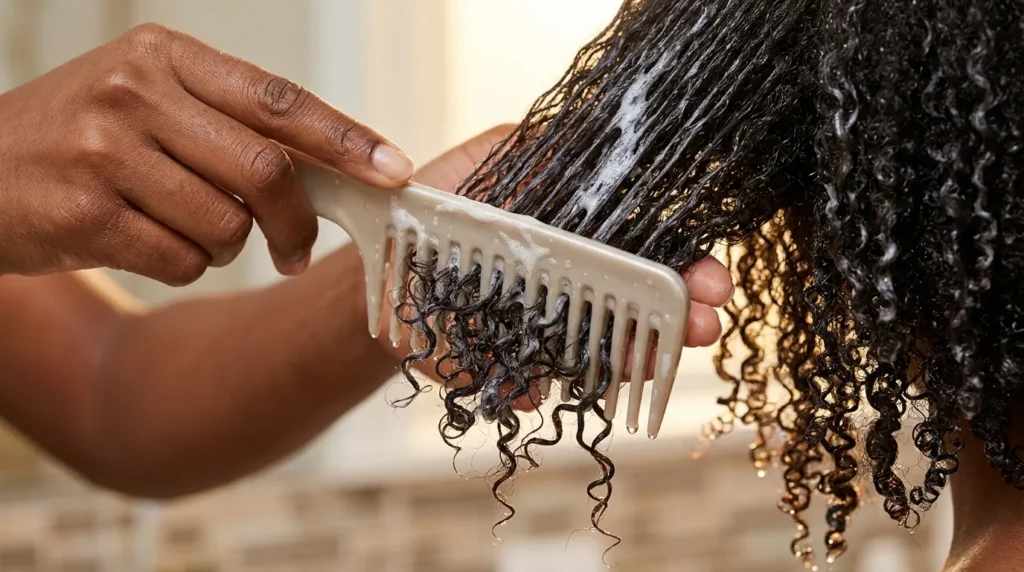
Detangling dry natural hair is one of the fastest ways to snap off your length and set your hair journey back by months. Natural hair, especially type 4, is at its most fragile when it is dry and matted. The coil and kink pattern causes strands to wrap around each other — and forcing a comb through that mess while it is dry creates breakage at the weakest points of every strand.
Wet hair, on the other hand, has much more elasticity. With conditioner added, the strands slip past each other instead of snapping. This one change alone can dramatically reduce your daily breakage.
Step-by-step: how to properly detangle natural hair
- Wet your hair thoroughly with warm water from a shower or spray bottle until it is completely saturated.
- Apply a generous amount of conditioner, detangling cream, or a product with good slip. You need enough that you can feel the strands sliding when you move your fingers through.
- Divide your hair into four to six sections and clip each section separately. Working in sections keeps you from re-tangling areas you have already done.
- Start at the very tips of the hair and gently work upward toward the roots. Never start at the roots and drag downward — that drags tangles against each other and causes breakage.
- Use a wide-tooth comb or your fingers only. Brushes with small bristles and fine-tooth combs are not appropriate for natural hair and cause unnecessary damage.
- Be patient and work through each section slowly. Rushing is the primary cause of breakage during detangling.
For very tight coils (type 4B and 4C), finger detangling first — gently pulling apart knots with your fingers before reaching for a comb — gives the best results with the least breakage. Use the wide-tooth comb only for final smoothing after your fingers have cleared the major tangles.
Use Protective Styles to Retain the Length You Grow
One of the most practical natural hair tips for beginners is this — growing hair and retaining hair are two different things. Your hair is always growing, approximately half an inch per month. The question is whether the ends are breaking off at the same rate or faster than new growth comes in. Protective styling is how you protect what you grow.
Protective styles — braids, two-strand twists, cornrows, low buns, tucked updos, wigs, and crochet styles — work by keeping your ends tucked away and protected from daily friction, manipulation, and environmental stress. Less daily manipulation directly equals less daily breakage, which equals visible length over time.
Rules every beginner must follow with protective styles:
- Never style too tightly. Any pulling or tension on the scalp or edges causes traction alopecia — a form of hair loss from repeated tension that can become permanent. If your scalp hurts after getting your hair done, it is too tight.
- Keep your hair moisturized underneath. A protective style is not a vacation from your routine. Spray your scalp and leave-in lightly every few days.
- Take styles down within two to eight weeks. Leaving protective styles in too long leads to matting, buildup, and severe breakage when you finally take them out.
- Deep condition immediately after taking a protective style down, before attempting any other styling.
For beginners, two-strand twists and low buns are the best starting options. They are simple, cause minimal tension, and are easy to take down without causing damage to your hair.
Switch to Satin or Silk — Your Cotton Pillowcase Is Damaging Your Hair

This is the simplest and fastest change you can make tonight. Cotton pillowcases absorb moisture from your hair while you sleep and create friction as you move that causes frizz, tangles, split ends, and breakage. Over months, sleeping on cotton without any protection causes significant damage — and it happens slowly enough that most people never connect it to their hair problems.
Your three options:
- Satin bonnet: The easiest and most affordable solution. Pull it on before bed and it protects your hair completely. Available for a few dollars at any beauty supply store.
- Satin or silk pillowcase: A better option if you find bonnets come off during sleep. Replace your cotton pillowcase with a satin or silk one entirely.
- Pineapple method: Loosely gather your hair on top of your head using a very loose hair tie or scrunchie before sleeping. This keeps the bulk of your curls from rubbing against any surface and preserves your curl pattern overnight.
Make this change before anything else. Even the best moisturizing routine cannot fully compensate for nightly friction damage from a cotton pillowcase.
Wash Your Hair Less — But Do It Right Every Time
Most beginners come from a straight-hair routine where washing every day or every two days is normal. Applying that frequency to natural hair is one of the most common and damaging mistakes. Natural hair needs its natural oils to stay moisturized, and frequent washing strips them away before they can do their job.
How often should you actually wash natural hair? For most beginners, washing once every one to two weeks is the ideal frequency. If your scalp gets oily or itchy quickly, lean toward once a week. If your hair runs dry, stretch to every two weeks and co-wash (washing with conditioner only, no shampoo) in between when you need to refresh.
Shampoo rules for natural hair beginners:
- Always use a sulfate-free shampoo. Sulfates are harsh detergents (like sodium lauryl sulfate or sodium laureth sulfate) that strip natural oils completely and leave natural hair extremely dry and prone to breakage.
- When shampooing, focus entirely on the scalp. Apply shampoo to your scalp, massage gently, and let the suds rinse down the strands. Do not scrub the length of your hair with shampoo — the scalp cleansing is enough.
- Always follow a shampoo session with a deep conditioner. Every single time without exception. Shampooing without deep conditioning leaves natural hair vulnerable to dryness and breakage.
Your Scalp Health Is the Foundation of Everything
Healthy hair starts at the root — literally. Most beginners focus entirely on their strands and forget that everything grows from the scalp. A dry, clogged, or inflamed scalp directly limits hair growth and contributes to shedding, thinning, and slow progress.
Product buildup on the scalp is a common beginner problem. When heavy butters, creams, and oils are applied directly to the scalp repeatedly without proper cleansing, they clog follicles and slow down growth. Keep heavy products on your strands, not your scalp.
How to maintain a healthy scalp as a beginner:
- Cleanse your scalp every one to two weeks with a sulfate-free shampoo. Focus on the scalp, not the strands.
- Use a diluted scalp oil to stimulate circulation. Peppermint oil, rosemary oil, and tea tree oil (each diluted in a carrier oil like jojoba or sweet almond oil) are excellent options. Peppermint and rosemary oil have been studied and shown to support hair growth when used consistently.
- Give yourself a five-minute scalp massage on every wash day. Scalp massage increases blood flow to the follicles and has been shown in research to improve hair thickness over time. Use the pads of your fingers — not your nails.
- Do not scratch your scalp with combs or your nails. Scratching causes micro-tears that lead to inflammation and shedding.
Build a Simple Consistent Routine and Stick To It
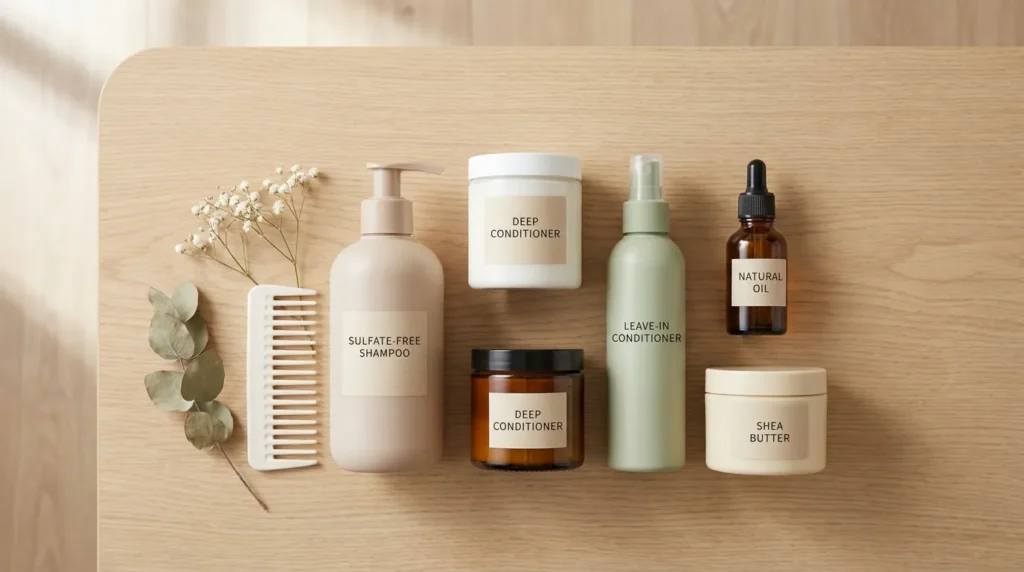
The most important of all natural hair tips for beginners is this: consistency beats complexity every single time. The most successful natural hair journeys are built on simple, repeatable routines — not on having thirty products or knowing every advanced technique.
Beginners often fall into what is called “product junkie” behavior — buying a new shampoo every month, switching methods every two weeks, and never giving anything long enough to actually work. Natural hair changes slowly. Products and methods take two to four wash cycles to show their full effect. Switching before that happens means you never really learn what works for your hair.
A beginner-friendly weekly routine you can start this week:
Wash Day (once every one to two weeks):
- Pre-poo: Apply oil or conditioner to dry hair before shampooing to reduce moisture loss during cleansing (optional but helpful)
- Shampoo your scalp with sulfate-free shampoo
- Apply deep conditioner, put on shower cap, wait 30 minutes
- Rinse with cool water
- Apply your LOC or LCO method while hair is still damp
- Style and let air dry or diffuse on low heat
Mid-week refresh (2 to 3 days after wash day):
- Lightly spritz hair with water using a spray bottle
- Apply a small amount of leave-in conditioner
- Seal with a light oil
Every night:
- Put on your satin bonnet
Start with this structure for eight full weeks before changing anything. After two months, you will understand your hair well enough to know what adjustments to make.
Track Your Progress With Photos Every Four to Six Weeks
Natural hair grows slowly and shrinks significantly when dry. Most beginners assume their hair is not growing simply because they cannot see a visible difference from week to week. After six months of a good routine, it can look like nothing has changed — until you stretch the hair and compare it to where it started.
Take a clear photo of your hair on day one of your journey. Then take another every four to six weeks. In the photo, always stretch your hair slightly to show the actual length rather than the shrunk length. Do this consistently and after six months you will have a clear, motivating record of your progress that shrinkage has been hiding from you.
Progress photos also serve as diagnostic tools. If your hair looks healthier and longer in month four than month one, your routine is working. If it looks the same or worse, something needs to change — and the photos will help you identify when the change happened and what was different about your routine at that time.
Frequently Asked Questions About Natural Hair Tips for Beginners
How long does it take to see results with a new natural hair routine?
Most people start to see a visible difference in moisture levels and manageability within two to four weeks of starting a consistent routine. For significant growth and length retention, give yourself three to six months. Natural hair change happens gradually, and consistency over several months produces results that a few weeks cannot show.
What is the best shampoo for beginners with natural hair?
Look for a sulfate-free, gentle shampoo with moisturizing ingredients like aloe vera, coconut milk, or glycerin. Avoid any shampoo with sodium lauryl sulfate or sodium laureth sulfate at the top of the ingredient list. Popular beginner-friendly options include co-washes (conditioning cleansers) for mid-week refreshes and clarifying sulfate-free shampoos for weekly wash days.
Should I use heat on my natural hair as a beginner?
Heat can be used carefully and occasionally, but beginners are better off avoiding it as much as possible in the first few months. Your hair is still adjusting and learning its natural texture. Too much heat too soon can cause heat damage that permanently alters your curl pattern. If you do use heat, always use a heat protectant first and keep the temperature below 350°F (175°C).
What is the difference between shrinkage and breakage?
Shrinkage is your curl coiling up when it dries, making your hair look shorter than it actually is. It is completely normal and is actually a sign of healthy, well-moisturized hair. Breakage is when actual strands snap off and you notice short pieces of hair falling out that are not full strands with a white bulb at the end. If you are seeing a lot of short broken pieces, that is a sign of dryness or too much manipulation — not normal shedding.
How do I know if my natural hair is healthy?
Healthy natural hair has good elasticity — it stretches when wet and snaps back without breaking. It absorbs moisture and stays soft for a day or more after moisturizing. Shedding is minimal (50 to 100 strands per day is normal). There is little to no excessive breakage when detangling. And the hair has a consistent curl or coil pattern rather than patchy areas of damage.
Can I grow my natural hair faster as a beginner?
Hair growth happens at the follicle level and is largely genetic. The average is about half an inch per month. What you can control is how much of that growth you retain by reducing breakage. A consistent routine with proper moisturizing, protective styling, and gentle handling can make a significant difference in your visible length over time — not because your hair is growing faster, but because less of it is breaking off.
Your Natural Hair Journey Starts With One Consistent Week
The best natural hair tips for beginners are the ones you actually apply. Reading everything in this guide is a start — but the results come from consistently showing up for your hair every week, even when it is frustrating, even when you do not see changes yet.
Start with the basics: know your hair type and porosity, apply your products in the right order with the LOC or LCO method, deep condition every wash day, and protect your hair every night with satin. Add each other tip in gradually as your routine becomes a habit.
Natural hair is not high maintenance when you understand it. It is actually very forgiving when you give it what it needs consistently. You will make mistakes, you will have bad hair days, and there will be moments when you want to give up. That is all part of the journey.
Keep going. Take your photos. Trust the process. Six months from now, you will not believe how far your hair has come.
Also Visit : Best Way to Take Care of Natural Hair (Simple Guide)